# How to Configure Email Alerts in OpenObserve: A Step-by-Step Guide
> Learn how to configure email alerts in OpenObserve with this step-by-step guide. Set up Gmail SMTP, create alert templates, and ensure instant notifications for critical system events
Source: https://openobserve.ai/blog/how-to-configure-email-alerts-in-openobserve/
Published: 2024-11-30
Authors: Sampath Siva Kumar Boddeti
Category: How To
Tags: Alerts, OpenObserve
---
In today's world of observability and monitoring, alerts play a vital role in ensuring the health and stability of systems. Prompt notifications help administrators and DevOps teams respond to critical events before they escalate into major issues. Email remains one of the most reliable and widely used mediums for receiving alerts due to its accessibility and simplicity.
In this blog, we’ll explore **how to configure email alerts in OpenObserve (O2)**, an open-source observability tool, to ensure you’re instantly notified of critical events in your environment.
**What You’ll Learn**
By the end of this guide, you will be able to:
1. Set up a Gmail account for sending alerts.
2. Test Your Gmail SMTP Configuration
3. Setup and Configure OpenObserve to send email alerts via SMTP.
4. Test and validate email notifications.
## Prerequisites
* A **Gmail account** with **App Password** enabled. (We’ll cover this in detail below.)
* A Self hosted OpenObserve instance ready to receive logs.
## Set up a Gmail account for sending alerts.
To send emails through Gmail, you need to set up an **App Password**
1. Log in to your Gmail account.
2. Go to **Google Account Settings** \> **Security**.
3. Under **Signing into Google**, enable **2-Step Verification** (if not already enabled).
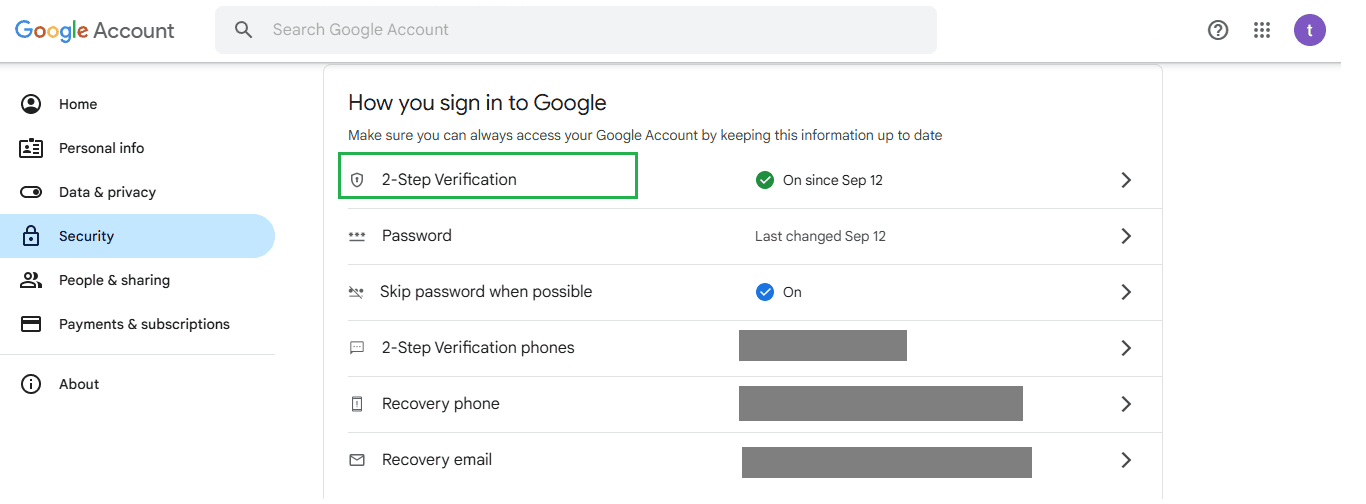
4. Once enabled, go to the **App Passwords** search section.
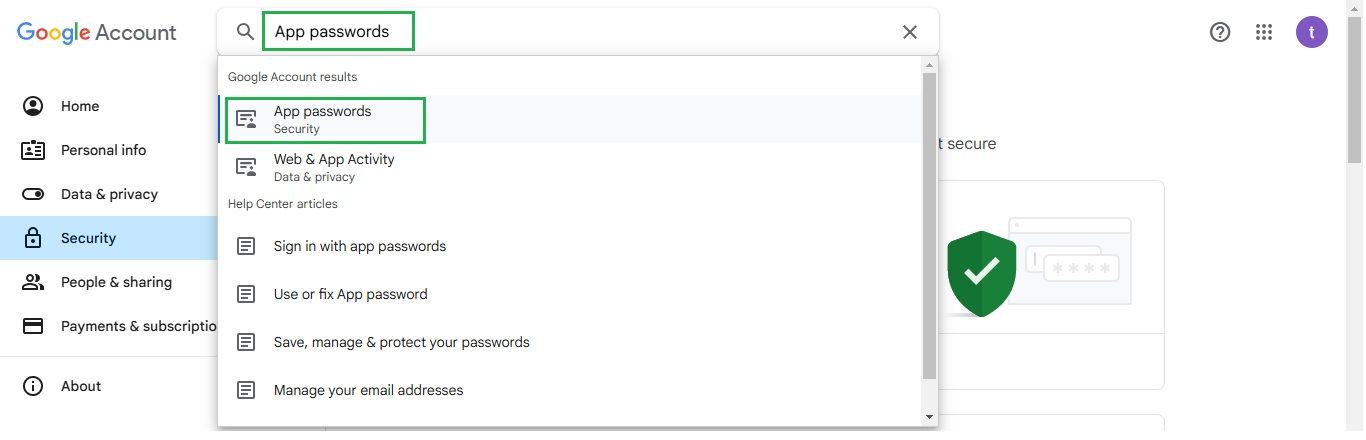
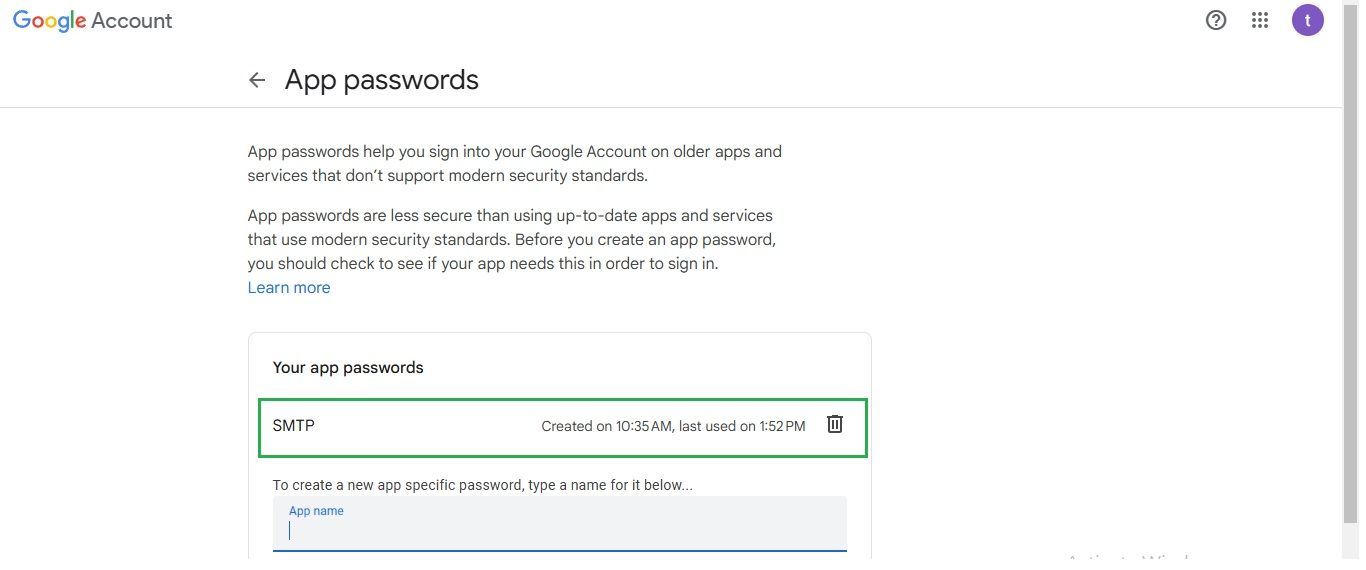
5. You can generate a new app password by entering the app name and clicking "Create."
6. I have already created an app password with the name **SMTP.**
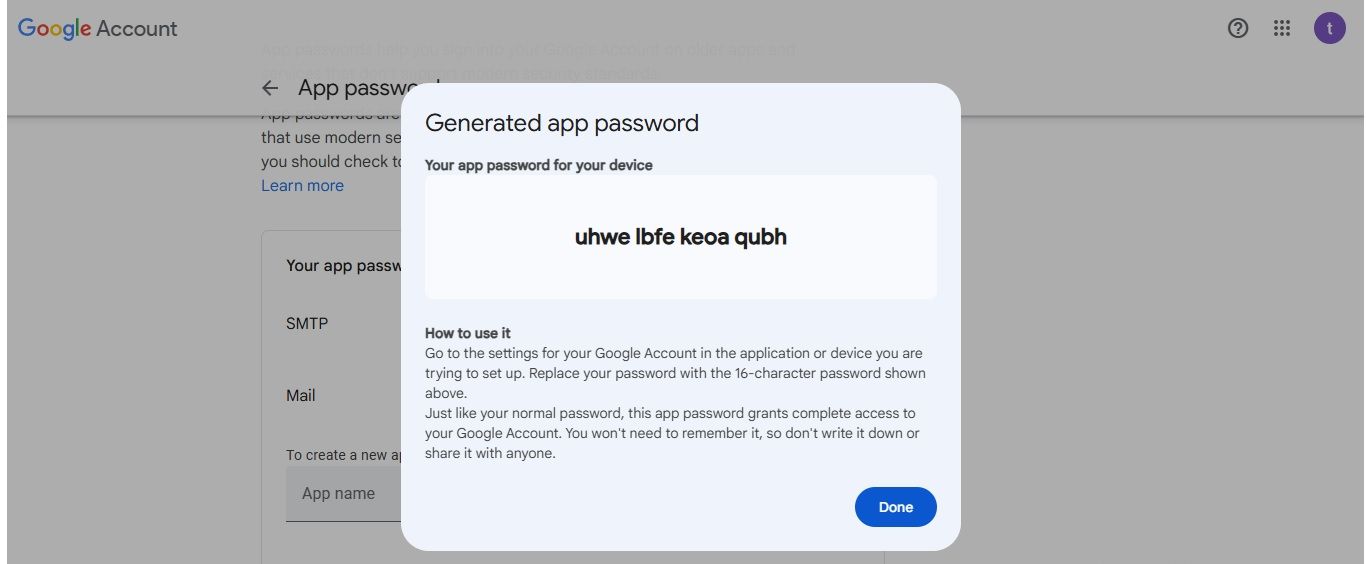
7. Once you're done, you should see your app password displayed. Copy it and save it for future use.
## Test Your Gmail SMTP Configuration
After setting up the **App Password** in your Gmail account, it's time to test your SMTP configuration to ensure everything is working properly. There are several online tools and websites available for this purpose. One such tool is Mailmeteor's SMTP Test Tool.
Here’s how to test your Gmail SMTP configuration:
1. **Visit the SMTP Test Tool**: Go to Mailmeteor's SMTP Test Tool.
2. **Select Gmail**: Choose **Gmail** as your email provider, and the tool will fill in the SMTP server (`smtp.gmail.com`) and port (`587`).
3. Enter your Gmail address and the App Password you created earlier.
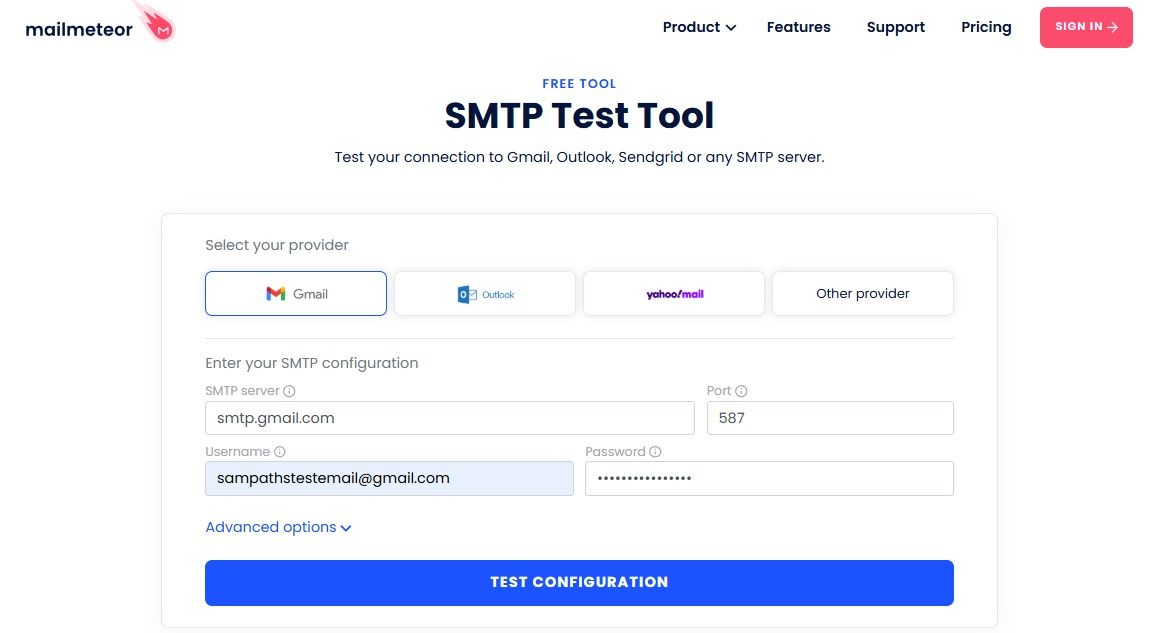
4. Click **Test Configuration** to check if your setup is correct and Gmail can send emails via SMTP.

5. After the test, you should receive a test email in your Gmail inbox

If you receive the test email in your Gmail inbox, the setup is successful\! Your Gmail SMTP configuration is now ready to send email alerts from OpenObserve.
## Setup and Configure OpenObserve to send email alerts via SMTP.
### Start OpenObserve with SMTP Configuration
You need to pass SMTP configuration parameters when starting OpenObserve. Below is the command to configure OpenObserve to send email alerts via Gmail:
```
ZO_SMTP_ENABLED=true \
ZO_SMTP_HOST="smtp.gmail.com" \
ZO_SMTP_PORT=587 \
ZO_SMTP_USER_NAME="your-gmail-address@gmail.com" \
ZO_SMTP_PASSWORD="your-app-password" \
ZO_SMTP_FROM_EMAIL="your-gmail-address@gmail.com" \
ZO_SMTP_ENCRYPTION="starttls" \
ZO_ROOT_USER_EMAIL="root@example.com" \
ZO_ROOT_USER_PASSWORD="Complexpass#123" \
./openobserve
```
**Replace the placeholders** with:
* `your-gmail-address@gmail.com`: Your Gmail address.
* `your-app-password`: Your app password
### Set Up an Email Template
1. Navigate to the **Templates** section in the OpenObserve web interface.
2. Create a new template for email alerts by clicking **Add Template**. This action allows you to define the content format for your alert emails.

3. Once you click **Add Template**, select **Email**, provide a name for the template, and fill in the **Title** and **Body** sections.
**Title Section:**
```
[Alert: {alert_name}] - Severity: {alert_type}
```
**Body Section:**
```
An alert has been triggered:
- Alert Name: {alert_name}
- Severity: {alert_type}
- Stream Name: {stream_name}
- Condition: {alert_operator} {alert_threshold}
- Triggered Count: {alert_count}
- Start Time: {alert_start_time}
- End Time: {alert_end_time}
For more details, visit: {alert_url}
```
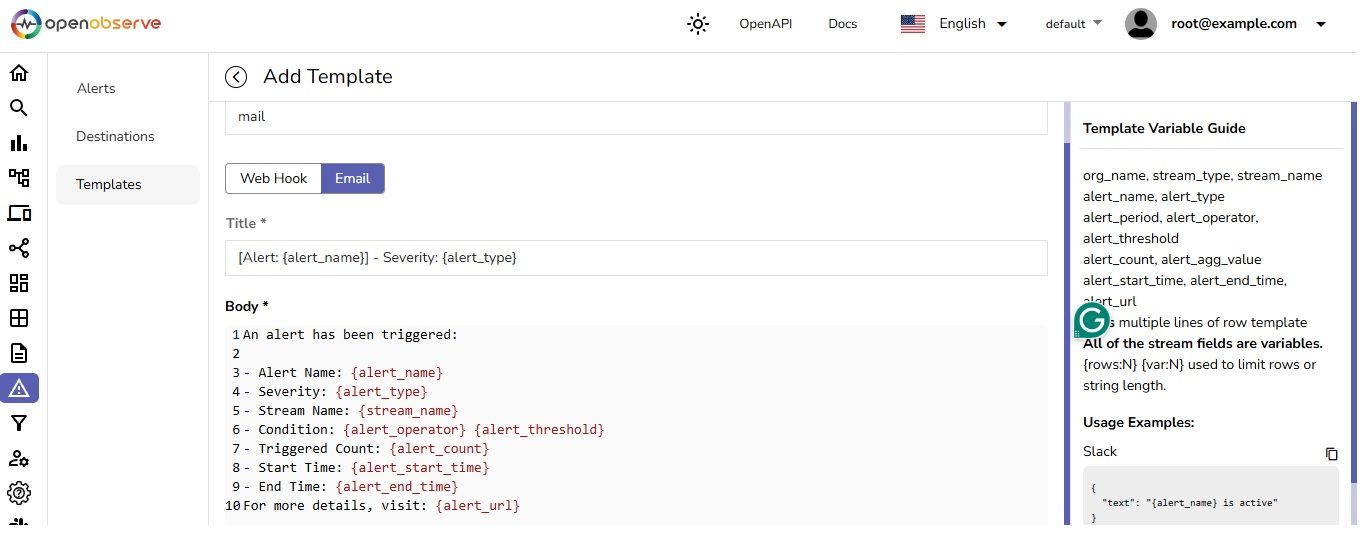
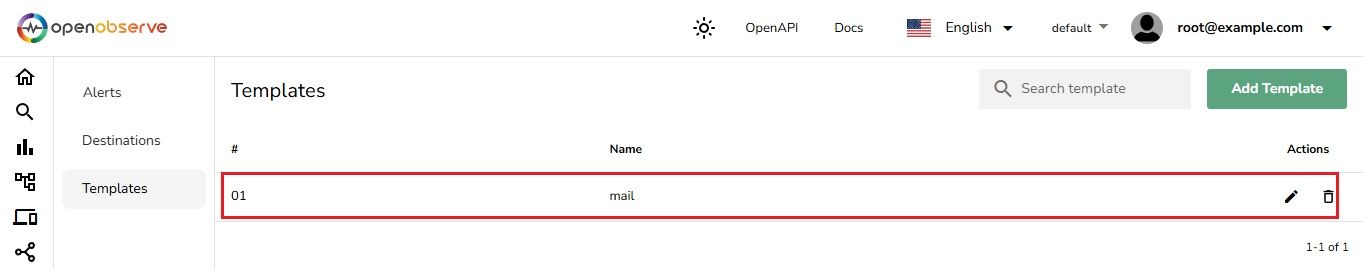
4. Once completed, click **Save**. You should then see the email template you just created listed in the **Template** section of OpenObserve.
### Add Email as an Alert Destination
1. Go to the **Destinations** section in OpenObserve.
2. Click **Add Destination**
3. Choose **Email** as the destination type for the alerts.
4. **Fill in Destination Details**:
* Enter a **name** for the destination.
* Select the **template** for the email.
* Provide the **recipient's email address** where the alerts should be sent.
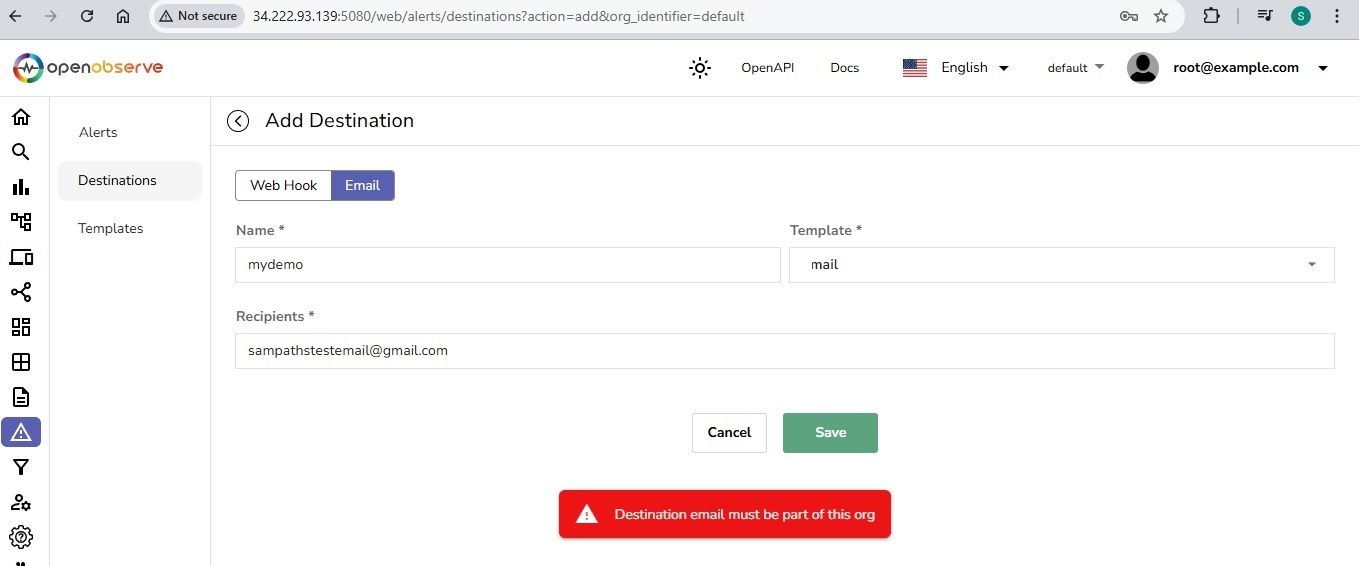
5. **Add Recipient as a User in O2 Organization**: Recipients must be part of the O2 organization:
* Go to the **IAM** (Identity and Access Management) section in O2.
* Click on **Add User**.
* Enter the **email ID**, **password**, **name**, and **role** of the user.
* Click **Save** to add the user.
6. As shown in the screenshot below, I have added two users (email IDs) in the IAM section of O2.
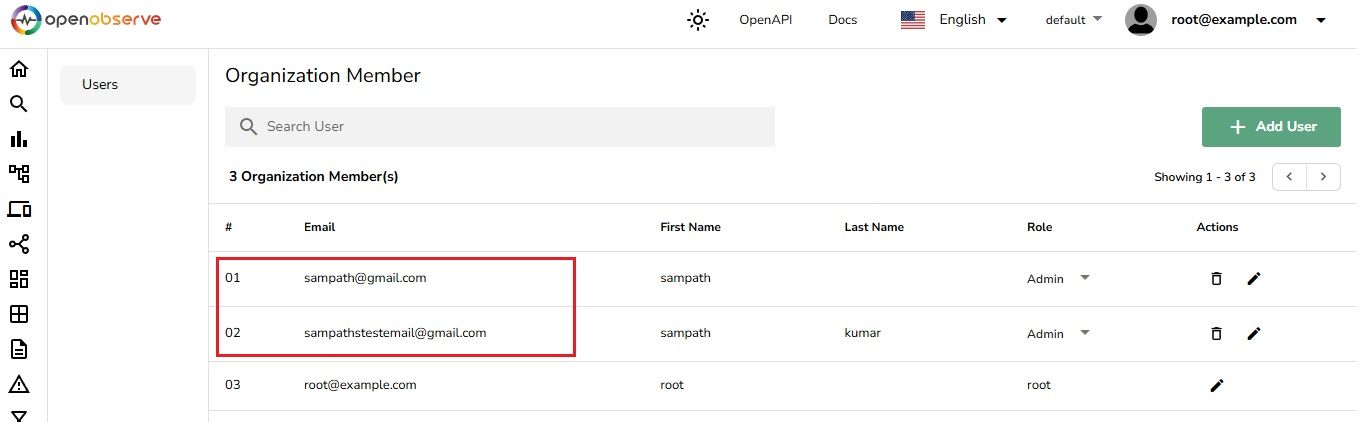
7. Now, I can send emails to both Gmail addresses as they are part of the organization. OpenObserve implemented this setup to minimize spam emails.
8. You can now successfully save the destination settings since the recipient is part of the O2 organization.
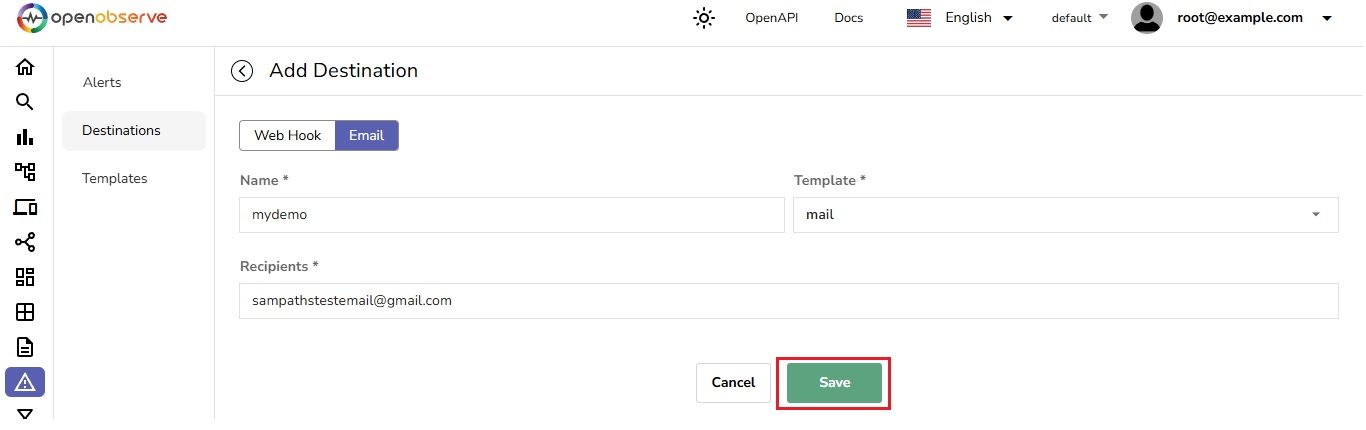
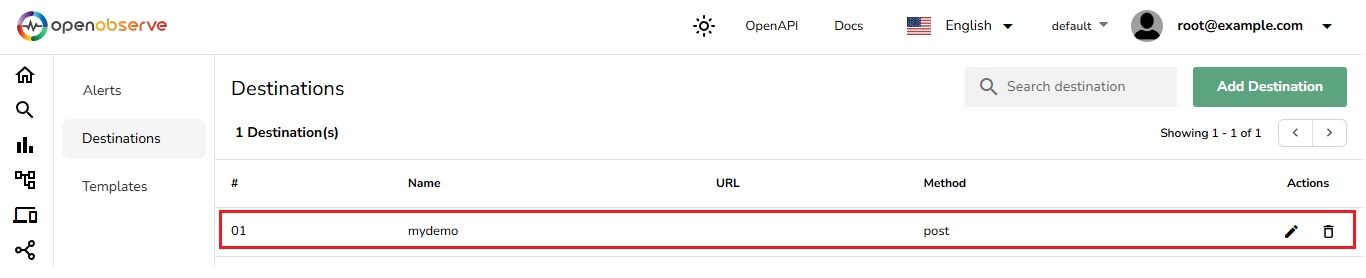
9. Once you click **Save**, you should see the “**mydemo”** destination created and listed in the **Destination** section of OpenObserve.
### Setup an Alert
1. Go to **Alerts** in OpenObserve.
2. Click on **Add Alert**.

3. Provide a name for the alert, and select the **stream type** and **stream name**.
4. For this demo, I am selecting **Logs** and **Default Stream**.
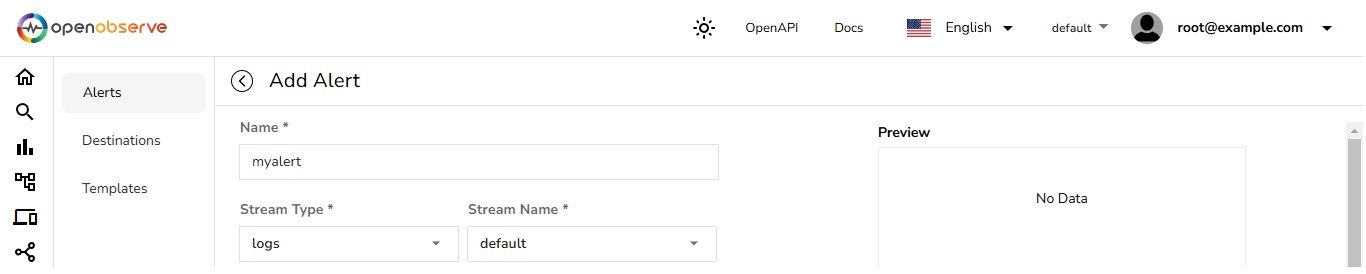
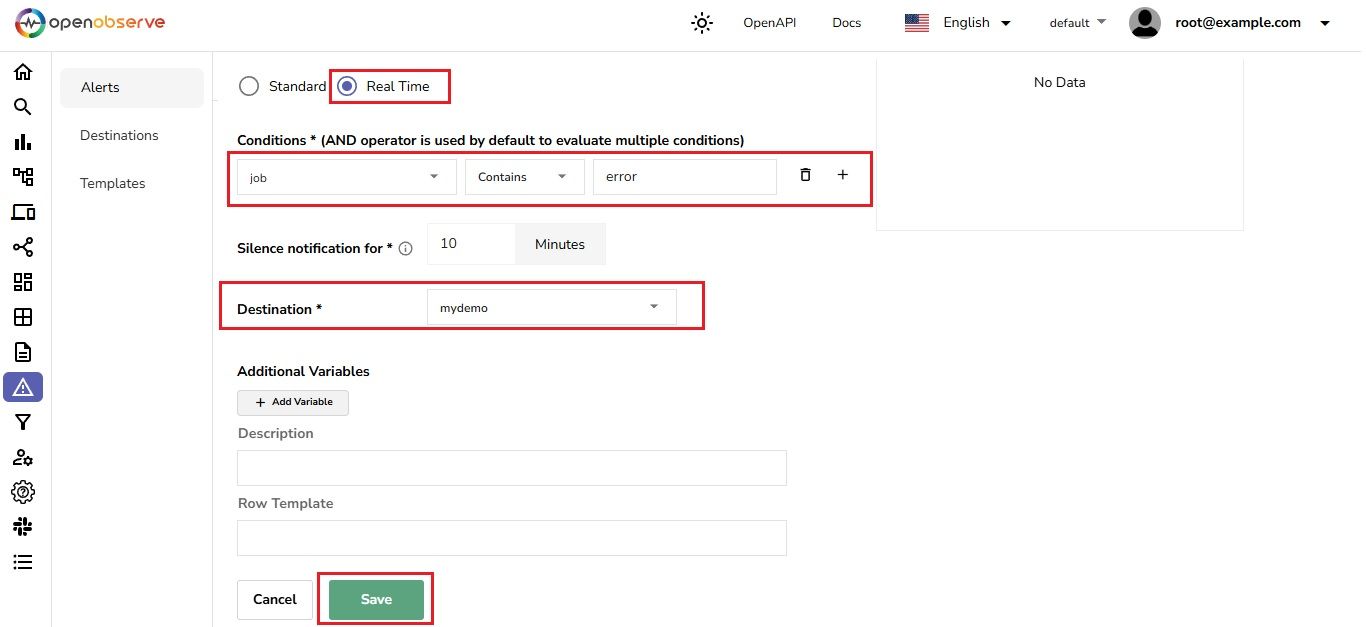
5. Choose between **Standard** and **Real-Time Alert** based on your use case. In this demo, I am selecting **Real-Time Alert**.
6. Define a condition for the alert to trigger upon log ingestion.
7. In this case, I am setting the condition to trigger the alert when the **"job"** field of my log contains **"error"**. This will send a notification to my destination in the selected template format.
8. Adjust the remaining settings as per your requirements and click **Save**.
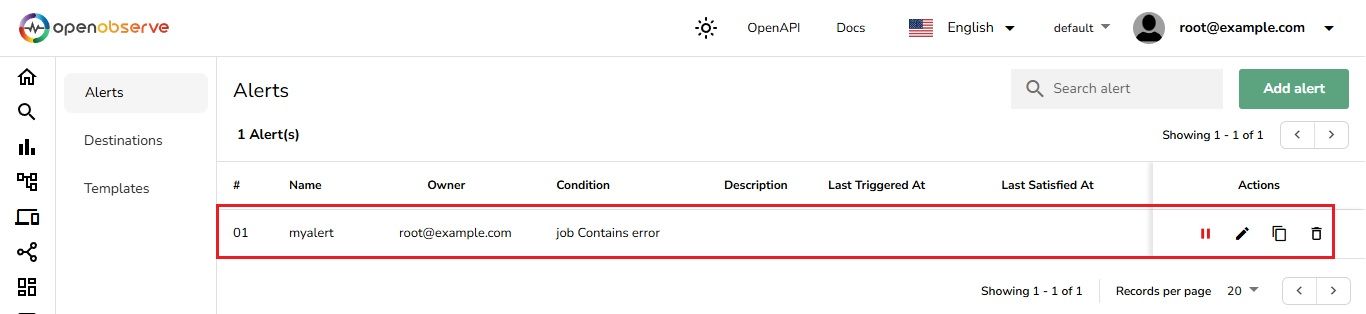
9. Once you save it, your alert **"myalert"** will be successfully created, and you can view it in the **Alerts** section of OpenObserve.
## Test and Validate Email Notification
1. Now, let's test the alerts by using a `curl` command to ingest logs into OpenObserve. You can find this `curl` command under **'Data Sources' \> 'Custom' \> 'Curl' in OpenObserve**.
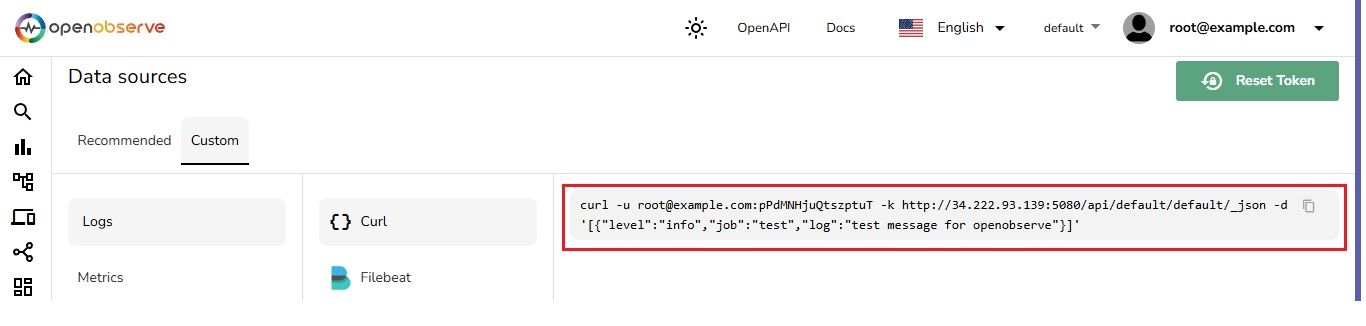
2. The `curl` command is sending the following fields:
* **level**: Log severity (e.g., "info")
* **job**: The job name (e.g., "test")
* **log**: The log message content (e.g., "test message for openobserve")
3. Now, let's change the **`job`** to **“`error”`** instead of **“`test”`** to trigger the alert.

4. The alert is triggered, and an email notification is received in my Gmail

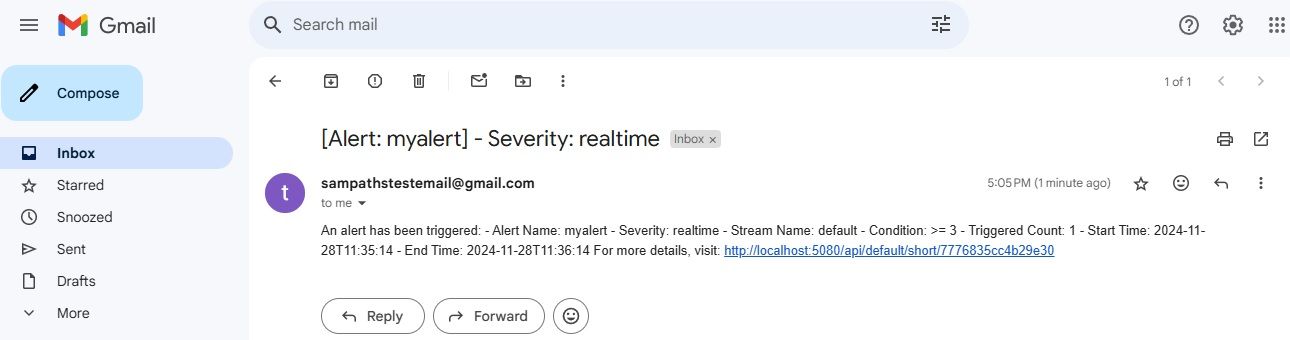
With the alert successfully triggered and the email notification received in Gmail, we have successfully configured OpenObserve to send email alerts based on specific conditions.
## Conclusion
By following this guide, you’ve successfully configured OpenObserve to send email alerts using Gmail’s SMTP service. These notifications will help you stay on top of critical system events, ensuring quick responses to maintain system stability.