
Create and Use Scheduled Pipeline
Use this guide to create and run scheduled pipelines. Scheduled pipelines run at a fixed interval. They query existing data from a stream using SQL or PromQL, apply optional transformations, and write the results to a destination stream or external system.
Visit the Pipelines overview page before starting.
Prerequisites
- Your OpenObserve Cloud or self-hosted instance is running.
- You have permissions to work with pipelines. Access is controlled from IAM > Roles > Permissions.
Steps to create a scheduled pipeline
Step 1: Open the pipeline editor
Step 1: Open the pipeline editor
- Log in to OpenObserve.
- In the left navigation panel, go to Data > Pipelines. By default, the system opens the Pipelines tab.
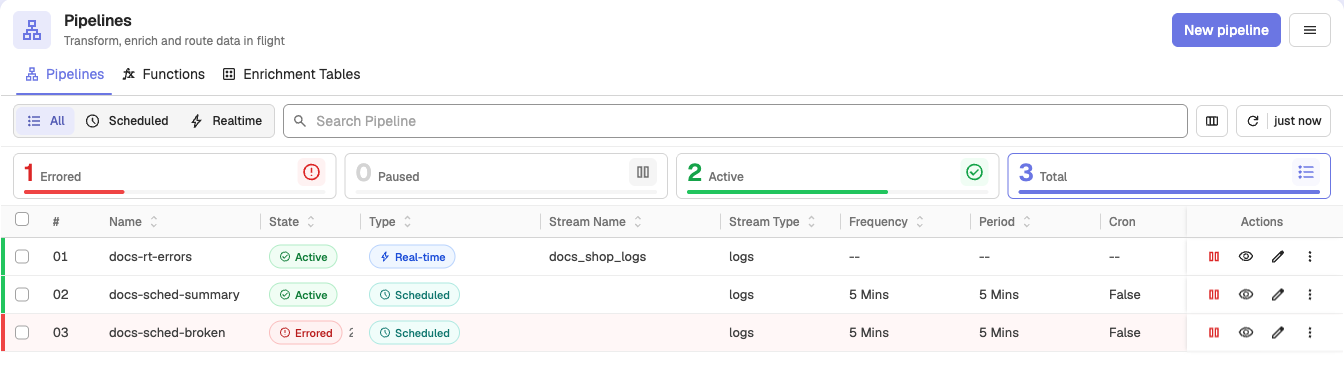
- Click New pipeline at the top-right corner.
Step 2: Enter a pipeline name
Step 2: Enter a pipeline name
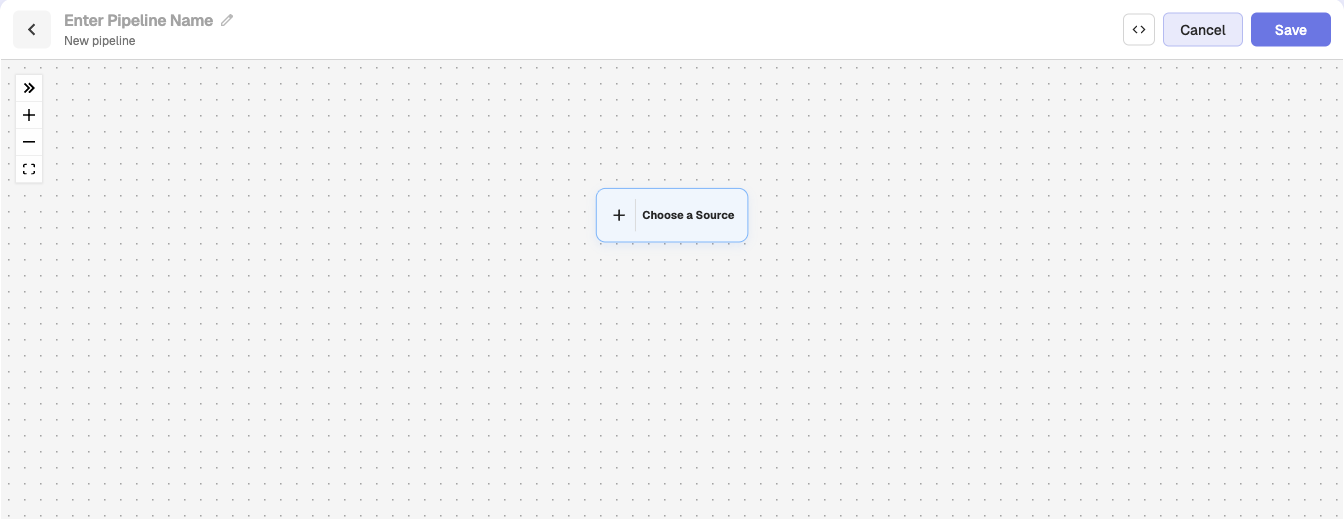
Enter a unique name in the input box at the top of the editor.

Step 3: Configure the Source node (Query)
Step 3: Configure the Source node (Query)
Scheduled pipelines do not use a Stream node as the source. They always begin with a Query node.
-
From the Source section, drag the Query node into the editor. On an empty canvas, you can also click Choose a Source and select Query.
-
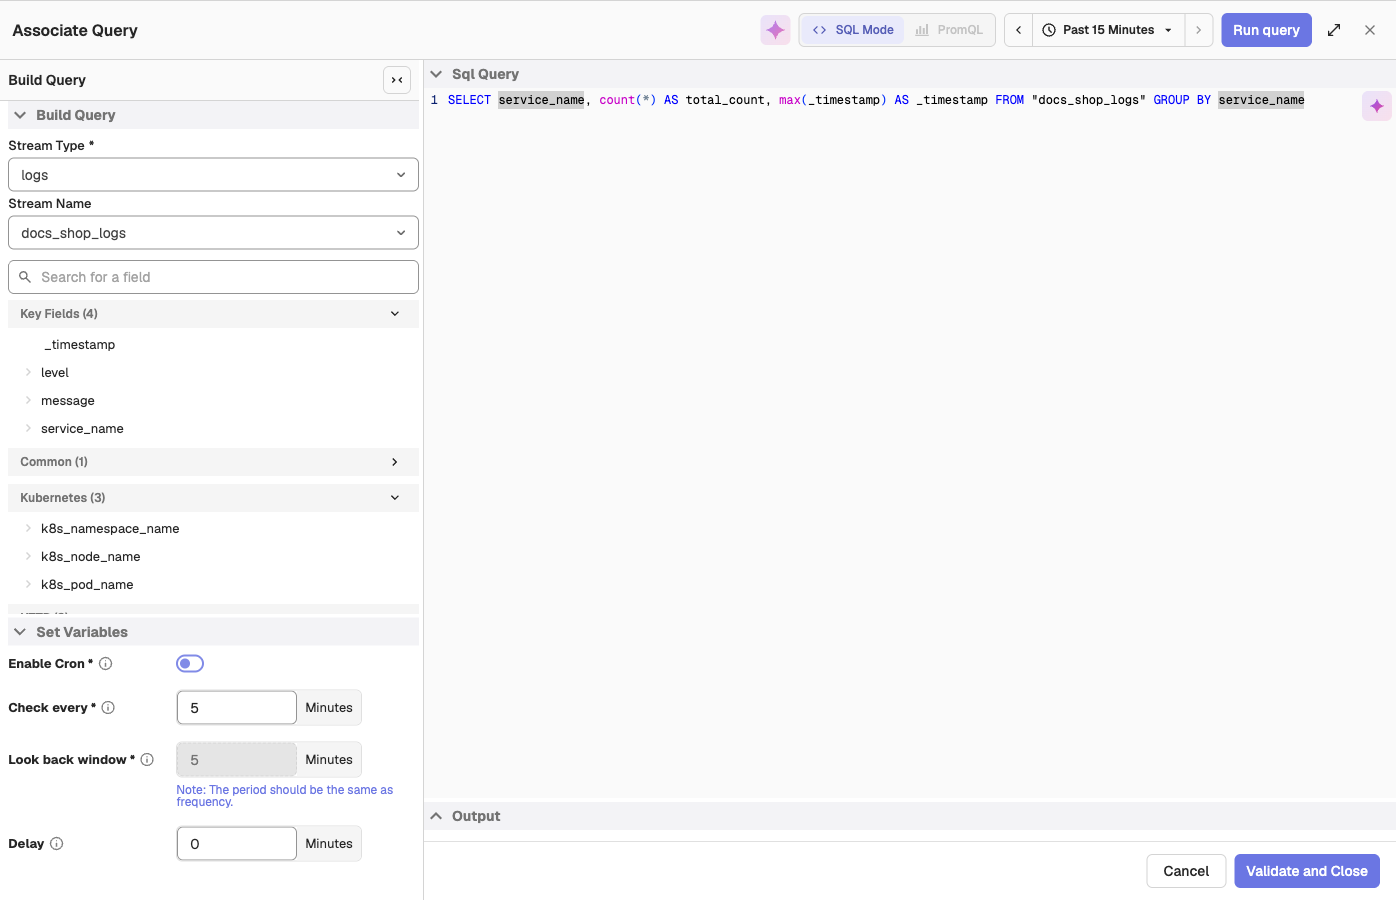
The Associate Query panel opens. The panel contains the following sections, Build Query, SQL Query editor, Output, Set Variables.
-
In the Build Query section:
- Select the Stream Type.
- Select the Stream Name.
-
Edit or write your SQL query in the Sql Query editor. For metrics streams, you can switch to PromQL.
-
Select the time range from the time range selector at the top-right corner.
-
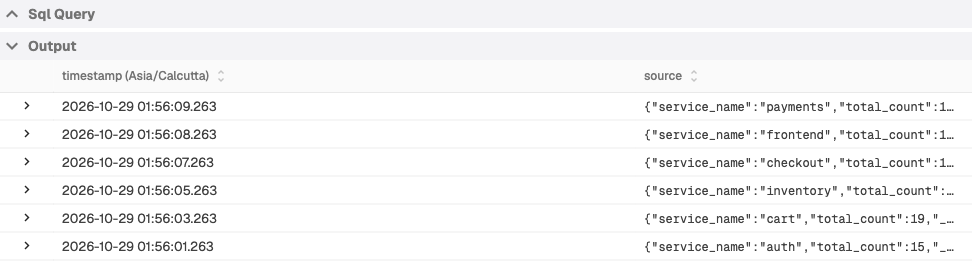
Click Run query to preview data in the Output panel.
-
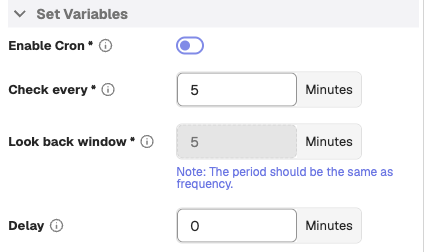
In the Set Variables section configures how the pipeline runs using the following settings:
- Enable Cron: Switch from interval-based scheduling to cron-based scheduling.
- Check every: How often the pipeline runs (the frequency).
- Look back window: The data window to process (the period). Without cron, it must equal Check every.
- Delay: How many minutes the pipeline waits after the scheduled time before execution.
See the Pipelines overview page to learn more about frequency, period, and cron. See the Configurable Delay in Scheduled Pipelines page to learn how to configure delay in scheduled-pipelines.
-
After configuring the query and variables, click Validate and Close. This adds the Query node to the editor.
Step 4: Configure the Transform node
Step 4: Configure the Transform node
-
From the Transform section, drag either a Conditions or Function node into the editor. You can also hover over a node and click + to pick the next step.
-
If you add a Conditions node:
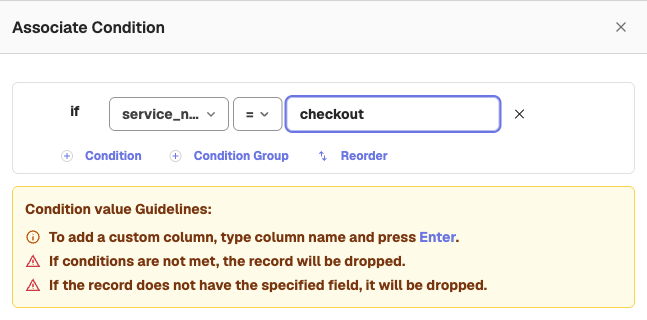
- In the Associate Condition screen, select the field name in the Column drop-down list. This list displays the fields detected in the source stream. To use a field that is not listed, type its name and press Enter.
- Select an operator.
- Enter a value in the Value input box.
- Add more conditions with Condition, or nested AND/OR groups with Condition Group, if needed.
Guidelines
- Use an empty string to check for empty values. For example,
app_name != "" - Use null to check for null values. For example,
app_name != null - If the condition does not match, the record is dropped.
- If the record does not contain the specified field, it is also dropped.
-
If you add a Function node:
Use a Function node to transform events using a VRL function.
A Function does not require predefined fields. You can use it even if the source stream has no schema.
To create a new function:
- In the Associate Function panel, enable the Create New Function toggle. The function editor opens in the panel.
- Enter the function name.
- Write a VRL function. Pipelines run VRL functions only.
- To test it, in the Query section select the stream type, stream name, and duration, and click Run query. The results appear under Events.
- Click Test Function and check the result under Output.
- Click Save to save the function.
-
The After Flattening toggle is enabled by default. It ensures the function processes normalized data. Disable this toggle only if you need the original structure.
Guidelines
- RBF (Run Before Flattening): Function executes before data structure is flattened.
- RAF (Run After Flattening): Function executes after data structure is flattened.
-
Click Save to confirm the transform node.
Step 5: Configure the Destination node
Step 5: Configure the Destination node
A destination defines where the processed events are written. You can forward data to another stream or to an external system.
To add a stream destination:
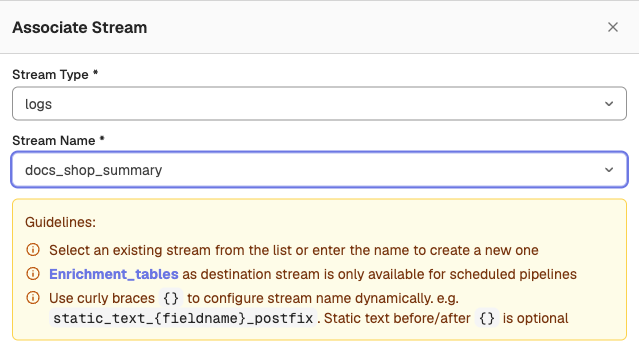
- Drag a Stream node into the editor.
- In the Associate Stream panel, configure the destination stream.
- Select the Stream Type, then select an existing stream in Stream Name, or type a new name to create a new stream.
Note
You can add Enrichment_tables as a destination stream for scheduled pipelines.
Dynamic stream names
You can configure the stream name dynamically with curly braces.
Example: static_text_{fieldname}_postfix
Static text before and after the braces is optional.
To add an external destination:
- Drag a Remote node into the editor. The Remote node is available in the self-hosted Enterprise Edition.
- In the External Destination panel, either select an existing destination or enable Create New Destination and fill in the required details such as destination type, name, URL, method, output format, and headers.
- Click Save.
For detailed steps on configuring external destinations, see the Remote Destination guide.
Step 6: Connect the nodes
Step 6: Connect the nodes
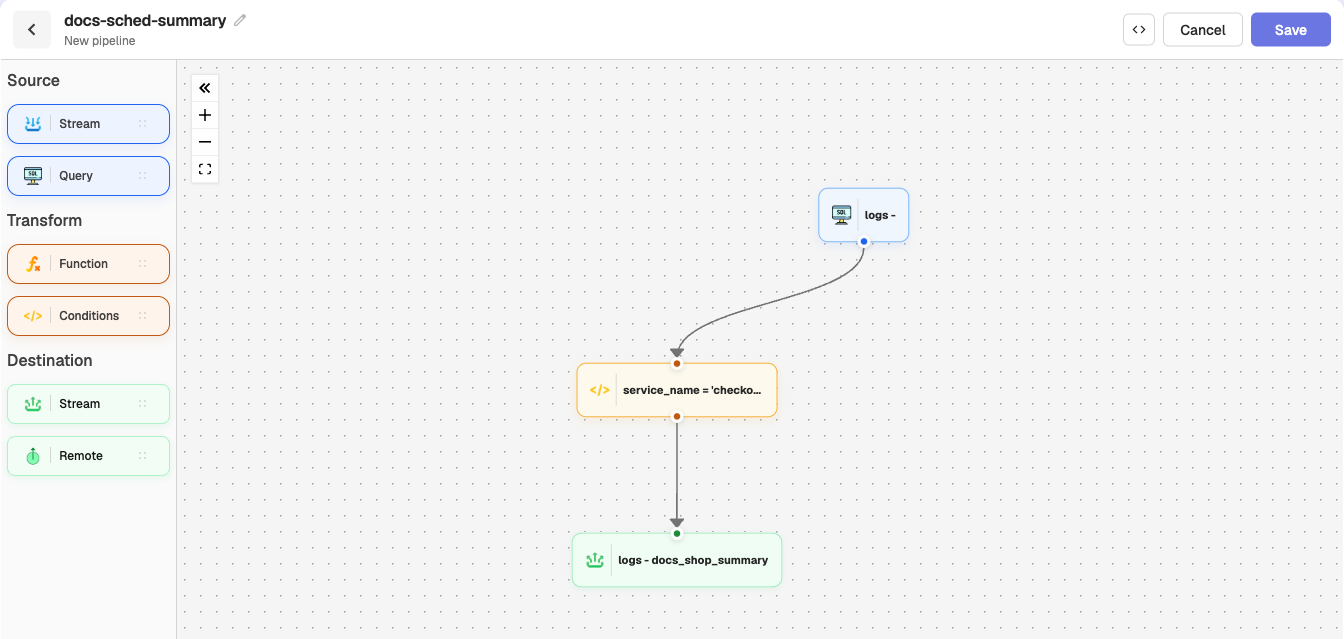
Use the connection icon to link Source > Transform > Destination.
To remove a link, select the link and press delete on your keyboard.
Step 7: Save the pipeline
Step 7: Save the pipeline
Click Save. The pipeline becomes active immediately.
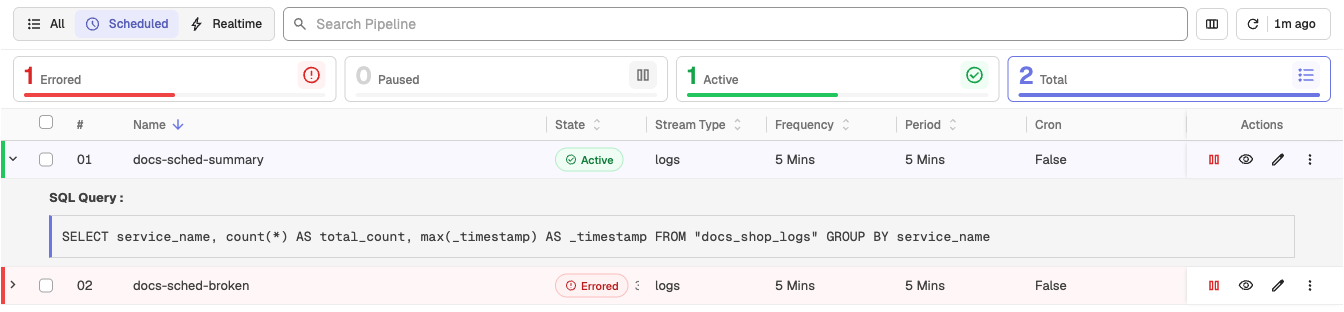
Use the scheduled pipeline
Step 1: Ingest data
Step 1: Ingest data
Use curl or any supported ingestion method.
To find the sample curl command, go to Data Sources > Custom > Logs > Curl.
The scheduled pipeline does not run immediately when data is ingested.
It processes data only when the schedule triggers, using the configured frequency, period, and delay.
Step 2: Verify output
Step 2: Verify output
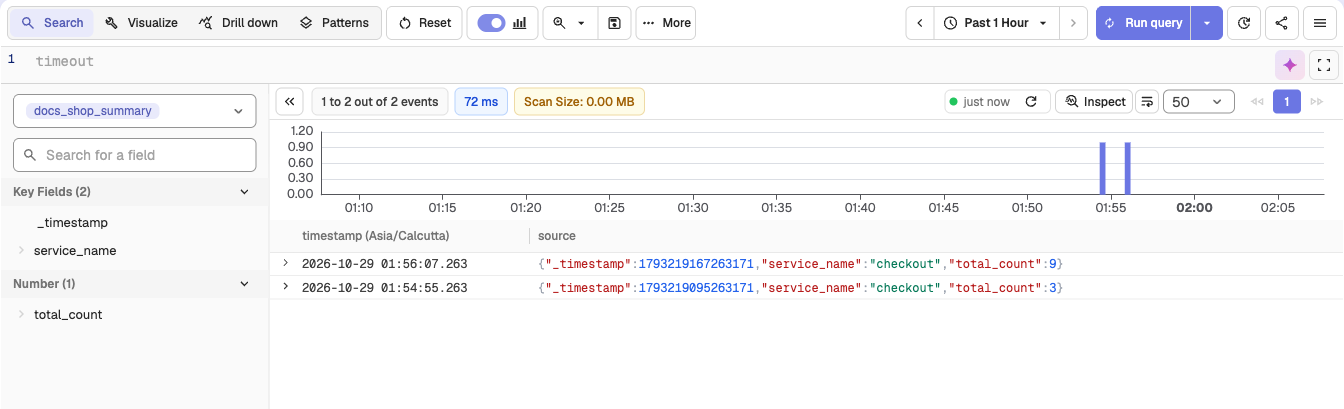
- Go to Logs.
- From the stream selection dropdown, select the stream you added as destination.
- Select the time range from the time range selector.
- Click Run query to view the result.
Related links
Create and Use Real-time Pipeline
Create real-time pipelines in OpenObserve to process data instantly on ingestion, applying conditions and functions to filter and route events to destinations.
Remote Destination
Configure remote destinations to send transformed pipeline data to external systems, with persistent queuing, retry logic, and high throughput.