
Alert Destinations
In OpenObserve, Destinations define how and where alert notifications are delivered when an alert is triggered. Destinations are reusable. You can assign a destination to one or more alerts to manage notifications efficiently.
Configure Alert Destinations
The Destinations section provides the following configuration options. Select a destination type to view configuration instructions.
Webhook
When the alert gets triggered, OpenObserve will send alert data to an external system using an HTTP POST request. Use this option to integrate with services that support webhook ingestion. You can customize the request payload using templates to match the format expected by the target system.
View use cases.
You can use this destination to:
- Create incident tickets in Jira Service Management or ServiceNow.
- Send notifications to Slack or Microsoft Teams channels.
Private and local network addresses are blocked by default
For SSRF protection, OpenObserve blocks Webhook URLs pointing to loopback or private network addresses, such as a self-hosted Ntfy server on your LAN. In a self-hosted deployment, set ZO_SKIP_SSRF_CHECKS=true to allow any private address, or ZO_SSRF_ALLOW_LOOPBACK=true for loopback only. See Network and Communication.
Prerequisites
Set up an alert template.
This allows you to define the content and layout of the alert message.
-
In OpenObserve, go to Reliability > Destination Templates.
-
Click New template to create a new template.
-
In the template creation screen:
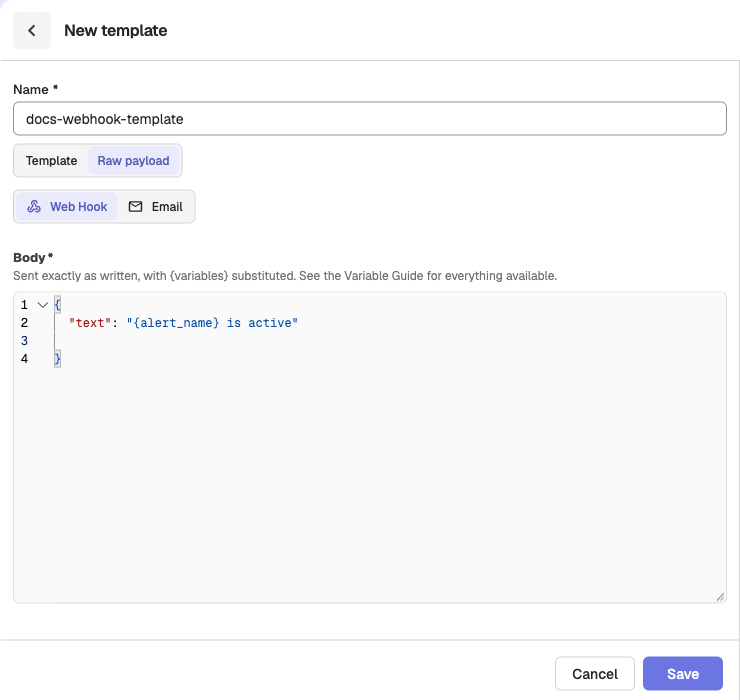
- Enter a name for the template.
- Select Raw payload, then Web Hook as the template type.
- Fill in the Body fields.
Body Example:
  {
    "text": "{alert_name} is active"
  }
Steps to configure webhooks as alert destination
-
Go to Reliability > Notification Destinations and click New destination.
-
Choose Custom Destination, then Web Hook.
-
Fill in the following details:
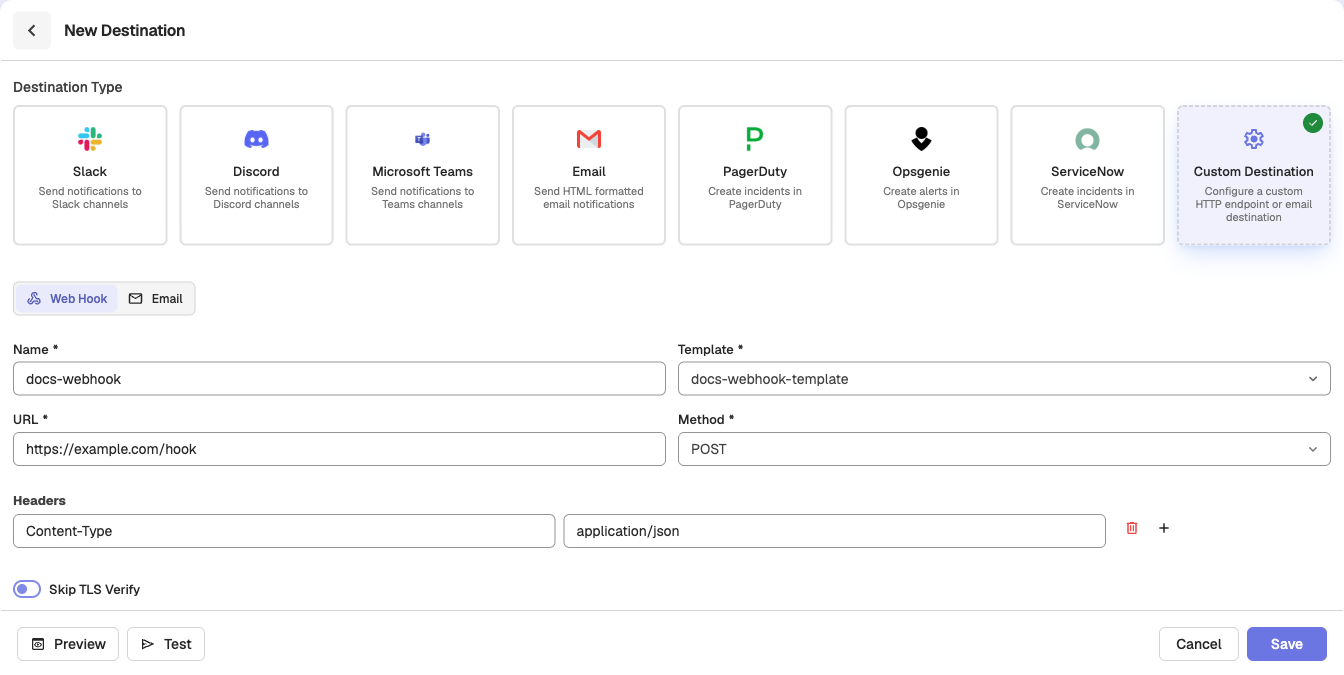
- Name: Enter a descriptive name for the Webhook destination. For example, SlackNotifications. Note that characters such as
,,:,?,/,#, andspacesare not allowed. - Template: Choose a predefined alert message template from the dropdown menu.
- URL: Specify the Webhook endpoint URL where notifications will be sent. For example,
https://hooks.slack.com/services/T02QBH105PF/B04C7NLLLRE/HY3fXf123 - Method: Select the HTTP method (
POST,GET, orPUT) depending on the Webhook's requirements. - Headers (Optional): Add custom headers in key-value format. For example, authentication tokens or content type. For example,
Key: Authorization Value: Basic cm9vdEBleGFtcGxlLmNvbTpDb21wbGV4GFzcy - Skip TLS Verify: Enable this option if the endpoint uses self-signed certificates or if you want to bypass SSL verification.
- Name: Enter a descriptive name for the Webhook destination. For example, SlackNotifications. Note that characters such as
-
Click Save to create the Webhook destination.
When the alert gets triggered, OpenObserve will send alert notifications to one or more email addresses using SMTP. Use this option when email is the preferred channel for receiving alerts. You must configure the email delivery settings under your OpenObserve SMTP setup. The alert payload can be formatted using a predefined template.
View use cases.
You can use this destination to:
- Notify on-call team members or distribution lists.
- Route alerts to incident mailboxes used by helpdesk.
Prerequisites
1. Set up an email account for sending alerts.
To send email alerts using Gmail SMTP, you must create an App Password. Follow these steps:
- Sign in to your Gmail account.
- Go to Google Account Settings > Security.
- Under Signing into Google, enable 2-Step Verification (if not already enabled).
- After enabling 2-Step Verification, go to the App Passwords.
- In the App Passwords page, enter a name for your app, such as SMTP, and click Create.
- Copy the generated App Password and store it securely. You will need it during configuration.
Test Your Gmail SMTP Configuration
Use an online tool such as Mailmeteor’s SMTP Test Tool to verify your configuration.
To test:
- Go to Mailmeteor's SMTP Test Tool and select the email provider.
- The tool fills in the SMTP server as
smtp.gmail.comand port587. - Enter your Gmail address and the App Password you created earlier.
- Click Test Configuration.
If successful, you will receive a test email in your inbox. This confirms your Gmail SMTP configuration is working.
2. Configure environment variables to enable email alerts through SMTP in OpenObserve.
Choose your deployment type and configure the environment variables accordingly:
- For Single Node Deployment: You need to pass SMTP configuration parameters when starting OpenObserve. Below is the command to configure OpenObserve to send email alerts via Gmail:
ZO_SMTP_ENABLED=true \
ZO_SMTP_HOST="smtp.gmail.com" \
ZO_SMTP_PORT=587 \
ZO_SMTP_USER_NAME="your-gmail-address@gmail.com" \
ZO_SMTP_PASSWORD="your-app-password" \
ZO_SMTP_FROM_EMAIL="your-gmail-address@gmail.com" \
ZO_SMTP_ENCRYPTION="starttls" \
ZO_ROOT_USER_EMAIL="root-user-email" \
ZO_ROOT_USER_PASSWORD="root-user-password" \
./openobserve
Replace the placeholders with your actual credentials and email addresses.
- For High Availability (HA) deployment: Configure the above environemnt variables in the values.yaml file
- For Cloud: No additional configuration required.
3. Set up an alert template.
This allows you to define the content and layout of the alert message.
-
In OpenObserve, go to Reliability > Destination Templates.
-
Click New template to create a new email template.
-
In the template creation screen:
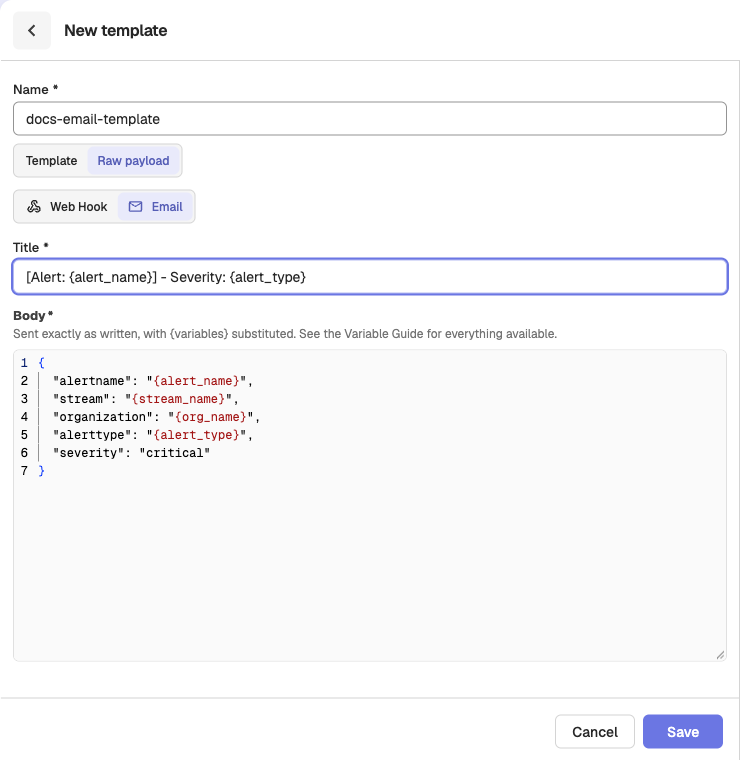
- Select Raw payload, then Email as the template type.
- Enter a name for the template.
- Fill in the Title and Body fields.
Title Example:
[Alert: {alert_name}] - Severity: {alert_type}Body Example:
{
  "alertname": "{alert_name}",
  "stream": "{stream_name}",
  "organization": "{org_name}",
  "alerttype": "{alert_type}",
  "severity": "critical"
}
4. Ensure that the recipient is part of the appropriate organization
- From the left navigation menu, go to IAM (Identity and Access Management) > Users.
- Click New user.
- Enter the user’s email address, role, password, and name.
- Click Save.
After the user is added, they become eligible to receive email alerts.
Steps to configure emails as alert destination
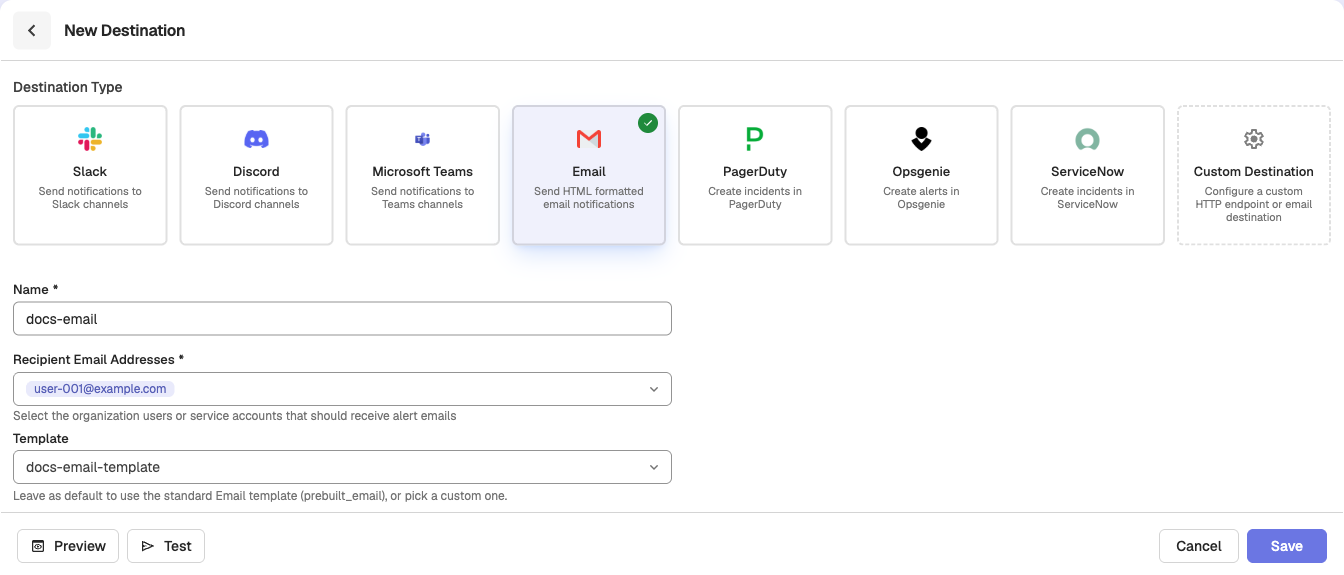
- Go to Reliability > Notification Destinations and click New destination.
- Choose Email as the destination type.
- Enter a name for the destination.
- Select an email template to define the alert content.
- Enter the recipient’s email address.
- Click Save.
This creates the email as alert destination.
Slack
When the alert gets triggered, OpenObserve sends the notification to a Slack channel through an incoming webhook. When you select the Slack destination type, OpenObserve asks How do you want to connect Slack? and offers the methods available on your deployment:
- Connect Slack: Cloud only. Authorize OpenObserve in Slack and pick a workspace and channel. There is no webhook URL to copy.
- Create with Slack manifest: Enterprise self-hosted only. Generate a ready-to-use Slack app manifest and install the app in your workspace.
- Use an existing webhook: All deployments. Paste an incoming webhook URL you already created in Slack. This is the only method in the open-source edition.
The recommended method is selected by default: Connect Slack on Cloud and Create with Slack manifest on self-hosted Enterprise.
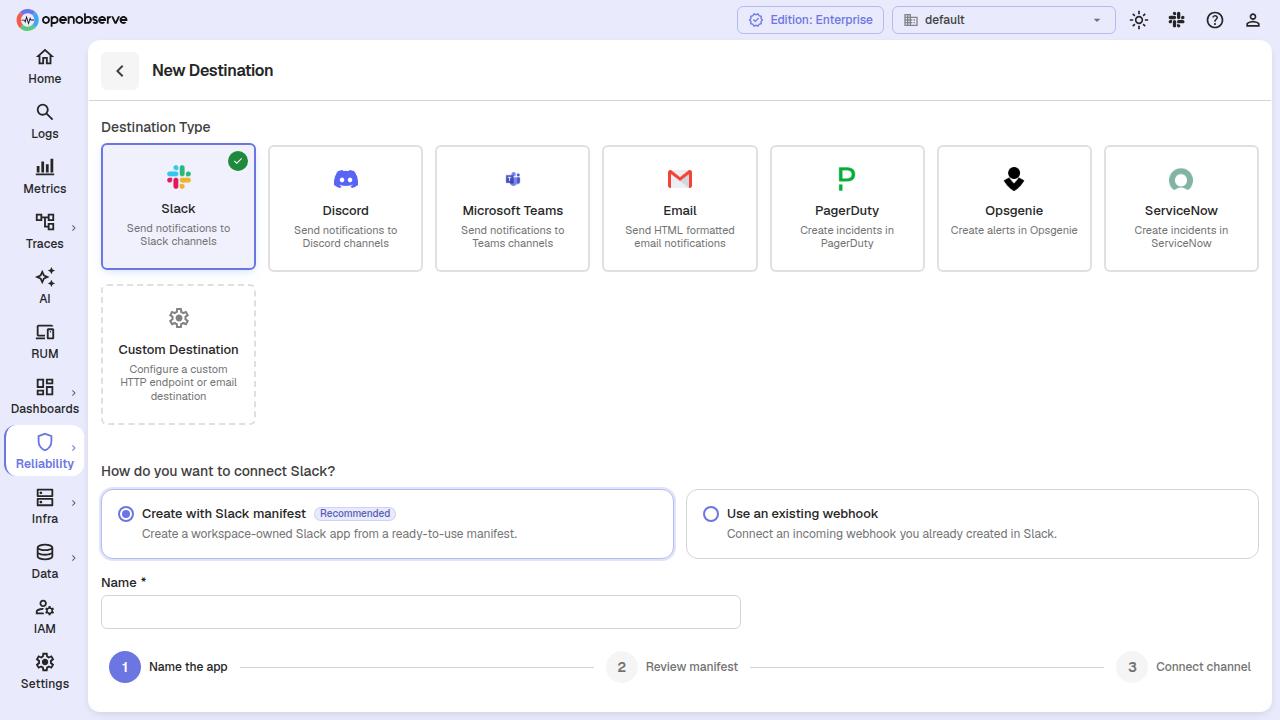
Connect Slack (Cloud)
OpenObserve requests only the incoming-webhook scope, so it can post to the channel you choose but cannot read workspace messages. The Slack access token is exchanged on the server and never reaches the browser; only the channel-bound webhook URL is stored with the destination.
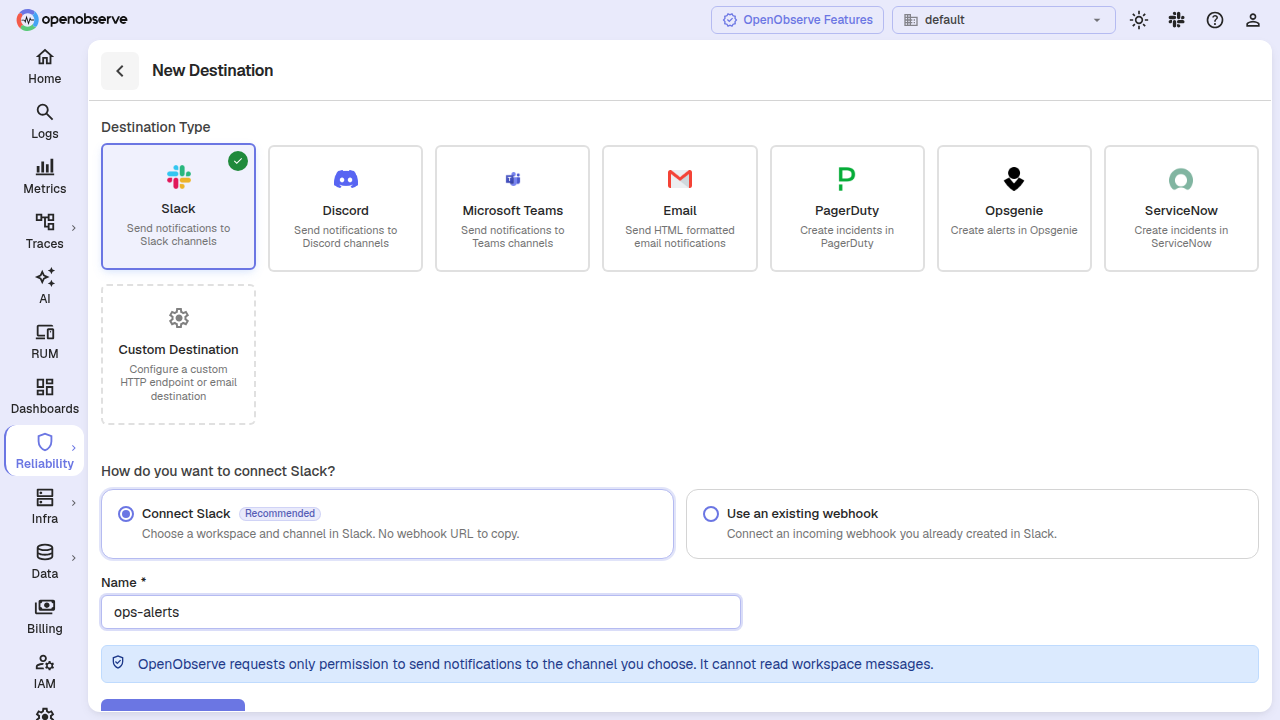
- Go to Reliability > Notification Destinations and click New destination.
- Select the Slack destination type.
- Keep Connect Slack selected, enter a name for the destination, and click Connect Slack.
- In the Slack window that opens, choose a workspace and channel, then allow access.
- When the connection completes, the destination shows the workspace and channel, and the webhook URL is filled in for you.
- Click Save.
To connect a different workspace or channel later, click Reconnect Slack.
Server configuration for Connect Slack
The Connect Slack flow uses a Slack app configured on the OpenObserve server through these environment variables:
| Variable | Description |
|---|---|
O2_SLACK_CLIENT_ID | Client ID of the Slack app used for alert-destination OAuth. If empty, the flow is disabled. |
O2_SLACK_CLIENT_SECRET | Client secret of the Slack app. If empty, the flow is disabled. |
O2_SLACK_REDIRECT_URL | Slack OAuth callback URL. Defaults to {ZO_WEB_URL}{ZO_BASE_URI}/web/slack/oauth/callback. |
Create with Slack manifest (Enterprise)
On self-hosted Enterprise deployments, you create a Slack app owned by your workspace from a generated manifest. The manifest requests only the incoming-webhook permission, so the app cannot read workspace messages.
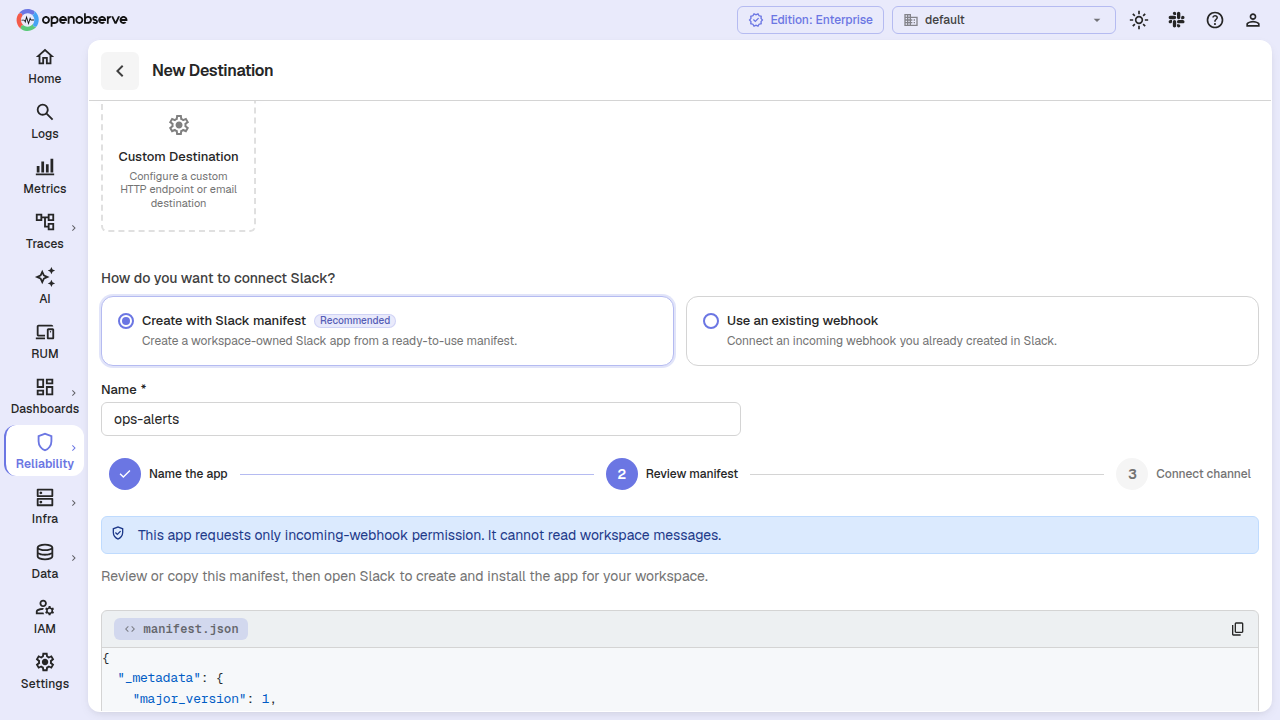
- Go to Reliability > Notification Destinations and click New destination.
- Select the Slack destination type and keep Create with Slack manifest selected.
- Enter a name for the destination and a Slack app name (up to 35 characters), then click Continue.
- Review or copy the generated manifest, then click Open Slack setup. Slack opens with the manifest pre-filled.
- In Slack, create and install the app, and choose a channel.
- In the Slack app settings, open Incoming Webhooks, copy the Webhook URL, and paste it into the destination.
- Click Save.
Use an existing webhook
If you already created an incoming webhook in Slack, connect it directly.
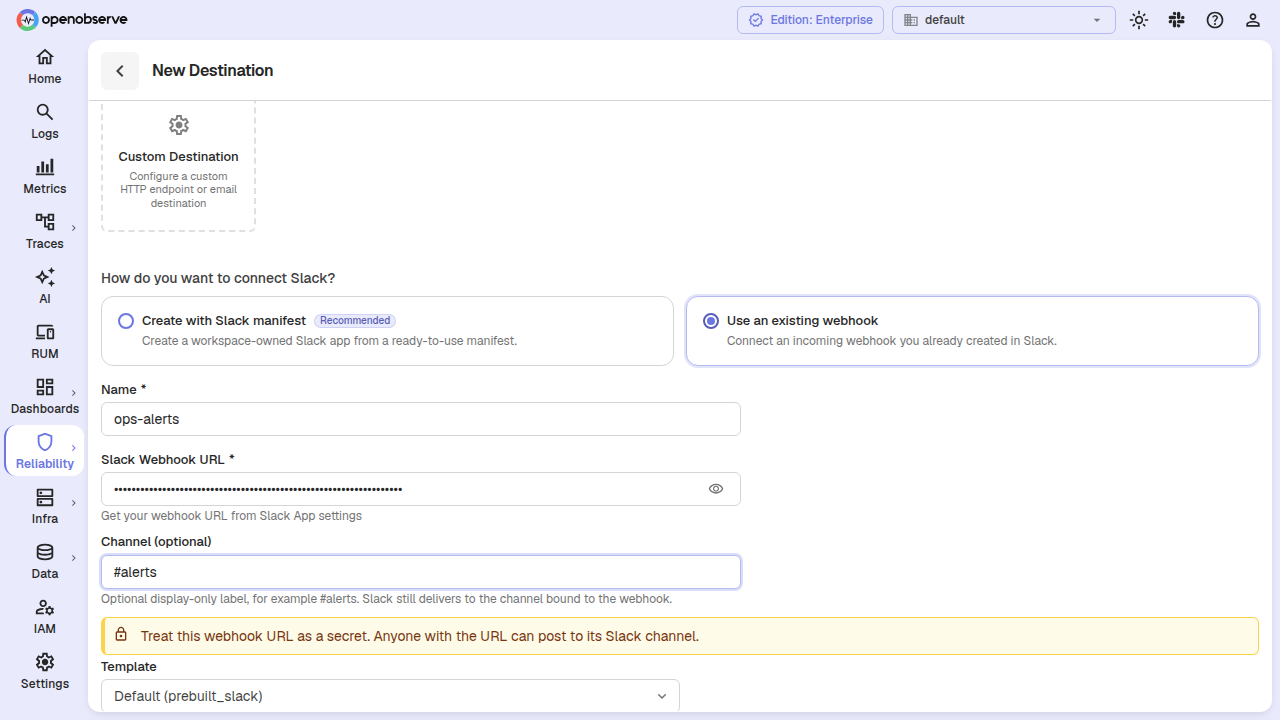
- Go to Reliability > Notification Destinations and click New destination.
- Select the Slack destination type and choose Use an existing webhook.
- Enter a name for the destination.
- Paste the Slack Webhook URL, for example
https://hooks.slack.com/services/.... - Optionally, enter a Channel label, such as
#alerts. The label is for display only; Slack still delivers to the channel bound to the webhook. - Click Save.
Treat the webhook URL as a secret
Anyone with the webhook URL can post to its Slack channel. The URL is masked in the form; click the eye icon to reveal or hide it.
After you set up the destination, use Test to send a test message to the channel. For Slack destinations, a successful test also shows Slack's response.
Query Management
Monitor and cancel live queries across dashboards, alerts, and logs; inspect execution time, range, user, and more in HA deployments.
Templates
Create alert notification templates in OpenObserve: content templates with preview and chart images, or raw payloads with variables and row templates.