Resources

OpenTelemetry Java Automatic Instrumentation

October 1, 2024 by OpenObserve Team
Automatic Instrumentation

Transform your application performance with the ease of OpenTelemetry Java Automatic Instrumentation.

OpenTelemetry Java Automatic Instrumentation offers a streamlined approach to capturing telemetry data (metrics, traces, and logs) from Java applications. 

By injecting bytecode into running applications, it automatically instruments popular libraries and frameworks without requiring extensive code changes. This significantly reduces the development effort and time needed to establish observability.

Key benefits include:

  • Reduced development overhead: No need to write custom instrumentation code.
  • Faster time to insights: Quickly gain visibility into application performance and behavior.
  • Standardized telemetry: Adheres to OpenTelemetry standards, ensuring compatibility with various observability tools like OpenObserve.
  • Improved troubleshooting: Identify performance bottlenecks and root causes efficiently.

By leveraging auto-instrumentation, organizations can accelerate their observability journey and make data-driven decisions to optimize application performance.

Compatibility 

OpenTelemetry Java Automatic Instrumentation is designed to work seamlessly with Java 8 and later versions. This broad compatibility ensures that you can adopt auto-instrumentation regardless of your application's Java runtime environment.

By supporting a wide range of JVMs, OpenTelemetry promotes wider adoption and enables consistent telemetry collection across different application stacks.

Capabilities

OpenTelemetry Java Automatic Instrumentation excels at automatically detecting and instrumenting a wide range of popular Java libraries and frameworks. This includes:

  • Web frameworks: Spring Boot, Tomcat, Jetty, etc.
  • Database drivers: JDBC, MySQL, PostgreSQL, etc.
  • Messaging systems: Kafka, RabbitMQ, etc.
  • HTTP clients: Apache HttpClient, OkHttp, etc.
  • Other common libraries: Logback, Hibernate, etc.

By instrumenting these components, you gain valuable insights into their performance, dependencies, and error patterns. This information is crucial for identifying bottlenecks and ensuring application reliability.

In the following section you will learn about the requirements for auto-instrumentation.

Requirements for Auto-Instrumentation

Automatic instrumentation in OpenTelemetry for Java involves several key requirements and configurations essential for monitoring Java applications effectively. Here's a detailed discussion on the requirements for auto-instrumentation.

Java Agent Requirement

To enable auto-instrumentation, a Java agent is necessary for each monitored service instance. This agent is a JAR file that must be attached to any Java 8+ application. It dynamically modifies the application's bytecode to capture telemetry data from various libraries and frameworks without requiring changes to the application code itself. 

This capability allows for the monitoring of inbound requests, outbound HTTP calls, database interactions, and more.

Configuration Specifics

Several configuration parameters are crucial for setting up the Java agent correctly:

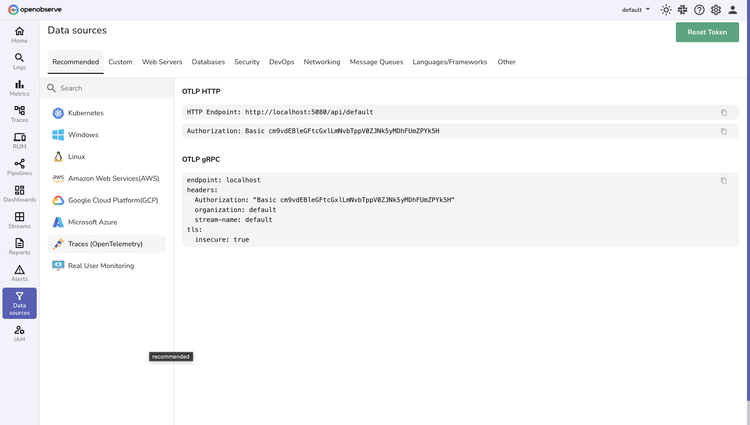
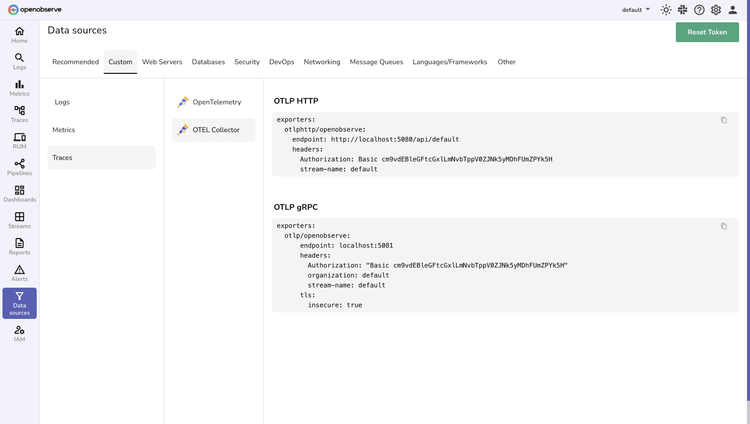
  • OTLP_HTTP_ENDPOINT: This specifies the endpoint to which the telemetry data will be sent. It is essential for the agent to communicate with the OpenTelemetry Collector or other backends.
  • SERVICE_NAME: This parameter identifies the service being monitored. It helps in organizing and filtering telemetry data based on the service.
  • APPLICATION_NAME: Similar to SERVICE_NAME, this parameter provides a human-readable name for the application, aiding in the identification of telemetry data associated with specific applications.

These parameters can typically be set through environment variables or system properties, allowing for flexible configuration based on deployment needs.

Agent Version Compatibility

For optimal performance and compatibility, it is recommended to use the Java agent version 2.6.0. This version ensures that users benefit from the latest features, bug fixes, and improvements in the OpenTelemetry framework. 

Using an outdated version may lead to incompatibilities or missing functionalities that could hinder effective monitoring and observability.

The next few sections deal with requisite steps for auto-instrumentation.

Setting Up Auto-Instrumentation

To set up auto-instrumentation for Java applications using OpenTelemetry, you need to follow these steps:

1. Downloading the OpenTelemetry Java Agent

2. Distributing the Agent to Service Hosts or Containers

  • Once you have downloaded the agent, you need to distribute it to the hosts or containers where your Java services are running.
  • This can be done by copying the agent JAR file to a shared location accessible by all service instances or by including it in the Docker image or container deployment process.

3. Setting Proper Permissions for Agent Execution

  • Ensure that the Java process running your application has the necessary permissions to execute the OpenTelemetry Java agent.
  • This typically involves setting the appropriate file permissions on the agent JAR file to allow read and execute access for the user or process running the Java application.
  • In containerized environments, you may need to configure the container's security context or set the appropriate file permissions during the container build process.

After completing these setup steps, you need to configure the Java agent by specifying the required parameters:

  • OTLP_HTTP_ENDPOINT: Set this environment variable or system property to specify the endpoint where the telemetry data will be sent, such as the OpenTelemetry Collector or other backends.
  • SERVICE_NAME: Provide a unique identifier for the service being monitored. This helps in organizing and filtering telemetry data.
  • APPLICATION_NAME: Assign a human-readable name for the application to aid in identifying telemetry data.

These configuration parameters can be set through environment variables or system properties, allowing for flexible deployment based on your specific needs.

By following these steps and configuring the necessary parameters, you can successfully set up auto-instrumentation for Java applications using the OpenTelemetry Java agent version 2.6.0 or higher

Configuring Auto-Instrumentation

Here is how to configure OpenTelemetry Java auto-instrumentation using environment variables and command line options:

Using Environment Variables

The recommended way to configure the OpenTelemetry Java agent is by setting environment variables that the JVM can access. The following environment variables can be used:

  • JAVA_TOOL_OPTIONS="-javaagent:path/to/opentelemetry-javaagent.jar"
  • OTEL_TRACES_EXPORTER=otlp
  • OTEL_METRICS_EXPORTER=none
  • OTEL_LOGS_EXPORTER=none
  • OTEL_EXPORTER_OTLP_ENDPOINT=http://OTLP_HTTP_ENDPOINT
  • OTEL_SERVICE_NAME=SERVICE_NAME
  • OTEL_RESOURCE_ATTRIBUTES=application=APPLICATION_NAME

Example Environment Variable Configuration

bash
JAVA_TOOL_OPTIONS="-javaagent:/path/to/opentelemetry-javaagent.jar"
OTEL_TRACES_EXPORTER=otlp
OTEL_METRICS_EXPORTER=none
OTEL_LOGS_EXPORTER=none
OTEL_EXPORTER_OTLP_ENDPOINT=http://otel-collector:4318
OTEL_SERVICE_NAME=my-service
OTEL_RESOURCE_ATTRIBUTES=application=my-app

Command Line Setup

Alternatively, you can append the configuration to the Java command line when starting your service:

bash
java -javaagent:/path/to/opentelemetry-javaagent.jar \
  -Dotel.traces.exporter=otlp \
  -Dotel.metrics.exporter=none \
  -Dotel.logs.exporter=none \
  -Dotel.exporter.otlp.endpoint=http://otel-collector:4318 \
  -Dotel.service.name=my-service \
  -Dotel.resource.attributes=application=my-app \
  ...

Example Command Line Configuration

bash
java -javaagent:/opt/opentelemetry-javaagent.jar \
  -Dotel.traces.exporter=otlp \
  -Dotel.metrics.exporter=none \
  -Dotel.logs.exporter=none \
  -Dotel.exporter.otlp.endpoint=http://otel-collector:4318 \
  -Dotel.service.name=shopping-cart \
  -Dotel.resource.attributes=application=ecommerce \
  -jar my-app.jar

The key configuration options are:

  • Path to the OpenTelemetry Java agent JAR file
  • Setting otlp as the traces exporter
  • Disabling metrics and logs exporting
  • Specifying the OTLP endpoint URL for the OpenTelemetry Collector
  • Defining the service and application names as resource attributes

Using Auto-Instrumentation

Here’s a guide on deploying a Java application with OpenTelemetry, configuring a Docker image with environment variables, and running the Docker image.

Steps to Deploy a Java Application with OpenTelemetry

  1. Download the OpenTelemetry Java Agent: Obtain the OpenTelemetry Java agent JAR file from the official OpenTelemetry releases.
  2. Add the Java Agent to Your Application: Modify your Java application's startup command to include the Java agent. This can be done either through command line options or by setting environment variables.
  3. Configure OpenTelemetry: Set the necessary configuration parameters, such as the service name, exporter settings, and resource attributes, using environment variables or JVM options.
  4. Build Your Application: Package your Java application into a JAR or WAR file, ensuring that it is ready for deployment.
  5. Deploy the Application: Deploy your application on your desired platform (e.g., cloud, on-premises server).

Configuring a Docker Image with Environment Variables

To configure a Docker image for your Java application with OpenTelemetry, you can use the following Dockerfile example:

FROM openjdk:11-jre

# Set the working directory
WORKDIR /app

# Copy the OpenTelemetry Java agent and your application JAR
COPY opentelemetry-javaagent.jar /app/
COPY my-app.jar /app/

# Set environment variables for OpenTelemetry
ENV JAVA_TOOL_OPTIONS="-javaagent:/app/opentelemetry-javaagent.jar"
ENV OTEL_SERVICE_NAME="my-service"
ENV OTEL_EXPORTER_OTLP_ENDPOINT="http://otel-collector:4318"
ENV OTEL_RESOURCE_ATTRIBUTES="application=my-app"

# Command to run the application
CMD ["java", "-jar", "my-app.jar"]

In this Dockerfile:

  • The OpenTelemetry Java agent and the application JAR are copied into the image.
  • Environment variables are set to configure OpenTelemetry.
  • The application is run with the specified Java command.

Running the Docker Image

After building your Docker image, you can run it using the following command:

bash
docker build -t my-java-app .
docker run -d --name my-running-app my-java-app

This command builds the Docker image with the tag my-java-app and then runs it in detached mode. The application will start with OpenTelemetry auto-instrumentation enabled, sending telemetry data to the specified OTLP endpoint.

By following these steps, you can successfully deploy a Java application with OpenTelemetry, configure it within a Docker image, and run the application.

Verifying Instrumentation

When the OpenTelemetry Java agent is successfully integrated into your application, you can expect to see specific log outputs that indicate the agent is functioning correctly. Typical expected log messages include:

  • Agent Initialization: Logs that confirm the OpenTelemetry agent has started and initialized successfully.
  • Instrumentation Messages: Logs indicating that various libraries or frameworks (like HTTP clients, databases, etc.) have been instrumented. For example:

\[INFO] OpenTelemetry Java Agent - Instrumentation for [Library Name] initialized.

  • Trace and Span Creation: Logs showing that traces and spans are being created as requests are processed. For example:

[TRACE] Creating span for \[operation name].

  • Exporting Telemetry Data: Logs that confirm telemetry data (traces, metrics, etc.) are being exported to the configured endpoint. For example:

[INFO] Exporting telemetry data to [OTLP endpoint].

Checking Metrics and Traces in Observability Tools

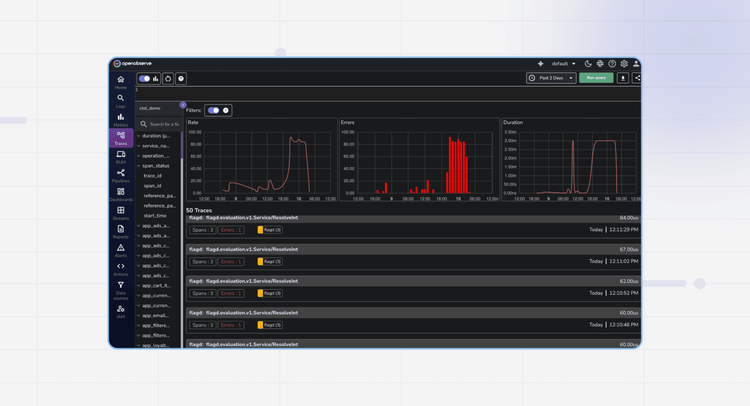
To verify that your instrumentation is working as expected, you can check the metrics and traces in observability tools such as OpenObserve APM. Here’s how to do it:

  1. Access OpenObserve APM: Log into your OpenObserve APM dashboard.
  2. Navigate to Traces: Look for a section labeled "Traces" or "Distributed Tracing." Here, you should see traces corresponding to requests made to your application.
  3. Inspect Individual Traces: Click on individual traces to view detailed information about the spans, including execution time, errors, and service dependencies.
  4. Check Metrics: Navigate to the "Metrics" section to view performance metrics such as response times, error rates, and throughput. You should see metrics that reflect the performance of your instrumented application.
  5. Alerts and Dashboards: Set up alerts and dashboards to monitor the health of your application continuously. This will help you identify any issues related to instrumentation or performance.

By following these steps, you can effectively verify that the OpenTelemetry Java agent is integrated correctly and that your application is sending telemetry data to your observability tools.

Advanced Auto-Instrumentation Techniques

Here are some advanced auto-instrumentation techniques using OpenTelemetry:

Combining Auto-Instrumentation with Custom Instrumentation

While auto-instrumentation covers many common libraries and frameworks, there may be cases where you need to add custom instrumentation for your specific application logic. OpenTelemetry supports a mix of auto-instrumentation and manual instrumentation.

To combine the two, you can:

  • Use auto-instrumentation for popular libraries like HTTP clients, databases, message queues, etc.
  • Add custom instrumentation around unique application code or components not covered by auto-instrumentation
  • Use the OpenTelemetry API to manually create spans, add attributes, and record metrics

This hybrid approach allows you to benefit from the out-of-the-box instrumentation while customizing the tracing for your specific needs.

Creating Custom Spans for Specific Application Logic

To create custom spans for application-specific logic, you can use the OpenTelemetry API directly in your code. Here's an example in Java:

java
import io.opentelemetry.api.OpenTelemetry;
import io.opentelemetry.api.trace.Span;
import io.opentelemetry.api.trace.Tracer;

Tracer tracer = OpenTelemetry.getGlobalTracer("my-service");

Span span = tracer.spanBuilder("my-custom-span")
    .setSpanKind(Span.Kind.INTERNAL)
    .startSpan();

try (Scope scope = span.makeCurrent()) {
    // Custom application logic here
    // ...
} finally {
    span.end();
}

This code creates a new span for a specific operation, allowing you to capture traces for custom code paths. You can set the span kind, add attributes, and record events as needed.

Enriching Spans with Additional Attributes

To add more context to your traces, you can enrich spans with additional attributes. This helps provide more insights into the request flow and aids in debugging and analysis.

Some examples of attributes you can add:

  • User ID or username
  • Tenant or organization ID
  • Cache hits/misses
  • Error codes or messages
  • Latency of downstream calls

Here's how to add attributes to a span in Java:

java
span.setAttribute("user.id", "123456")
    .setAttribute("cache.hits", 5)
    .setAttribute("cache.misses", 2);

By leveraging these advanced techniques, you can create a comprehensive observability solution that provides deep visibility into your application's performance and behavior.

Learning More About OpenTelemetry

OpenTelemetry is a vendor-neutral, open-source project that provides a standardized framework for collecting and exporting telemetry data such as traces, metrics, and logs from applications. 

It is designed to support observability across various programming languages and platforms, enabling developers to gain insights into application performance and behavior. 

OpenTelemetry aims to unify the way telemetry data is collected and processed, making it easier for organizations to implement observability without being locked into specific vendor solutions.

Available Instrumentation for Different Languages

OpenTelemetry supports a wide range of programming languages, providing auto-instrumentation libraries and SDKs for:

  • Java: Instrumentation for popular frameworks like Spring, JAX-RS, and more.
  • JavaScript: Support for Node.js and browser-based applications.
  • Python: Instrumentation for web frameworks like Flask and Django.
  • Go: Integration with various libraries and frameworks.
  • C#: Support for .NET applications.
  • Ruby: Instrumentation for Ruby on Rails and other frameworks.

Each language has its specific libraries and configurations, allowing developers to easily instrument their applications and collect telemetry data.

OpenTelemetry Registry and Contribution Opportunities

OpenTelemetry encourages community involvement and contributions. The OpenTelemetry registry serves as a central repository for instrumentation libraries, documentation, and examples. Developers can contribute by:

  • Creating New Instrumentation: If a library or framework is not yet supported, developers can create new instrumentation modules.
  • Improving Documentation: Enhancing existing documentation or providing examples can help others in the community.
  • Reporting Issues: Users can report bugs or request features to improve the project.
  • Participating in Discussions: Engaging in community discussions on forums or GitHub can help shape the direction of the project.

Contributing to OpenTelemetry not only helps improve the project but also fosters a collaborative environment where developers can share knowledge and best practices related to observability.

Support and Resources

Signing Up for OpenObserve

To get started with OpenObserve, you need to create an account on their platform. Here are the steps:

  1. Sign Up For Free
  2. Fill Out the Registration Form
  3. Verify Your Email
  4. Log In

Once your account is activated, log in to the OpenObserve platform to start using the observability tools.

Developer Resources and Guides (OpenObserve)

OpenObserve provides comprehensive developer resources and guides to help users effectively utilize the platform. You can typically find these resources in the following sections:

  • Documentation: Detailed guides on how to set up and configure OpenObserve, including installation instructions and usage examples.
  • API References: Information on the APIs available for integration with OpenObserve, including endpoints and data formats.
  • Tutorials: Step-by-step tutorials that walk you through common use cases and advanced features.
  • Community Forums: Access to community discussions where you can ask questions and share knowledge with other users.

By following these steps and utilizing the available resources, you can effectively set up and leverage OpenObserve for your observability needs.

Conclusion

OpenTelemetry Java Automatic Instrumentation provides a robust foundation for building comprehensive observability solutions. 

By seamlessly integrating with popular Java libraries and frameworks, it simplifies the process of capturing and analyzing telemetry data.

OpenObserve complements this by offering a powerful platform to ingest, store, and analyze the collected telemetry data. 

Its efficient storage, advanced querying capabilities, and intuitive visualizations empower teams to gain actionable insights and optimize application performance.

By combining OpenTelemetry's instrumentation with OpenObserve's analytics, you can effectively monitor, troubleshoot, and optimize Java applications. 

Sign up Today For Free and See for yourself.

Author:

authorImage

The OpenObserve Team comprises dedicated professionals committed to revolutionizing system observability through their innovative platform, OpenObserve. Dedicated to streamlining data observation and system monitoring, offering high performance and cost-effective solutions for diverse use cases.

OpenObserve Inc. © 2024