Resources

Real-Time Monitoring for NGINX

June 29, 2024 by OpenObserve Team
Nginx Monitoring

Mastering Nginx Monitoring: A Comprehensive Guide to Real-Time Performance Optimization

Ah, the digital age – where we want everything fast: fast food, fast cars, and especially, fast websites. And in the marathon to keep our websites zippy, NGINX acts like the premium sports drink, quenching our thirst for speed. But what about making sure this digital sports drink isn't running out? Enter the fascinating world of real-time NGINX monitoring – it's like having a high-tech hydration check for your web infrastructure.

As a powerful web server and reverse proxy, NGINX plays a crucial role in delivering seamless user experiences. However, managing and monitoring NGINX can be challenging, especially as your application scales. That's where real-time monitoring comes in.

Introduction to Real-Time Monitoring for NGINX

Real-time monitoring is essential for maintaining the health and performance of your NGINX web servers. By continuously collecting and analyzing metrics in real-time, you can proactively identify and resolve issues before they impact your users. Real-time monitoring enables you to:

  • Detect and diagnose performance bottlenecks
  • Identify potential security threats
  • Optimize resource utilization
  • Ensure high availability and reliability of your web applications

NGINX Plus, the commercial version of NGINX, offers advanced monitoring capabilities out of the box. It provides a comprehensive set of tools and features specifically designed to streamline the monitoring process and give you deep visibility into your NGINX server's performance.

With NGINX Plus, you gain access to an interactive dashboard, a powerful REST API, and extensive metrics that provide valuable insights into your web infrastructure. By leveraging these monitoring capabilities, you can proactively manage your NGINX servers, ensure optimal performance, and deliver exceptional user experiences.

Getting Started with NGINX Plus Monitoring

Prerequisites:

Before embarking on your real-time monitoring journey with NGINX Plus, ensure you have the following prerequisites in place:

  • NGINX Plus R14 or later installed on your system.
  • Access to the NGINX Plus configuration files.
  • Familiarity with NGINX configuration directives.
  • Enabling Shared Memory Zones for Data Collection

To unlock the full potential of real-time monitoring, you need to enable shared memory zones in your NGINX Plus configuration. NGINX Plus uses shared memory zones to collect and store valuable metrics related to your servers, upstreams, and caches. Here's how to enable them:

1. Open your NGINX Plus configuration file (e.g., /etc/nginx/nginx.conf) using a text editor.

2. For each HTTP and TCP server block you want to monitor, add the status_zone directive. This directive specifies the name of the shared memory zone for storing server-related metrics.

server {
  listen 80;
  server_name example.com;
  status_zone server_zone;
  ...
}

  ...
}

3. To monitor upstream server groups, add the zone directive to each upstream block. This directive defines the shared memory zone for storing upstream-related metrics.

upstream backend {
  zone backend_zone 64k;
  server backend1.example.com;
  server backend2.example.com;
}

4. If you have a cache setup, ensure that you have defined a shared memory zone for caching using the keys_zone parameter in the proxy_cache_path, fastcgi_cache_path, scgi_cache_path, or uwsgi_cache_path directive.

proxy_cache_path /path/to/cache keys_zone=cache_zone:10m;

5. Save the configuration file after making the necessary changes.

Configuring NGINX Plus for Monitoring

To harness the full monitoring capabilities of NGINX Plus, you need to configure the NGINX Plus API and enable the interactive dashboard. Follow these steps to set up monitoring:

1. Open your NGINX Plus configuration file.

2. In the http context, add a new server block dedicated to the API and dashboard.

http {
  server {
    listen 8080;
    server_name example.com;
    
    location /api {
      api write=on;
      allow 127.0.0.1;
      deny all;
    }
    
    location = /dashboard.html {
      root /usr/share/nginx/html;
    }
  }
  • The api directive enables the NGINX Plus API, and write=on allows write access to the API.
  • The allow and deny directives restrict access to the API endpoint. Adjust these directives based on your security requirements.
  • The location = /dashboard.html block specifies the location of the interactive dashboard file.

3. To secure the API endpoint, you can configure HTTP basic authentication by adding the following directives within the /api location block:

auth_basic "NGINX Plus API";
auth_basic_user_file /path/to/auth/file;

Replace /path/to/auth/file with the path to the file containing the username and password for authentication.

4. Save the configuration file.

5. Test the NGINX Plus configuration for any syntax errors by running the following command:

nginx -t

6. If the configuration test is successful, restart NGINX Plus to apply the changes:

nginx -s reload

Utilizing the Interactive Dashboard

Utilizing the Interactive Dashboard

One of the standout features of NGINX Plus is its interactive dashboard, which provides a user-friendly interface for monitoring your server's performance. The dashboard offers a wealth of information organized into various tabs, each focusing on specific aspects of your NGINX Plus setup.

To access the interactive dashboard, you need to simply open a web browser and navigate to the URL where the dashboard configuration took place (e.g., http://example.com/dashboard.html).

If the system prompts you, you should enter the username and password for authentication.

Let's explore the key tabs and metrics available in the dashboard:

  • HTTP and TCP/UDP Zones: This tab provides detailed performance statistics for your server locations, allowing you to monitor request rates, response codes, and bandwidth usage. It also includes information on request limiting, helping you identify and mitigate potential security threats.
  • HTTP and TCP/UDP Upstreams: Here, you can access valuable insights into the performance of your upstream server groups. Monitor the health and responsiveness of individual servers, track request distribution, and identify any bottlenecks or overloaded servers.
  • Caches: If you have caching configured, this tab offers a comprehensive overview of your cache performance. Monitor cache hit ratios, storage utilization, and eviction rates to optimize your caching strategy and improve overall performance.
  • Shared Zones, Clusters, and Resolvers: Gain visibility into the memory usage of shared zones, monitor the synchronization status across NGINX clusters, and track the performance of your DNS resolvers. This information helps you ensure the smooth operation of your distributed infrastructure.
  • Workers: Get a detailed breakdown of worker process metrics, including per-worker connection statistics, request processing times, and SSL handshake performance. This tab helps you identify any worker-related issues and optimize resource allocation.

Customizing the Dashboard for Effective Monitoring

To tailor the NGINX Plus dashboard to your specific monitoring needs, consider the following tips:

  1. Prioritize the metrics that are most relevant to your application and infrastructure. Focus on the key performance indicators (KPIs) that directly impact your users' experience.
  2. Create custom dashboards by combining metrics from different tabs to get a holistic view of your system's performance. Use the dashboard's drag-and-drop functionality to arrange the metrics in a way that makes sense for your monitoring workflow.
  3. Set up alerts and thresholds based on your performance goals and service level agreements (SLAs). Configure notifications to be triggered when critical metrics exceed predefined limits, enabling you to proactively address potential issues.
  4. Regularly review and analyze the data presented in the dashboard. Look for trends, patterns, and anomalies that may indicate underlying problems or opportunities for optimization.

Managing Upstream Servers from the Dashboard

NGINX Plus allows you to manage upstream servers directly from the interactive dashboard. You can add, remove, or modify upstream servers on the fly without the need to modify the configuration file. Here's how:

  1. Navigate to the "HTTP Upstreams" or "TCP/UDP Upstreams" tab in the dashboard.
  2. Locate the upstream server group you want to manage.
  3. Click on the "Edit" button next to the upstream server group.
  4. In the edit mode, you can:
    1. Add a new server by providing its hostname or IP address and port.
    2. Remove an existing server by clicking the "Remove" button next to it.
    3. Modify the parameters of an existing server, such as weight, maximum connections, and fail timeout.
  5. Click "Save" to apply the changes.

Managing upstream servers from the dashboard provides flexibility and allows you to quickly adapt to changing traffic patterns or server availability without the need for a configuration reload.

By leveraging the interactive dashboard and its customization options, you can gain valuable insights into your NGINX Plus server's performance, identify potential issues, e.

Leveraging the NGINX Plus REST API

In addition to the interactive dashboard, NGINX Plus provides a powerful REST API that allows you to programmatically retrieve metrics, manage upstream servers, and perform advanced monitoring tasks.

The API offers flexibility and automation capabilities, enabling you to integrate NGINX Plus monitoring into your existing toolchain.

To leverage the NGINX Plus REST API, you can use tools like curl or any HTTP client library. Here are a few examples of common API requests:

1. Retrieve server metrics:

curl -s 'http://example.com/api/9/nginx'

This command retrieves general information about the NGINX Plus server, including version, build, and uptime.

2, Retrieve upstream group metrics:

curl -s 'http://example.com/api/9/http/upstreams'

Use this command to fetch metrics related to your configured upstream server groups, such as the number of active connections, request rates, and response codes.

3. Reset cache metrics:

curl -X POST -s 'http://example.com/api/9/http/caches/cache_zone/reset'

If you need to reset the metrics for a specific cache zone, use this API request to clear the counters and start fresh.

These are just a few examples of the extensive capabilities of the NGINX Plus REST API. Exploring the API documentation and experimenting with different endpoints unlock a wealth of monitoring and management possibilities.

Advanced Data Collection Techniques

While the interactive dashboard and REST API provide a solid foundation for monitoring NGINX Plus, you can take your data collection to the next level by employing advanced techniques. Consider the following few strategies:

  1. Granular Status Zones: Use the status_zone directive in specific server and location blocks to collect metrics at a more granular level.
    For example, you can define separate status zones for different API endpoints or static file locations, allowing you to analyze performance metrics specific to those areas.
    

  2. Upstream Server Monitoring: Dive deeper into upstream server monitoring by enabling health checks and configuring the zone directive for each upstream group.
    This allows you to track the health status, response times, and error rates of individual upstream servers, helping you identify and troubleshoot issues more effectively.
    

  3. Custom Logging: Customize your NGINX Plus access logs to include additional metrics and variables relevant to your monitoring needs.
    By capturing specific data points, such as request duration, client IP, or custom headers, you can gain valuable insights into user behavior and application performance.
    

  4. Third-Party Integrations: Extend the capabilities of NGINX Plus monitoring by integrating with third-party tools and platforms.
    For example, you can export metrics to popular monitoring solutions like Prometheus, Grafana, or ELK stack, leveraging their powerful visualization and alerting features.
    

Combining these advanced data collection techniques with the built-in monitoring features of NGINX Plus lets you create a comprehensive and tailored monitoring solution meeting the unique requirements of your web infrastructure.

Integrating OpenAPI and Swagger UI for Enhanced Monitoring

OpenAPI and Swagger UI are powerful tools that can enhance your monitoring experience with NGINX Plus. OpenAPI is a specification for describing RESTful APIs, while Swagger UI is an interactive documentation tool that allows you to explore and test APIs.

Setting up Swagger UI for NGINX Monitoring

To set up Swagger UI for NGINX monitoring, follow these steps:

  1. Download the Swagger UI package from the official website (https://swagger.io/tools/swagger-ui/).
  2. Extract the package and copy the contents of the dist directory to a location accessible by NGINX Plus (e.g., /usr/share/nginx/html/swagger-ui/).
  3. Create an OpenAPI specification file (e.g., nginx-api.yaml) that describes the NGINX Plus API endpoints and their parameters. You can use the NGINX Plus API documentation as a reference to create this file.
  4. Update your NGINX Plus configuration to serve the Swagger UI and the OpenAPI specification file:
    server {
      ...
      
      location /swagger-ui/ {
        alias /usr/share/nginx/html/swagger-ui/;
      }
      
      location /nginx-api.yaml {
        alias /path/to/your/nginx-api.yaml;
      }
      
      ...
    }

5. Restart NGINX Plus to apply the configuration changes.

Operational Benefits of Using Swagger UI with NGINX Plus

Using Swagger UI with NGINX Plus provides several operational benefits:

  1. API Exploration: Swagger UI allows you to interactively explore the NGINX Plus API endpoints, view request and response formats, and understand the available parameters and their usage.
  2. API Testing: You can use Swagger UI to send test requests to the NGINX Plus API endpoints directly from the browser. This enables you to quickly validate API functionality and troubleshoot issues.
  3. Documentation: Swagger UI automatically generates interactive documentation based on the OpenAPI specification file. This documentation serves as a valuable reference for developers and administrators working with the NGINX Plus API.
  4. Collaboration: Swagger UI promotes collaboration among team members by providing a shared interface for exploring and testing the API. It facilitates knowledge sharing and ensures consistent usage of the API across different teams.

Security Practices for Disabling Swagger UI

While Swagger UI is a valuable tool for development and testing, it is recommended to disable it in production environments to reduce the attack surface. To disable Swagger UI, you can:

  1. Remove the Swagger UI-related configuration from your NGINX Plus configuration file.
  2. Restrict access to the Swagger UI and OpenAPI specification file by applying appropriate access controls, such as IP-based restrictions or authentication mechanisms.
  3. Regularly review and update the OpenAPI specification file to ensure it accurately reflects the current state of your NGINX Plus API.

By integrating OpenAPI and Swagger UI with NGINX Plus, you can enhance the monitoring and management capabilities of your web infrastructure while maintaining security best practices.

Best Practices for Real-Time Monitoring with NGINX

Best Practices for Real-Time Monitoring with NGINX

To ensure the effectiveness and reliability of your real-time monitoring setup, consider the following best practices:

  1. Regular Updates: Keep your NGINX Plus installation up to date with the latest version to benefit from new monitoring features, performance enhancements, and security fixes. Stay informed about release notes and upgrade accordingly.
  2. Security and Access Control: Implement robust security measures to protect your monitoring endpoints and sensitive data. Use strong authentication mechanisms, such as HTTP basic authentication or SSL/TLS encryption, to prevent unauthorized access. Restrict access to the NGINX Plus API and dashboard to trusted IP ranges or networks.
  3. Performance Tuning: Regularly review and optimize your NGINX Plus configuration to ensure optimal performance. Fine-tune directive values, such as worker_processes, worker_connections, and buffer sizes, based on your server's resource utilization and traffic patterns. Continuously monitor and adjust these settings as your application evolves.
  4. Alerts and Notifications: Set up alerts and notifications based on predefined thresholds and critical metrics. Utilize the NGINX Plus API or integrate with external monitoring tools to trigger alerts when key performance indicators (KPIs) deviate from expected values. This allows you to proactively address potential issues before they escalate.
  5. Capacity Planning: Use the insights gained from real-time monitoring to inform your capacity planning decisions. Analyze historical data, identify usage patterns, and anticipate future growth to ensure your infrastructure can handle increased traffic and user demand. Proactively scale your resources to maintain optimal performance and availability.

Following these best practices and continuously refining your monitoring strategy helps you maximize the benefits of real-time monitoring with NGINX Plus and ensure the long-term success of your web applications.

Integration with OpenObserve

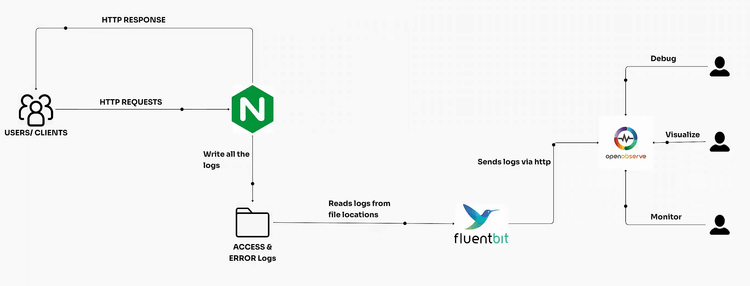
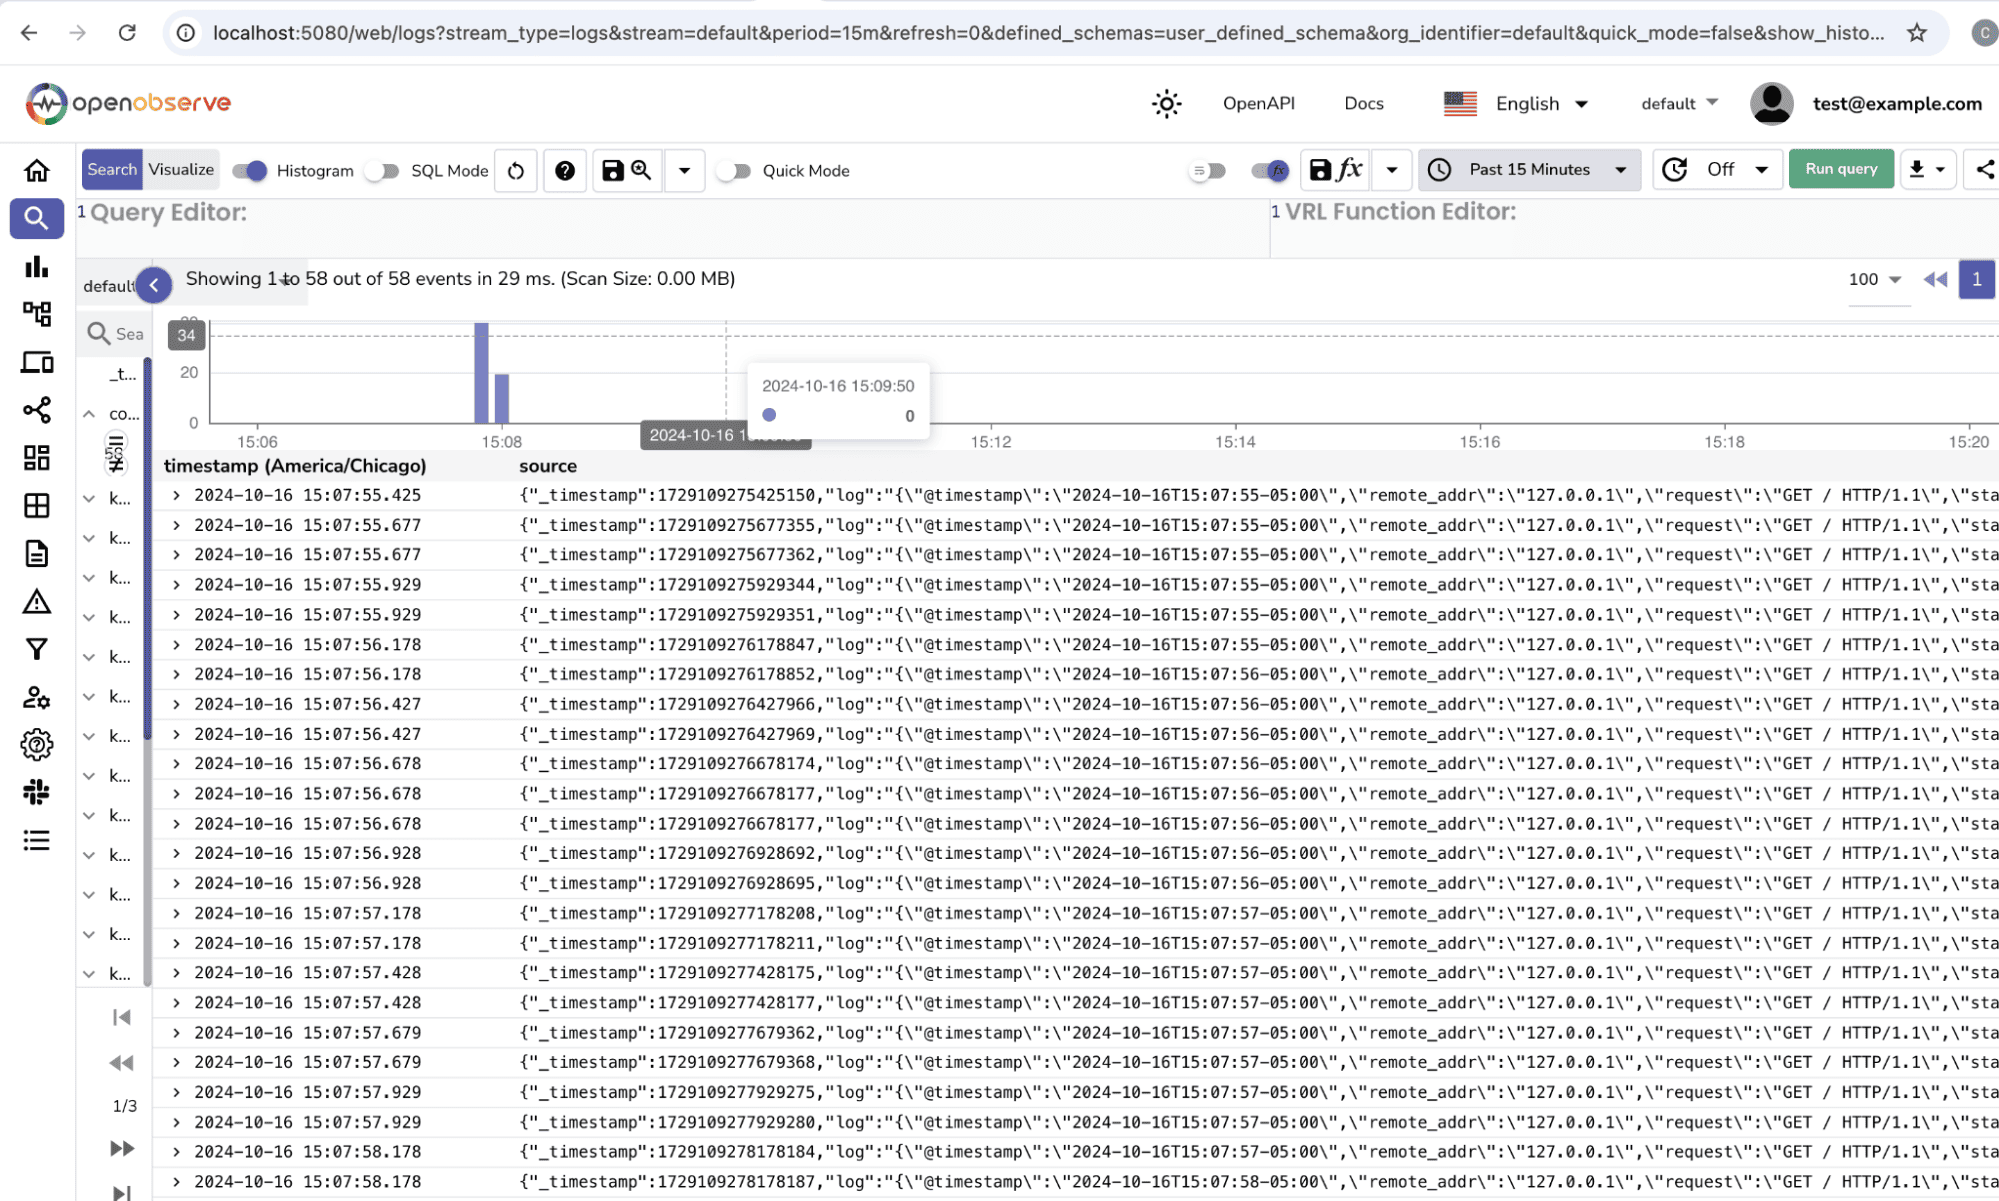
To take your NGINX Plus monitoring to the next level, consider integrating with OpenObserve - a powerful observability platform designed to streamline monitoring, troubleshooting, and optimization. OpenObserve seamlessly integrates with NGINX Plus, providing an enhanced monitoring experience with advanced features and insights.

Here's how you can integrate OpenObserve with your NGINX Plus setup:

  1. Sign up for an OpenObserve account at https://openobserve.ai.
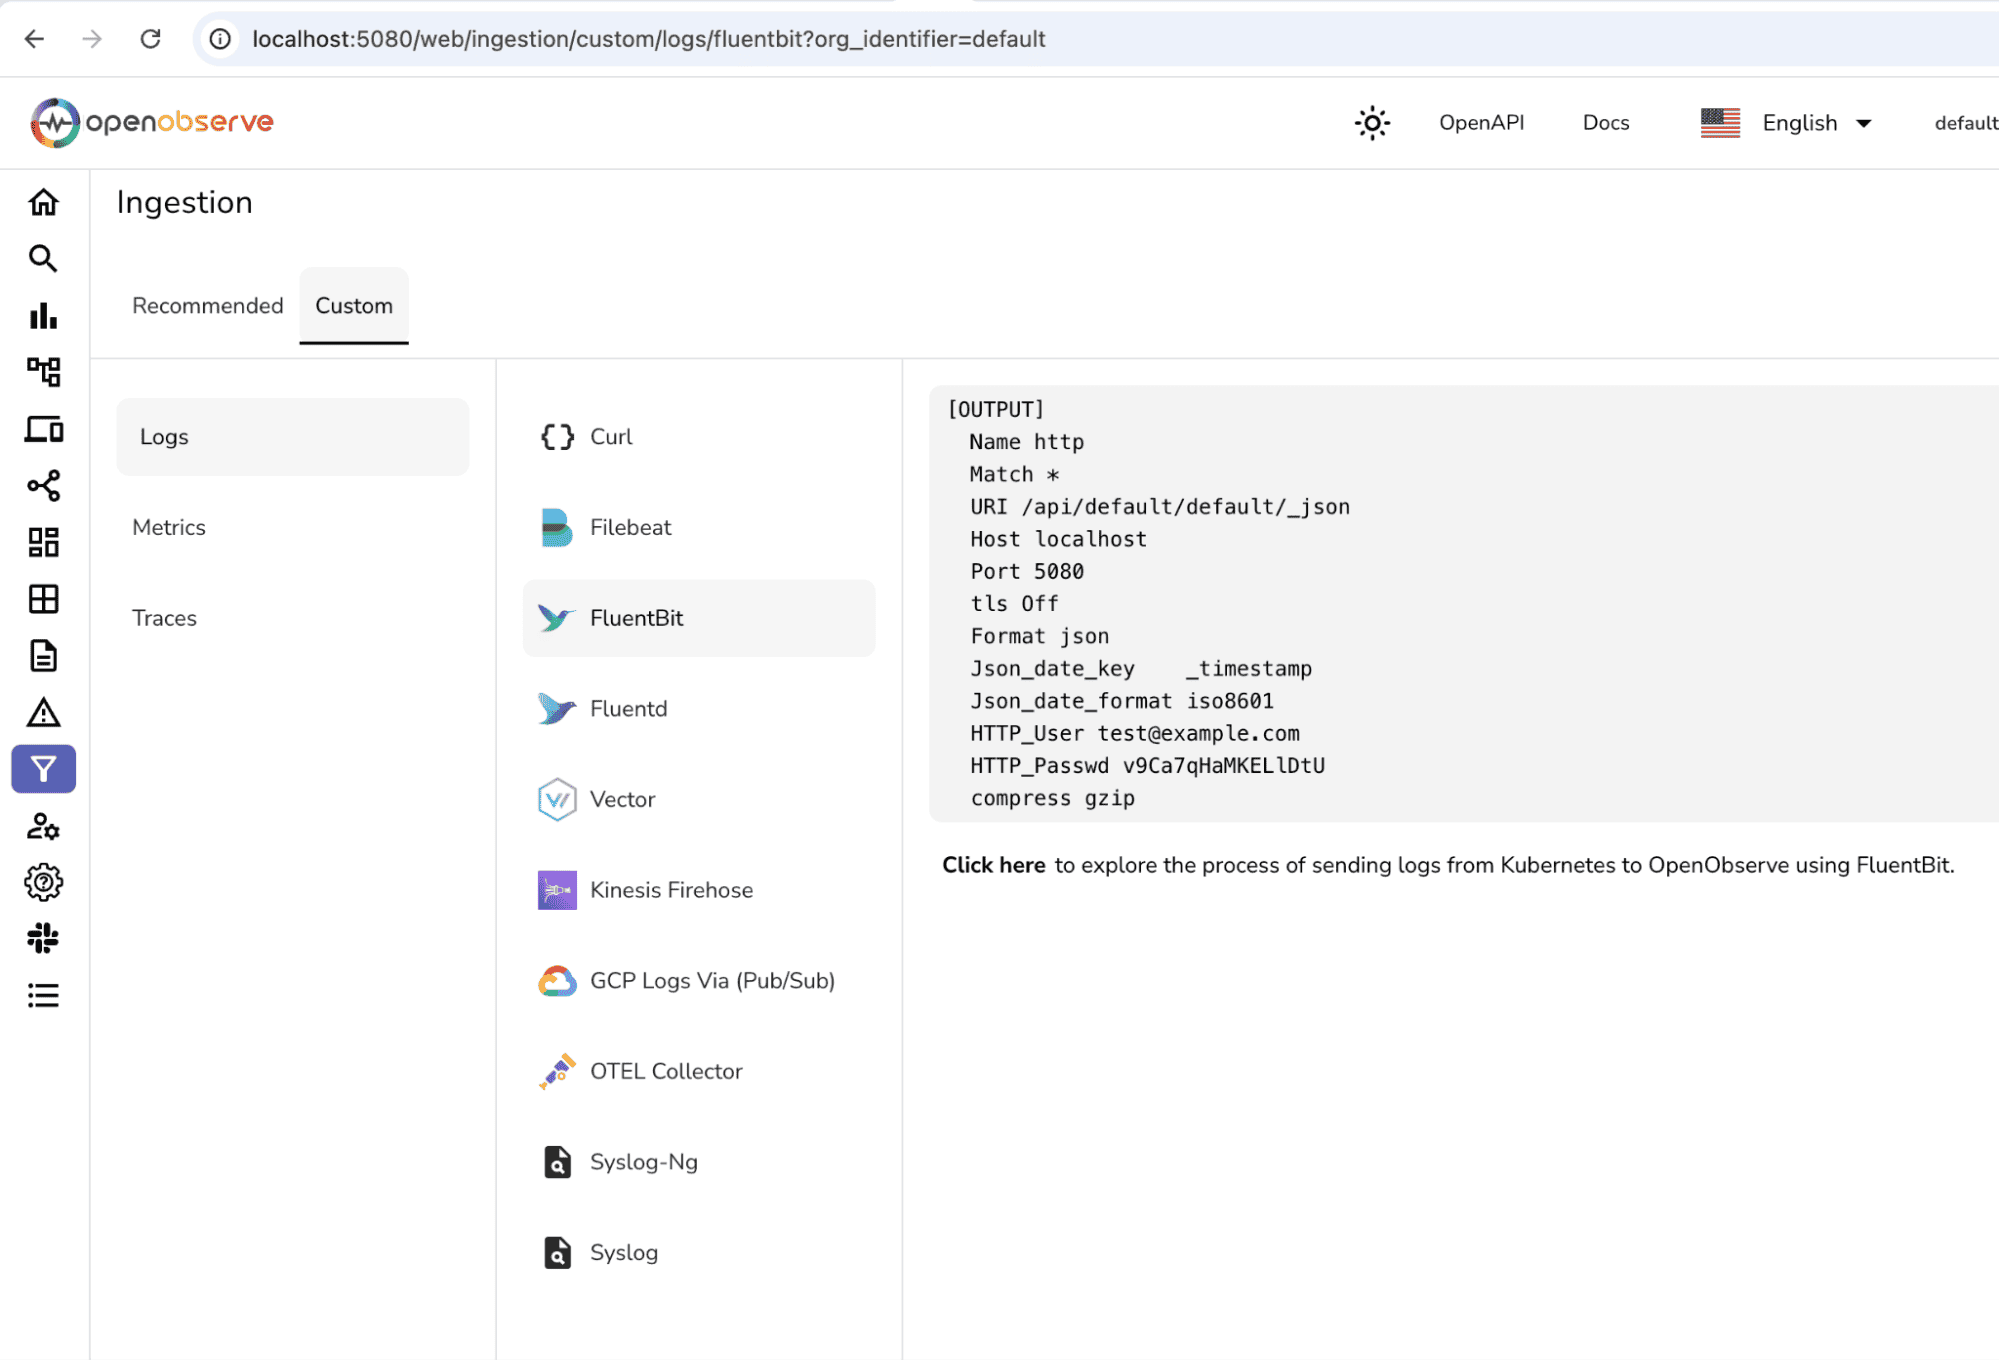
  2. Install the OpenObserve agent on your NGINX Plus server by following the provided installation instructions.
  3. Configure the OpenObserve agent to collect metrics from your NGINX Plus server by specifying the necessary endpoints and authentication details.
  4. Access the OpenObserve dashboard to visualize and analyze thecollected metrics, set up alerts, and create custom dashboards tailored to your specific monitoring requirements.

OpenObserve extends the capabilities of NGINX Plus monitoring by providing:

  • Advanced Analytics: Gain deeper insights into your NGINX Plus performance with machine learning-powered anomaly detection, identifying potential issues before they impact your users.
  • Real-Time Notifications: Stay informed about critical events and performance deviations with real-time notifications delivered through various channels, such as email, Slack, or PagerDuty.
  • Customizable Dashboards: Create personalized dashboards that align with your monitoring goals, combining metrics from NGINX Plus with data from other systems and applications for a holistic view of your infrastructure.
  • Integrations and Ecosystem: Leverage OpenObserve's extensive integration ecosystem to connect NGINX Plus monitoring with your existing tools, such as log management systems, APM solutions, and incident management platforms.

By integrating OpenObserve with NGINX Plus, you can unlock a new level of visibility, insights, and control over your web infrastructure, empowering you to deliver exceptional user experiences and maintain optimal performance.

Troubleshooting Common Monitoring Challenges

Even with a robust monitoring setup, you may encounter challenges along the way. Here are a few common issues and their troubleshooting steps:

  1. Data Accuracy and Latency: Noticing discrepancies in the collected metrics or experiencing latency in data updates should prompt you to verify that your shared memory zones are properly configured.
    Ensure that the <code>status_zone</code> and <code>zone</code> directives are correctly placed in your NGINX Plus configuration. Adjust the data collection intervals to align with your monitoring requirements.
    

  2. Configuration Errors: If you encounter issues with your monitoring setup, double-check your NGINX Plus configuration for any syntax errors or misconfigurations.
    Use the NGINX Plus configuration tester (<code>nginx -t</code>) to validate your configuration before reloading. Verify that the necessary directives, such as <code>api</code> and <code>status_zone</code>, are correctly defined.
    

  3. Connectivity Issues: If you experience connectivity problems between your monitoring tools and the NGINX Plus API or dashboard, investigate network-related issues.
    Ensure that the monitoring endpoints are accessible from the relevant systems and that firewall rules allow the necessary traffic. Verify that the authentication credentials are correctly configured.
    

  4. Performance Impact: Monitoring activities can introduce additional overhead to your NGINX Plus server. If you notice performance degradation or increased resource consumption, review your monitoring configuration and optimize it accordingly.
    Consider adjusting the frequency of data collection, enabling caching for frequently accessed metrics, or offloading monitoring tasks to dedicated servers.
    

  5. Ensuring Continuous Monitoring During High Traffic: To maintain reliable monitoring even during periods of high traffic, consider the following strategies:
    • Implement load balancing for your monitoring infrastructure to distribute the monitoring workload across multiple servers.
    • Optimize your monitoring configuration to minimize the impact on server performance. Adjust the frequency of data collection and consider using sampling techniques to reduce the monitoring overhead.
    • Leverage caching mechanisms to store frequently accessed metrics and reduce the load on the monitoring system.
    • Set up dedicated monitoring instances or separate monitoring infrastructure to isolate monitoring tasks from production traffic.

Approaching monitoring challenges systematically is essential when troubleshooting. Start by isolating the problem, reviewing logs, and gathering relevant information. Consulting the NGINX Plus documentation, community forums, or seeking assistance from NGINX support channels can provide further guidance and solutions.

Conclusion

Real-time monitoring is a game-changer for optimizing the performance and reliability of your NGINX Plus-powered web infrastructure. By leveraging the powerful monitoring capabilities, interactive dashboards, and REST API provided by NGINX Plus, you gain deep visibility into your server's behavior, enabling you to proactively identify and resolve issues.

By implementing real-time monitoring with NGINX Plus and following the guidance provided in this article, you can unlock the full potential of your web infrastructure, ensuring optimal performance, scalability, and user satisfaction.

Take the first step towards revolutionizing your NGINX Plus monitoring approach by signing up for a free trial of OpenObserve and experiencing the benefits firsthand. With OpenObserve's seamless integration and advanced features, you can streamline your monitoring efforts, gain actionable insights, and drive continuous improvement.

Don't wait until performance issues impact your users. Embrace real-time monitoring with NGINX Plus today and embark on a journey of optimized web infrastructure management. Stay proactive, stay informed, and deliver exceptional digital experiences with confidence.

Author:

authorImage

The OpenObserve Team comprises dedicated professionals committed to revolutionizing system observability through their innovative platform, OpenObserve. Dedicated to streamlining data observation and system monitoring, offering high performance and cost-effective solutions for diverse use cases.

OpenObserve Inc. © 2024