How Can You Store and Monitor Ansible Logs Effortlessly?


Try OpenObserve Cloud today for more efficient and performant observability.
Get Started For Free
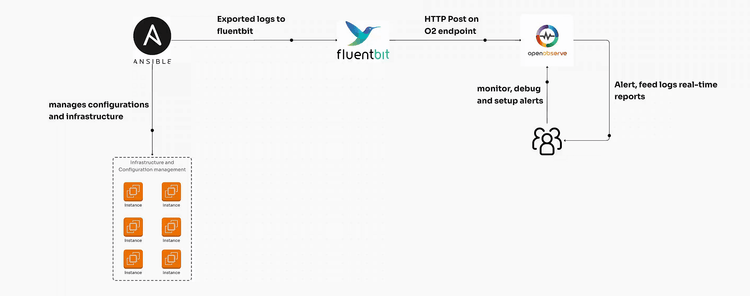
Storing and monitoring Ansible logs is crucial for tracking deployments, debugging, and understanding automation outcomes. This guide provides step-by-step instructions to set up Ansible on Ubuntu, create a sample task for local execution, and use Fluent Bit to collect and send ansible logs to a centralized observability solution.
Start by installing Ansible. If it’s not already installed, follow these instructions:
sudo apt update
sudo apt install ansible -y
ansible --version
This should output the Ansible version, confirming the installation.
Create a sample Ansible playbook to test local execution. This task will simply create a file and write some text into it.
mkdir ~/ansible_logs_demo
cd ~/ansible_logs_demo
[defaults]
log_path = /tmp/ansible_log_demo.txt
# i use vi, you can pick whatever you want
vi local_task.yml
---
- name: Ansible Local Task Demo
  hosts: localhost
  tasks:
    - name: Create a sample file
      ansible.builtin.file:
        path: /tmp/ansible_log_demo.txt
        state: touch

    - name: Write a message to the sample file
      ansible.builtin.copy:
        content: "This is a demo log entry from Ansible."
        dest: /tmp/ansible_log_demo.txt
ansible-playbook local_task.yml
#verbose logging
ansible-playbook local_task.yml -v
This will create and write to /tmp/ansible_log_demo.txt. Now that we have a task generating logs, let’s set up Fluent Bit to send these logs to our log monitoring solution.
To capture and forward Ansible logs, we’ll use Fluent Bit, a lightweight log processor.
curl https://raw.githubusercontent.com/fluent/fluent-bit/master/install.sh | sh
sudo vi /etc/fluent-bit/fluent-bit.conf
[SERVICE]
    Flush         5
    Daemon        Off
    Log_Level     info

[INPUT]
    Name          tail
    Path          /tmp/ansible_log_demo.txt
    Tag           ansible.demo
    Refresh_Interval 5

[OUTPUT]
    Name http
    Match *
    URI /api/<O2_ORG_NAME>/<O2_STREAM_NAME>/_json
    Host <O2_HOST>
    Port 443
    tls On
    Format json
    Json_date_key    _timestamp
    Json_date_format iso8601
    HTTP_User <O2_USER>
    HTTP_Passwd <O2_PASSWORD>
    compress gzip
sudo systemctl start fluent-bit
sudo systemctl enable fluent-bit
Check Fluent Bit’s status to ensure it’s running smoothly
sudo systemctl status fluent-bit
ansible-playbook local_task.yml -vvv

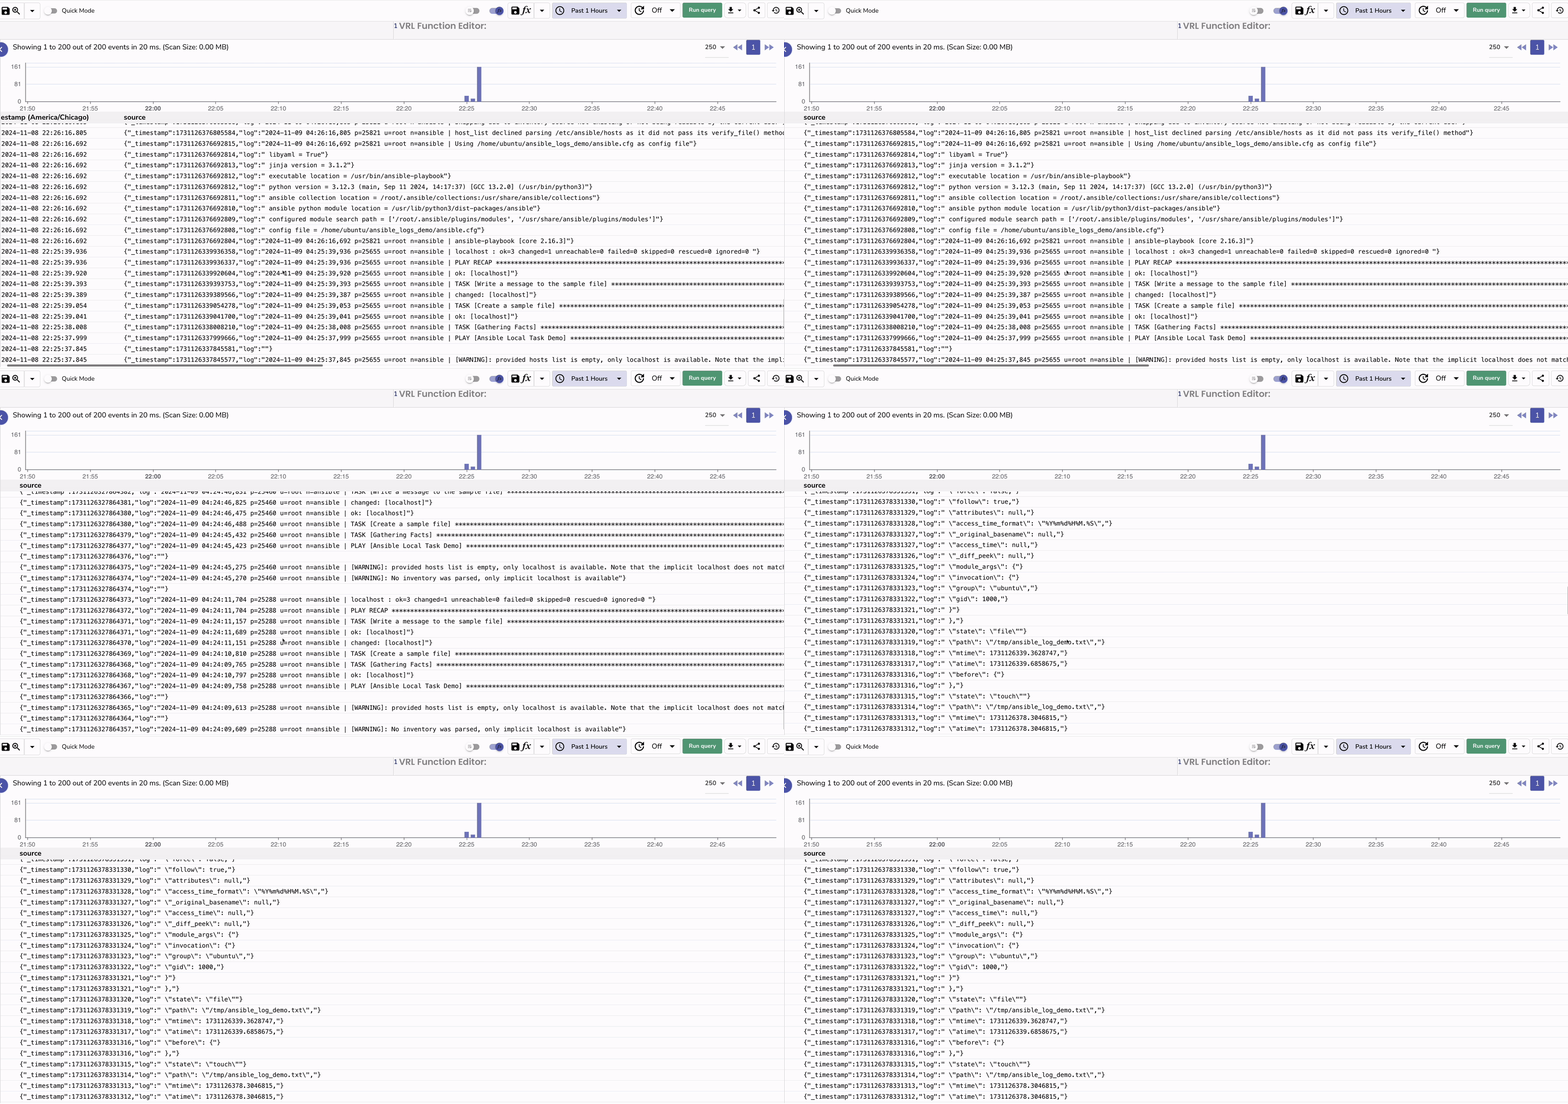
Efficiently managing and monitoring Ansible logs is essential for maintaining clear visibility into your automation processes. By setting up Ansible with Fluent Bit on Ubuntu, you now have a streamlined way to capture, process, and store Ansible logs in a centralized observability solution. This approach ensures you’re equipped to troubleshoot issues, optimize deployments, and enhance overall config management reliability.
With the steps in this guide, you’ve gained the skills to configure Ansible logs ingestion for real-time visibility and easy access to historical logs. As automation becomes more integral to infrastructure and configuration management, keeping track of Ansible logs can be pivotal for maintaining a well-documented and efficient operation.

Chaitanya Sistla is a Principal Solutions Architect with 17X certifications across Cloud, Data, DevOps, and Cybersecurity. Leveraging extensive startup experience and a focus on MLOps, Chaitanya excels at designing scalable, innovative solutions that drive operational excellence and business transformation.