Supercharge Your User Experience: Real User Monitoring (RUM) and Frontend Performance Metrics

Chaitanya Sistla
October 31, 2024
13 min read
Don’t forget to share!
Getting Started with OpenObserve
Try OpenObserve Cloud today for more efficient and performant observability.
Let’s explore RUM, its importance, and how OpenObserve complements RUM with its powerful features. Finally, we’ll build a React User Portal and integrate OpenObserve RUM to track frontend performance metrics and user interactions.
Real User Monitoring (RUM) is a performance monitoring technique that captures and analyzes every interaction users have with your application in real time. Unlike synthetic monitoring (which simulates user behavior), RUM collects real-time data directly from users' browsers. This allows you to:
RUM provides an invaluable view into how your application performs under real-world conditions, helping you improve user experience by identifying issues as they occur.
OpenObserve enhances RUM capabilities with its comprehensive observability platform and extends the power of Real User Monitoring (RUM) by offering a robust platform to track, analyze, and visualize real-time user interactions and performance metrics. With OpenObserve, you gain complete visibility into the frontend of your application. Let’s explore how OpenObserve's RUM capabilities enhance the monitoring experience.
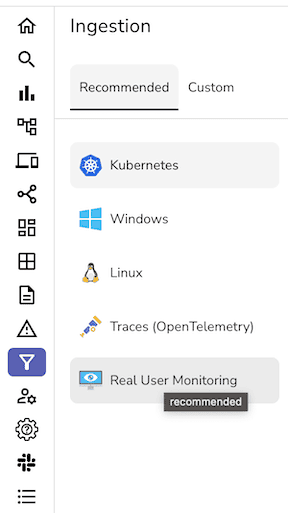
Using OpenObserve’s RUM dashboard, you can:
For more detailed documentation on OpenObserve RUM, you can visit our official documentation.
Now that we understand the power of RUM and how OpenObserve complements it, let’s start by building a React User Portal. We’ll integrate OpenObserve RUM to monitor real-time user interactions and track frontend performance metrics.
Note: Ensure you have Node.js and npm installed on your system before proceeding.
We’ll start by creating a new React project and installing the necessary dependencies:
npx create-react-app user-portal-app
cd user-portal-app
# Install Material-UI and React Router dependencies
npm install @mui/material @emotion/react @emotion/styled @mui/icons-material react-router-dom
To start monitoring user interactions and frontend performance, we need to integrate OpenObserve RUM into our React app.
npm install @openobserve/browser-rum @openobserve/browser-logs
import React, { useState, useEffect } from "react";
import { BrowserRouter as Router, Route, Routes, Link } from "react-router-dom";
import { Drawer, List, ListItem, ListItemText, AppBar, Toolbar, Typography, Container, Box, IconButton } from "@mui/material";
import MenuIcon from "@mui/icons-material/Menu";
import Dashboard from "./components/Dashboard";
import Profile from "./components/Profile";
import Settings from "./components/Settings";
import { openobserveRum } from "@openobserve/browser-rum";
import { openobserveLogs } from "@openobserve/browser-logs";

function App() {
  const [open, setOpen] = useState(false);

  // Toggle sidebar drawer
  const toggleDrawer = (state) => () => {
    setOpen(state);
  };

  // Initialize OpenObserve RUM and Logs
  useEffect(() => {
    const options = {
      clientToken: '<your_token>', // Replace '<your_token>' with your actual OpenObserve client token
      applicationId: 'web-application-id',
      site: 'localhost:5080',
      service: 'my-web-application',
      env: 'production',
      version: '0.0.1',
      organizationIdentifier: 'default',
      insecureHTTP: true,
      apiVersion: 'v1',
    };

    openobserveRum.init({
      applicationId: options.applicationId,
      clientToken: options.clientToken,
      site: options.site,
      organizationIdentifier: options.organizationIdentifier,
      service: options.service,
      env: options.env,
      version: options.version,
      trackResources: true,
      trackLongTasks: true,
      trackUserInteractions: true,
      apiVersion: options.apiVersion,
      insecureHTTP: options.insecureHTTP,
      defaultPrivacyLevel: 'allow'
    });

    openobserveLogs.init({
      clientToken: options.clientToken,
      site: options.site,
      organizationIdentifier: options.organizationIdentifier,
      service: options.service,
      env: options.env,
      version: options.version,
      forwardErrorsToLogs: true,
      insecureHTTP: options.insecureHTTP,
      apiVersion: options.apiVersion,
    });

    openobserveRum.setUser({
      id: "1",
      name: "Captain Hook",
      email: "captainhook@example.com",
    });

    openobserveRum.startSessionReplayRecording();
  }, []);

  return (
    <Router>
      <AppBar position="static">
        <Toolbar>
          <IconButton edge="start" color="inherit" aria-label="menu" onClick={toggleDrawer(true)}>
            <MenuIcon />
          </IconButton>
          <Typography variant="h6" component="div" sx={{ flexGrow: 1 }}>
            User Portal
          </Typography>
        </Toolbar>
      </AppBar>

      {/* Sidebar Drawer */}
      <Drawer open={open} onClose={toggleDrawer(false)}>
        <List>
          <ListItem button component={Link} to="/" onClick={toggleDrawer(false)}>
            <ListItemText primary="Dashboard" />
          </ListItem>
          <ListItem button component={Link} to="/profile" onClick={toggleDrawer(false)}>
            <ListItemText primary="Profile" />
          </ListItem>
          <ListItem button component={Link} to="/settings" onClick={toggleDrawer(false)}>
            <ListItemText primary="Settings" />
          </ListItem>
        </List>
      </Drawer>

      {/* Main Content */}
      <Container>
        <Box my={4}>
          <Routes>
            <Route path="/" element={<Dashboard />} />
            <Route path="/profile" element={<Profile />} />
            <Route path="/settings" element={<Settings />} />
          </Routes>
        </Box>
      </Container>
    </Router>
  );
}

export default App;
You can also find the above O2 RUM details by following the steps mentioned here:
Lets create the Dashboard, Profile, and Settings pages for our user portal.
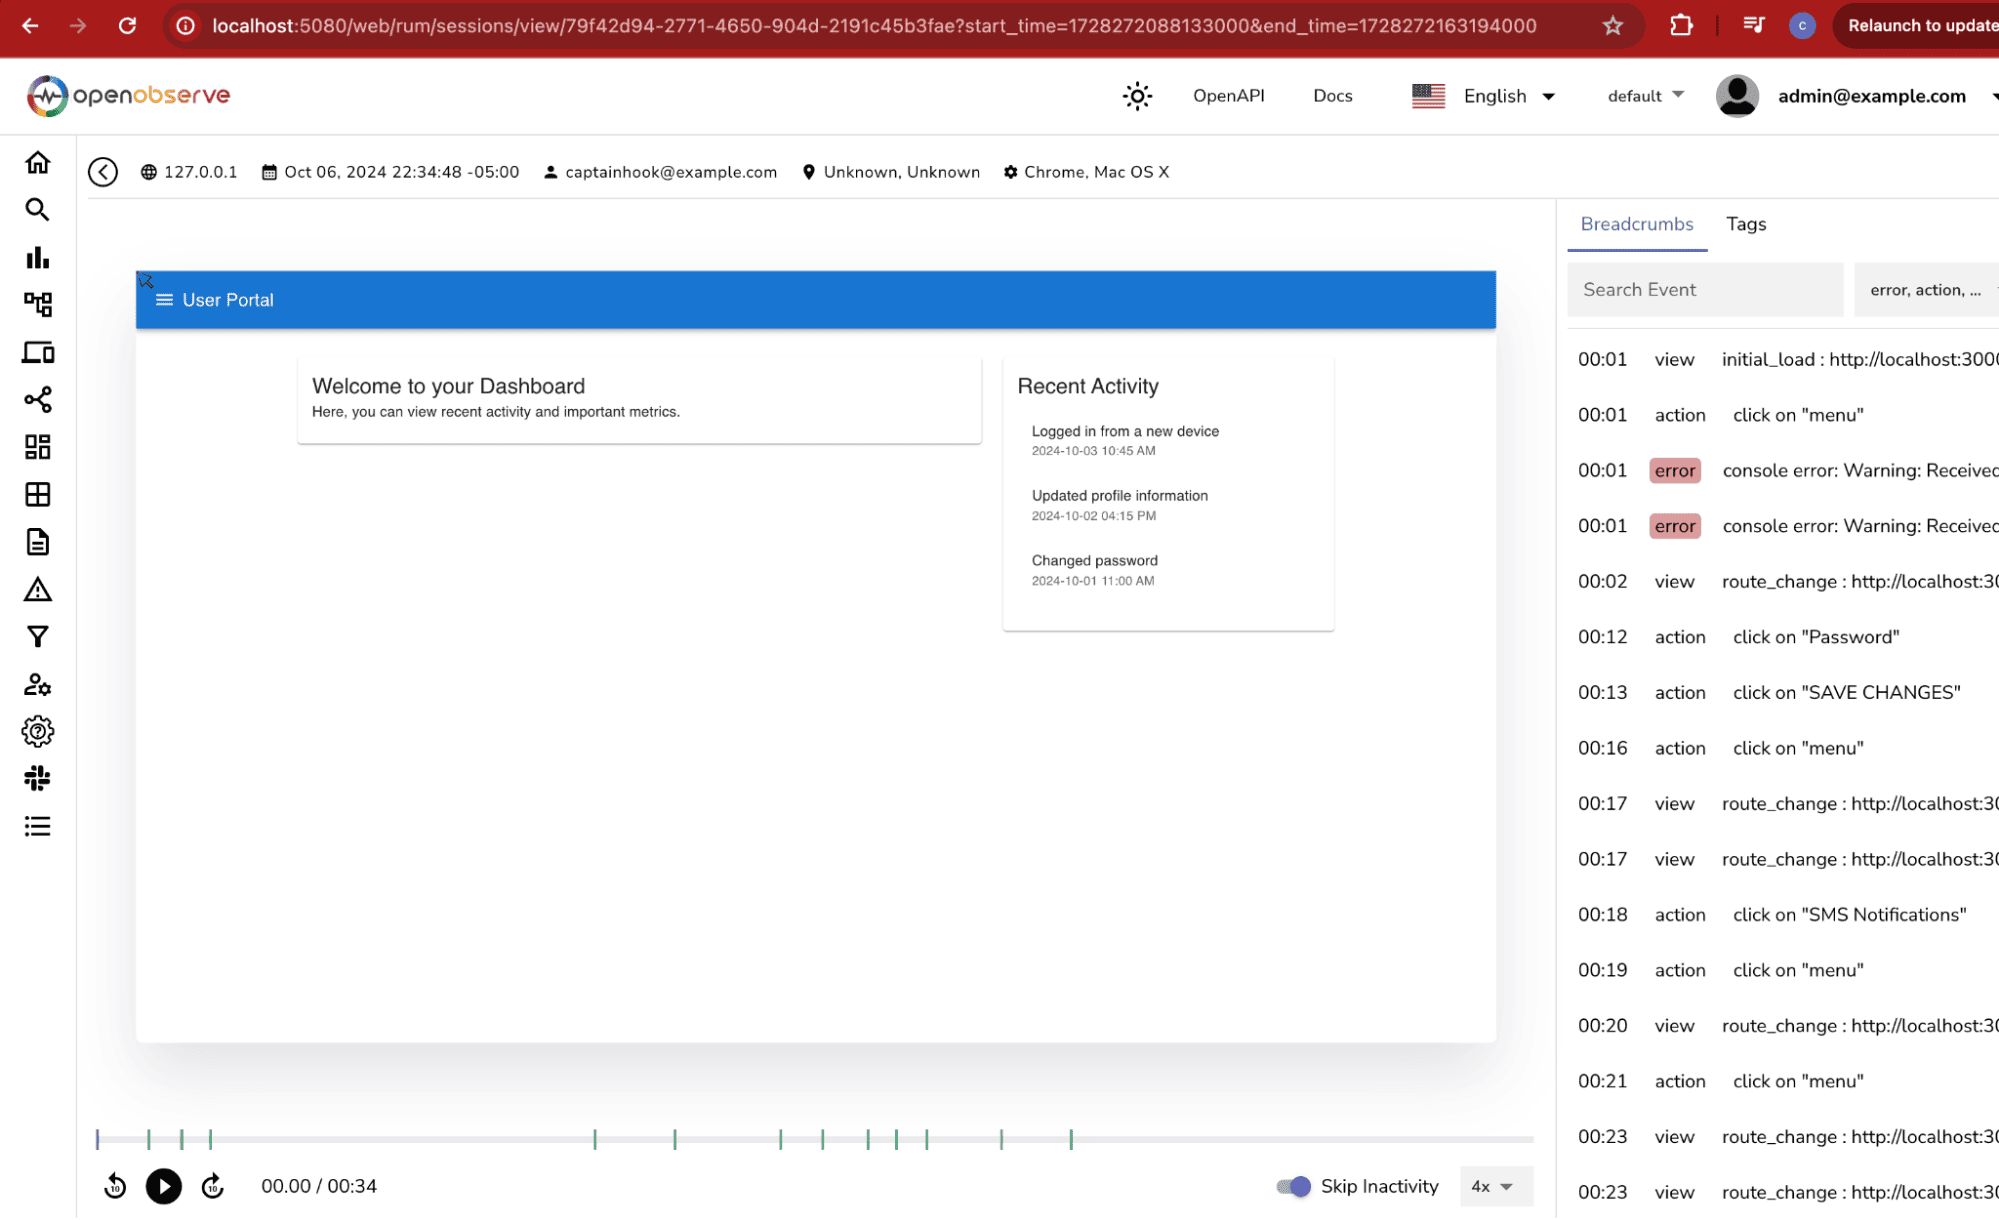
Dashboard with Recent Activity
The Dashboard will display a welcome message and a list of recent user activities
// TODO: Implement real data fetching for recent activity
import React from "react";
import { Typography, Card, CardContent, Grid, List, ListItem, ListItemText } from "@mui/material";

function Dashboard() {
  const recentActivity = [
    { id: 1, activity: "Logged in from a new device", date: "2024-10-03 10:45 AM" },
    { id: 2, activity: "Updated profile information", date: "2024-10-02 04:15 PM" },
    { id: 3, activity: "Changed password", date: "2024-10-01 11:00 AM" },
  ];

  return (
    <Grid container spacing={3}>
      <Grid item xs={12} md={8}>
        <Card>
          <CardContent>
            <Typography variant="h5" component="div">
              Welcome to your Dashboard
            </Typography>
            <Typography>
              Here, you can view recent activity and important metrics.
            </Typography>
          </CardContent>
        </Card>
      </Grid>

      <Grid item xs={12} md={4}>
        <Card>
          <CardContent>
            <Typography variant="h5" component="div">
              Recent Activity
            </Typography>
            <List>
              {recentActivity.map((item) => (
                <ListItem key={item.id}>
                  <ListItemText
                    primary={item.activity}
                    secondary={item.date}
                  />
                </ListItem>
              ))}
            </List>
          </CardContent>
        </Card>
      </Grid>
    </Grid>
  );
}

export default Dashboard;
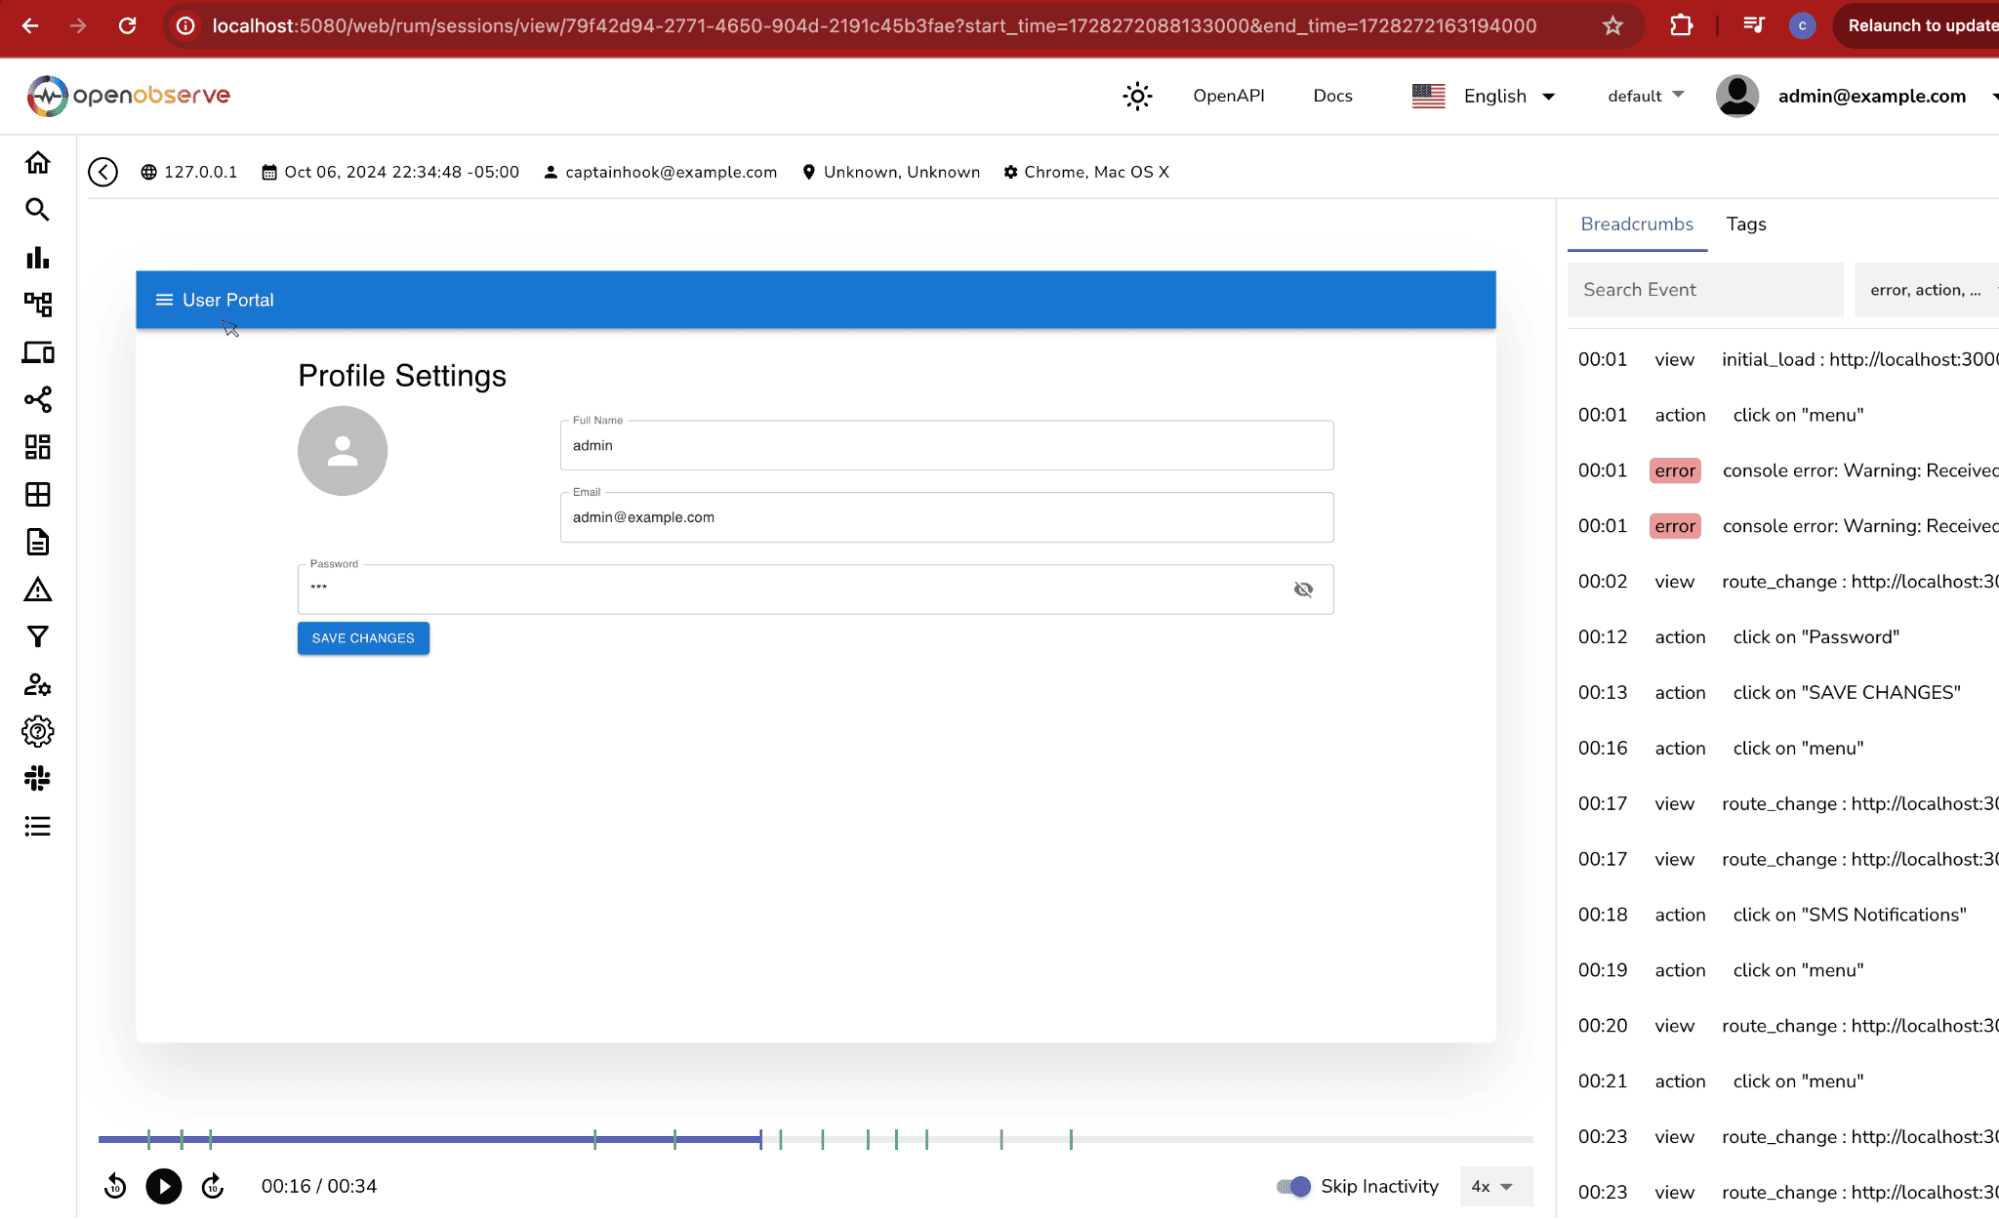
Profile with Password Visibility Toggle and User Avatar
On the Profile page, users can update their name, email, and password. We’ll also add a password visibility toggle and a user avatar
import React, { useState } from "react";
import { Typography, TextField, Button, Box, IconButton, InputAdornment, Avatar, Grid } from "@mui/material";
import Visibility from '@mui/icons-material/Visibility';
import VisibilityOff from '@mui/icons-material/VisibilityOff';
import PersonIcon from '@mui/icons-material/Person';

function Profile() {
  const [showPassword, setShowPassword] = useState(false);
  const [password, setPassword] = useState("");
  const [name, setName] = useState("");
  const [email, setEmail] = useState("");
  const [errors, setErrors] = useState({ name: false, email: false });

  const handleClickShowPassword = () => {
    setShowPassword(!showPassword);
  };

  const handleMouseDownPassword = (event) => {
    event.preventDefault();
  };

  const handlePasswordChange = (event) => {
    setPassword(event.target.value);
  };

  const handleNameChange = (event) => {
    setName(event.target.value);
    setErrors({ ...errors, name: event.target.value === "" });
  };

  const handleEmailChange = (event) => {
    setEmail(event.target.value);
    setErrors({ ...errors, email: !/\S+@\S+\.\S+/.test(event.target.value) });
  };

  const handleSubmit = () => {
    if (name === "" || !/\S+@\S+\.\S+/.test(email)) {
      setErrors({ name: name === "", email: !/\S+@\S+\.\S+/.test(email) });
    } else {
      alert("Profile updated successfully!");
    }
  };

  return (
    <Box>
      <Typography variant="h4" component="div" gutterBottom>
        Profile Settings
      </Typography>

      <Grid container spacing={2}>
        <Grid item xs={3}>
          <Avatar sx={{ width: 100, height: 100 }}>
            <PersonIcon style={{ fontSize: 50 }} />
          </Avatar>
        </Grid>
        <Grid item xs={9}>
          <TextField
            label="Full Name"
            variant="outlined"
            fullWidth
            margin="normal"
            value={name}
            onChange={handleNameChange}
            error={errors.name}
            helperText={errors.name && "Name is required"}
          />
          <TextField
            label="Email"
            variant="outlined"
            fullWidth
            margin="normal"
            value={email}
            onChange={handleEmailChange}
            error={errors.email}
            helperText={errors.email && "Enter a valid email"}
          />
        </Grid>
      </Grid>

      <TextField
        label="Password"
        variant="outlined"
        fullWidth
        margin="normal"
        type={showPassword ? "text" : "password"}
        value={password}
        onChange={handlePasswordChange}
        InputProps={{
          endAdornment: (
            <InputAdornment position="end">
              <IconButton
                onClick={handleClickShowPassword}
                onMouseDown={handleMouseDownPassword}
              >
                {showPassword ? <VisibilityOff /> : <Visibility />}
              </IconButton>
            </InputAdornment>
          ),
        }}
      />

      <Button variant="contained" color="primary" onClick={handleSubmit}>
        Save Changes
      </Button>
    </Box>
  );
}

export default Profile;
The Settings page will feature notification preferences that users can toggle
// TODO: Implement actual settings update logic
import React from "react";
import { Typography, Switch, FormControlLabel, Box, Grid } from "@mui/material";

function Settings() {
  const [notifications, setNotifications] = React.useState({
    email: true,
    sms: false,
    push: true,
  });

  const handleChange = (event) => {
    setNotifications({ ...notifications, [event.target.name]: event.target.checked });
  };

  return (
    <Box>
      <Typography variant="h4" component="div" gutterBottom>
        Application Settings
      </Typography>

      <Typography variant="h6" component="div" gutterBottom>
        Notification Preferences
      </Typography>

      <Grid container spacing={2}>
        <Grid item xs={12}>
          <FormControlLabel
            control={
              <Switch
                checked={notifications.email}
                onChange={handleChange}
                name="email"
              />
            }
            label="Email Notifications"
          />
        </Grid>
        <Grid item xs={12}>
          <FormControlLabel
            control={
              <Switch
                checked={notifications.sms}
                onChange={handleChange}
                name="sms"
              />
            }
            label="SMS Notifications"
          />
        </Grid>
        <Grid item xs={12}>
          <FormControlLabel
            control={
              <Switch
                checked={notifications.push}
                onChange={handleChange}
                name="push"
              />
            }
            label="Push Notifications"
          />
        </Grid>
      </Grid>
    </Box>
  );
}

export default Settings;
Alrighty, our portal is ready, it’s time to test it and ensure that OpenObserve RUM is capturing user interactions and performance metrics.
Note: Ensure your OpenObserve instance is running and accessible before testing.
1. Running the App Locally
npm start
http://localhost:3000. Interact with the Dashboard, Profile, and Settings pages to trigger RUM tracking. You can also open your network logs to view the sessions that are being tracked from rum and logs query continuously. 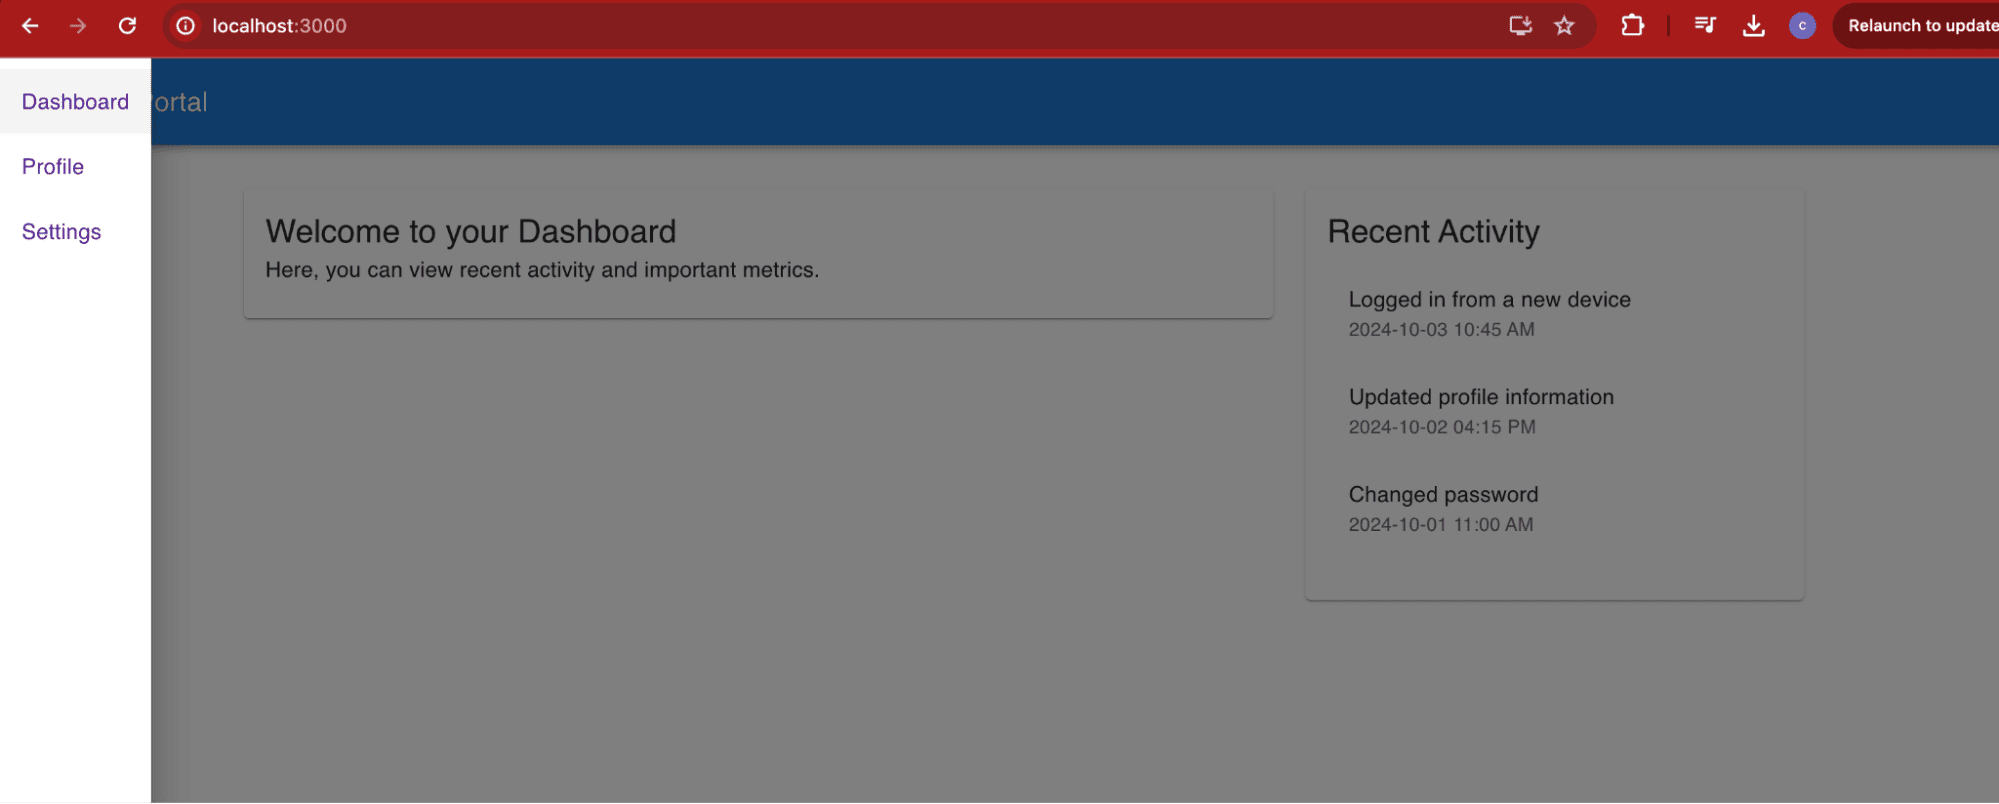
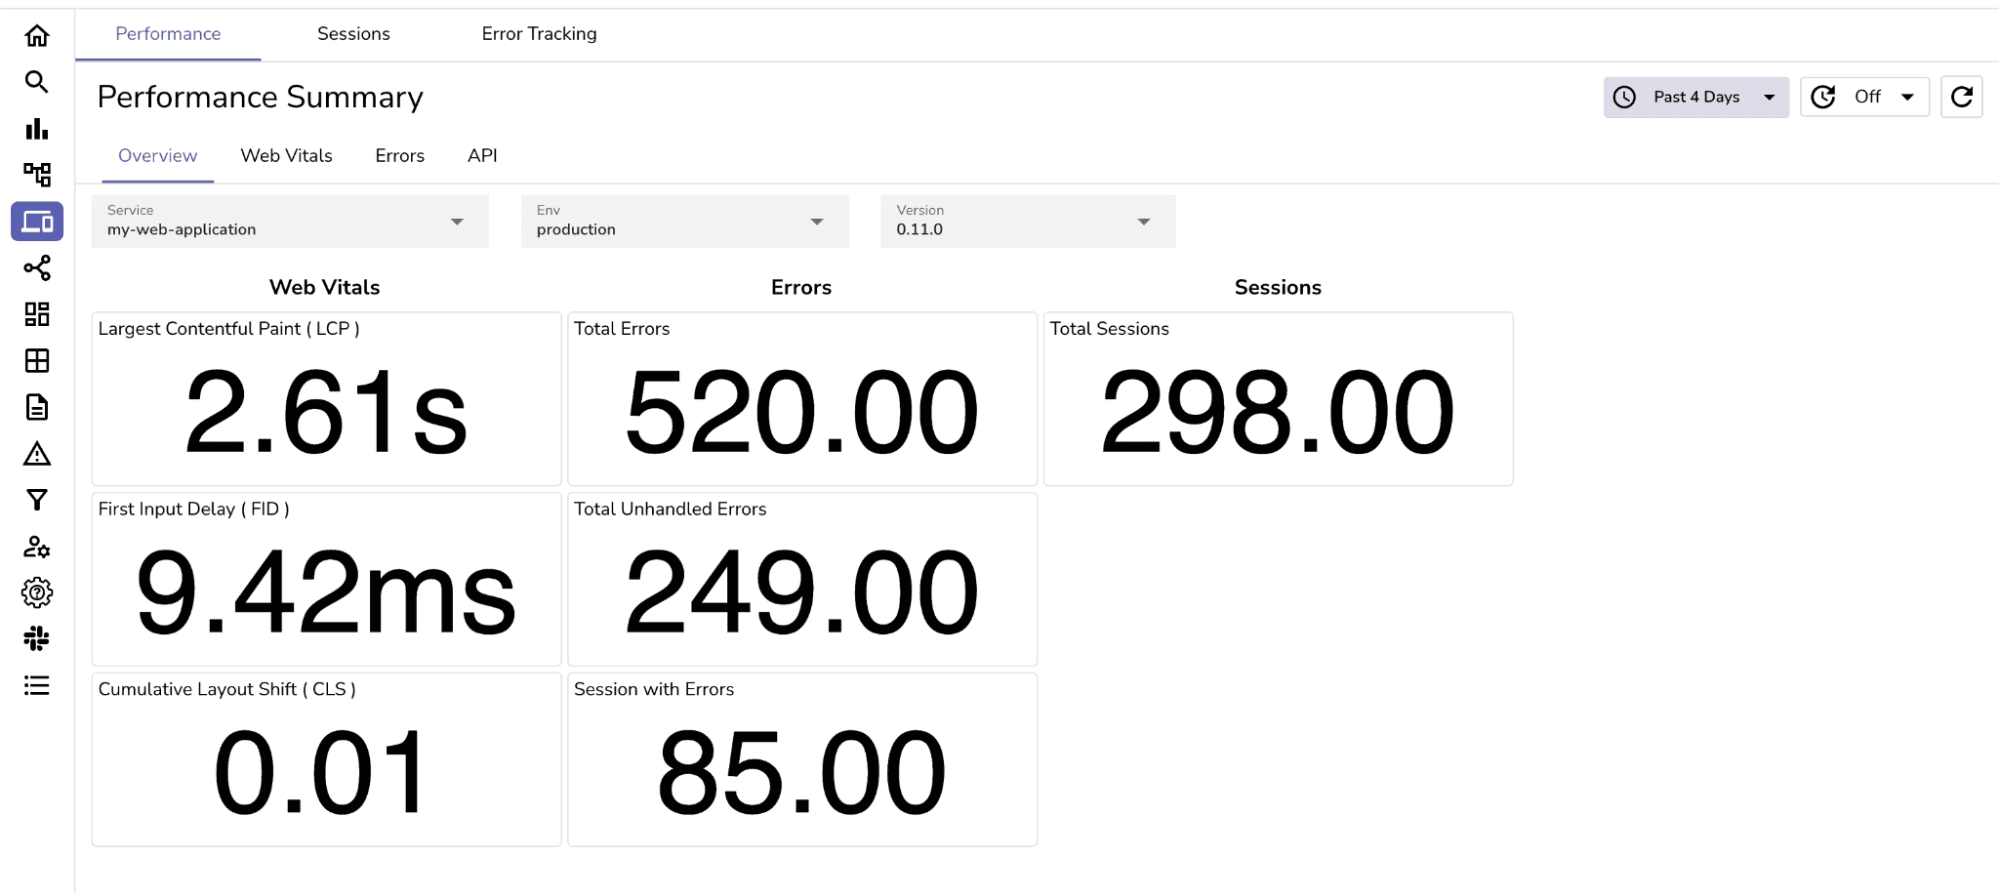
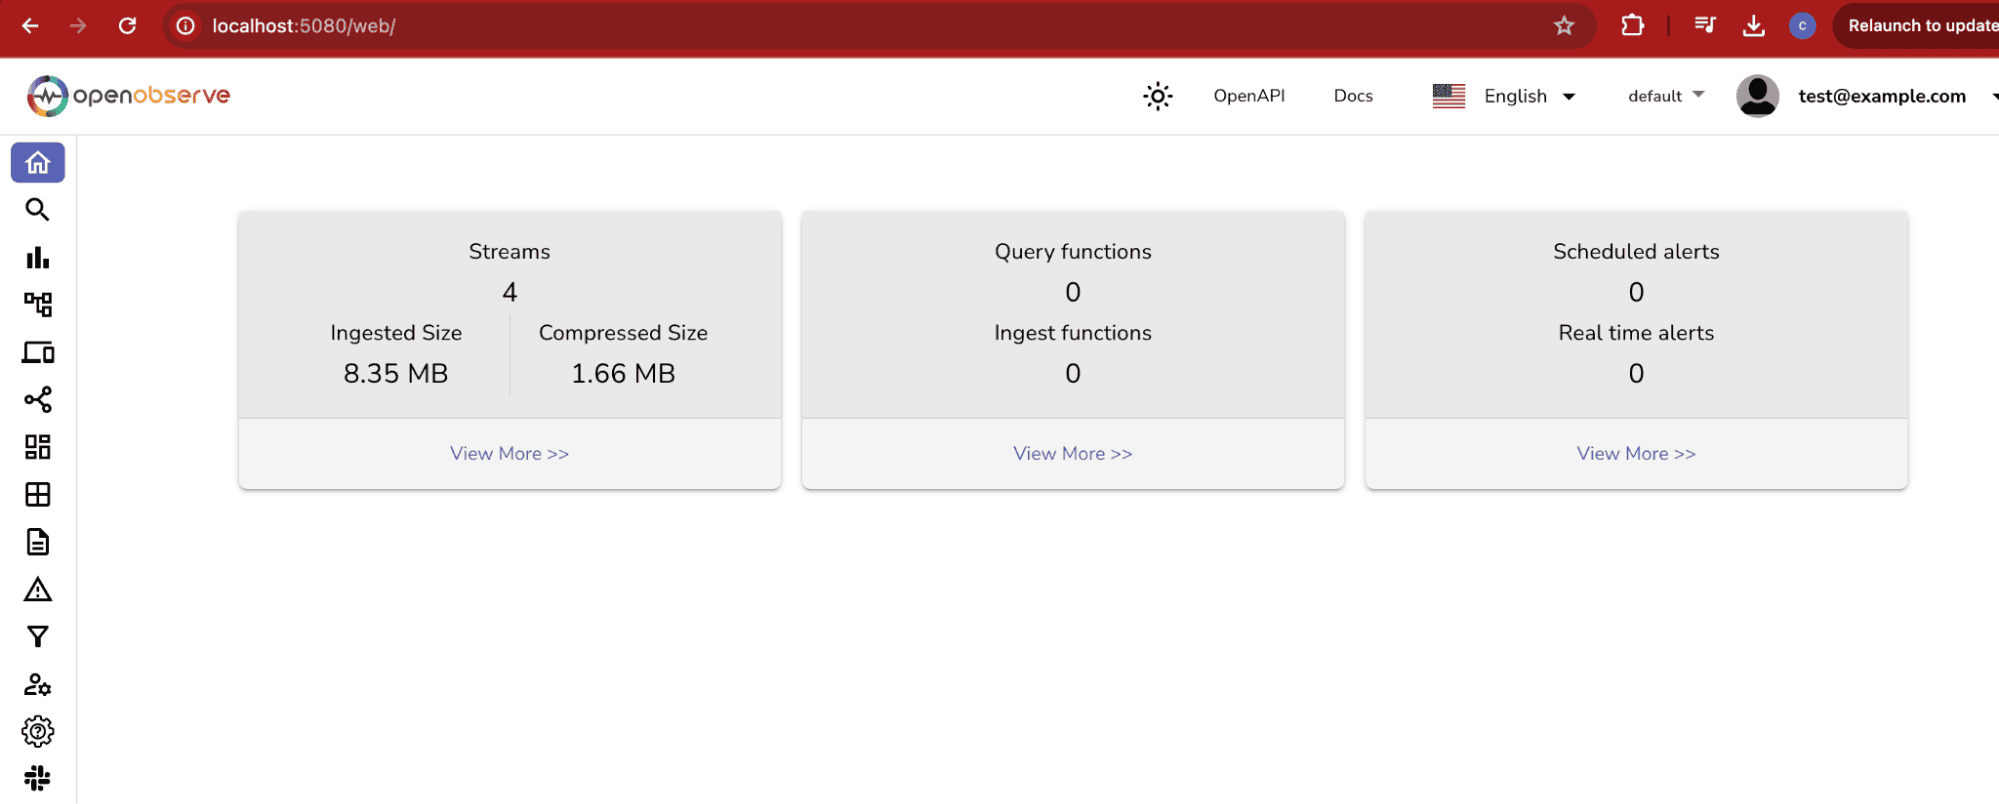
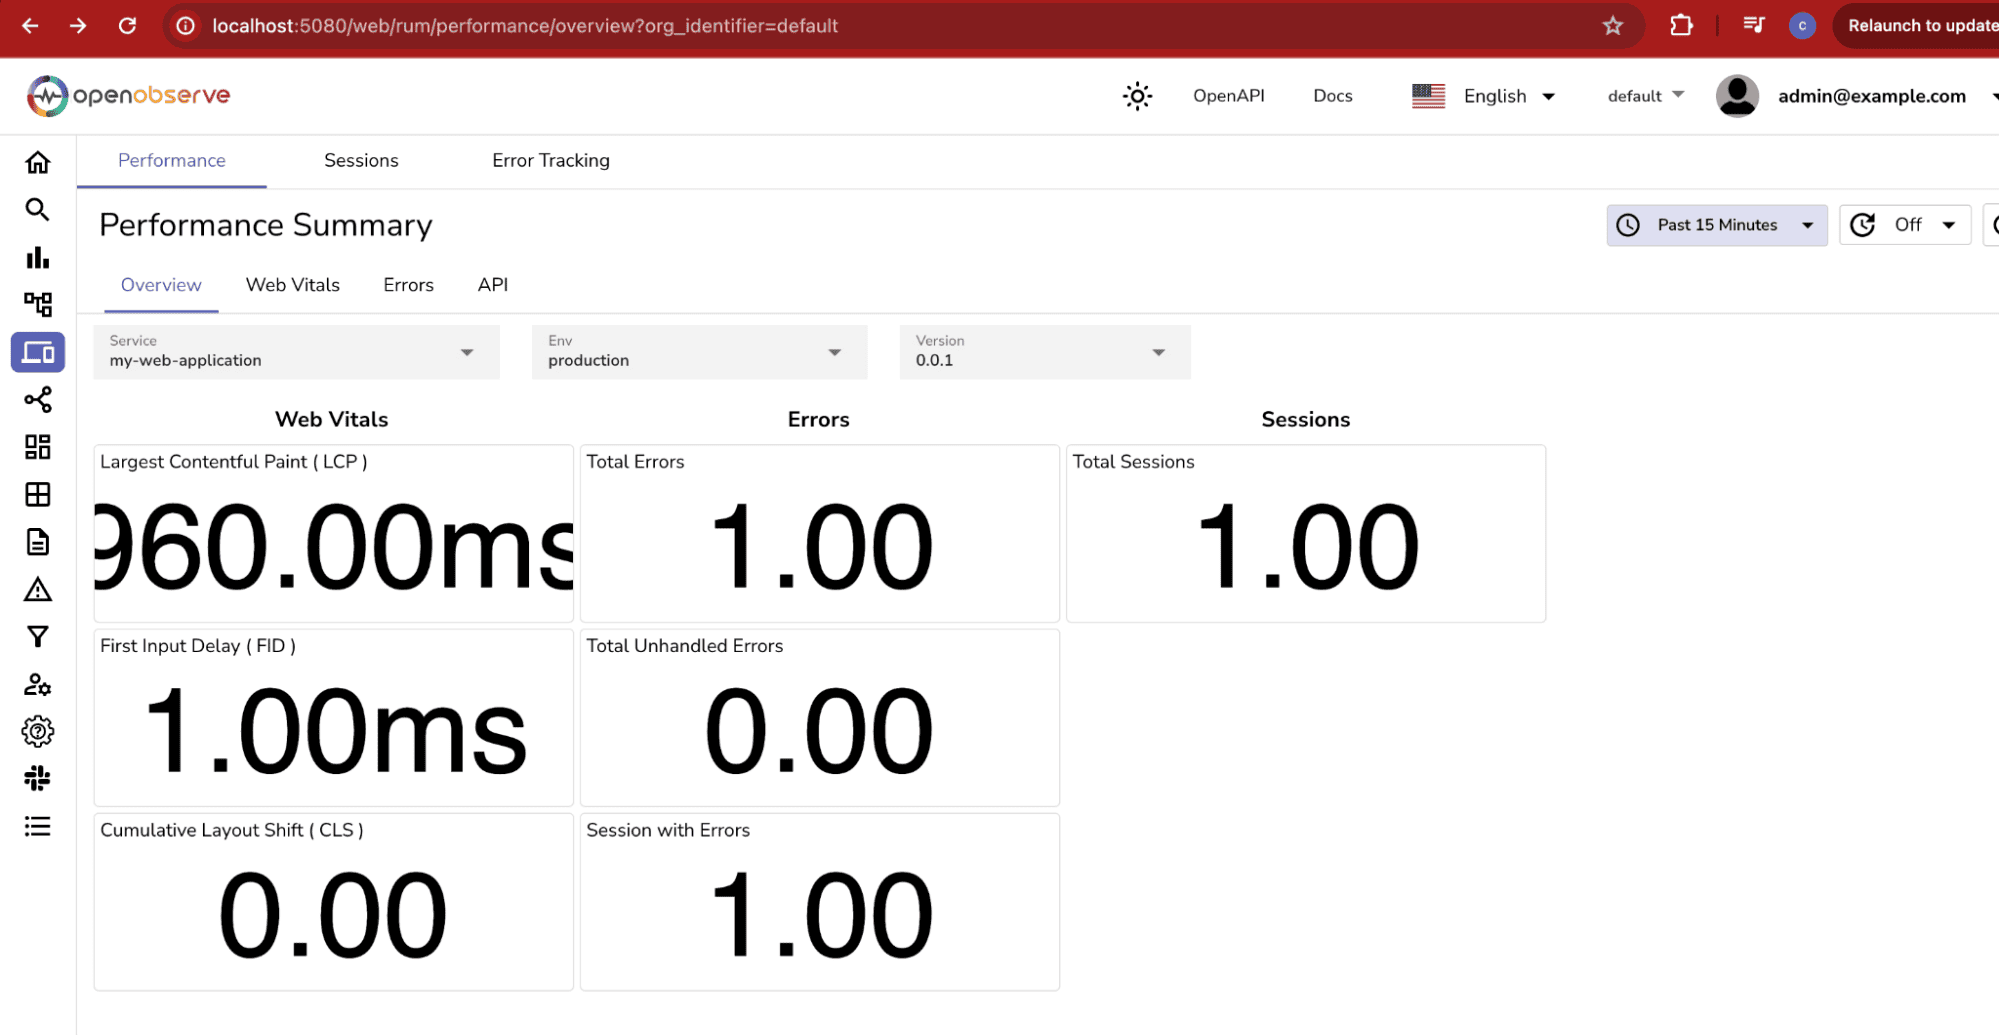
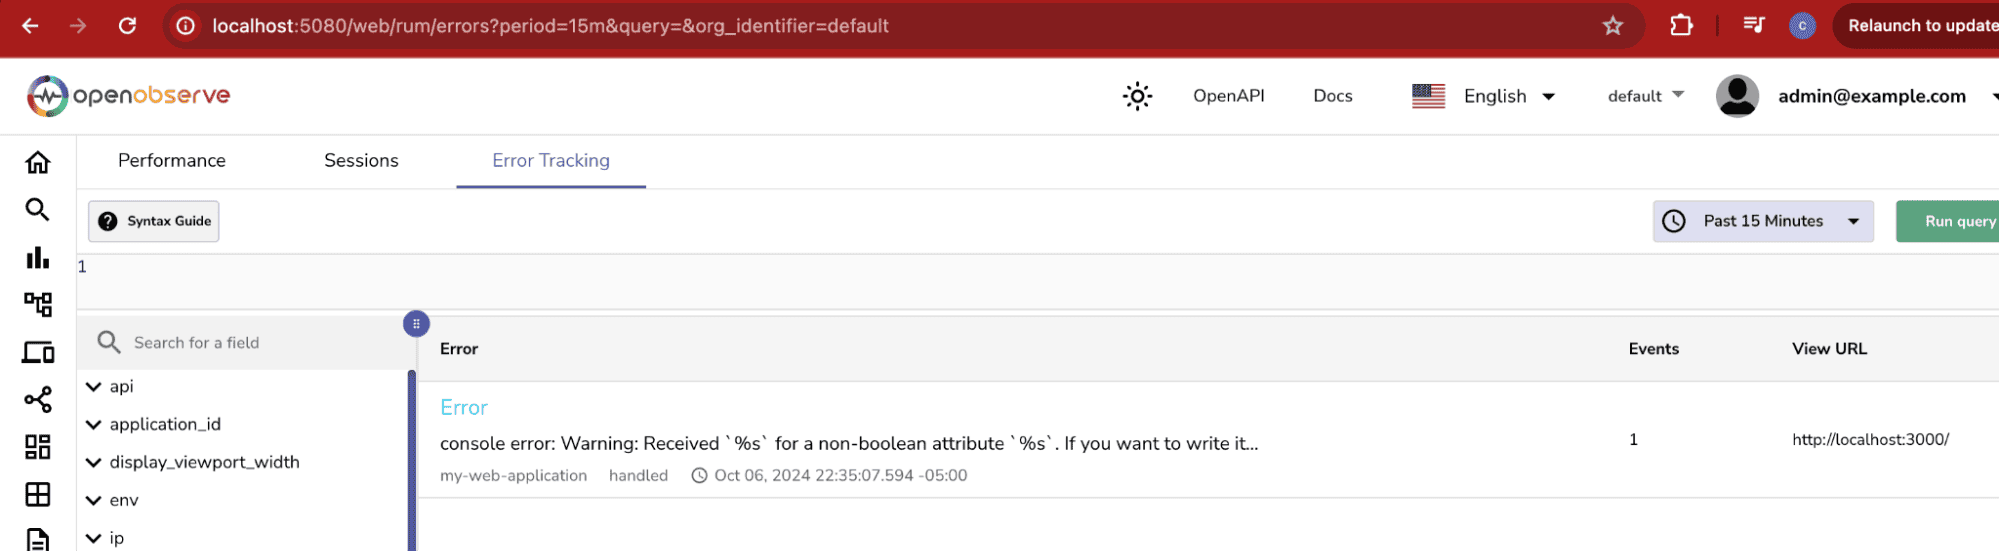
2. Viewing RUM Data in OpenObserve
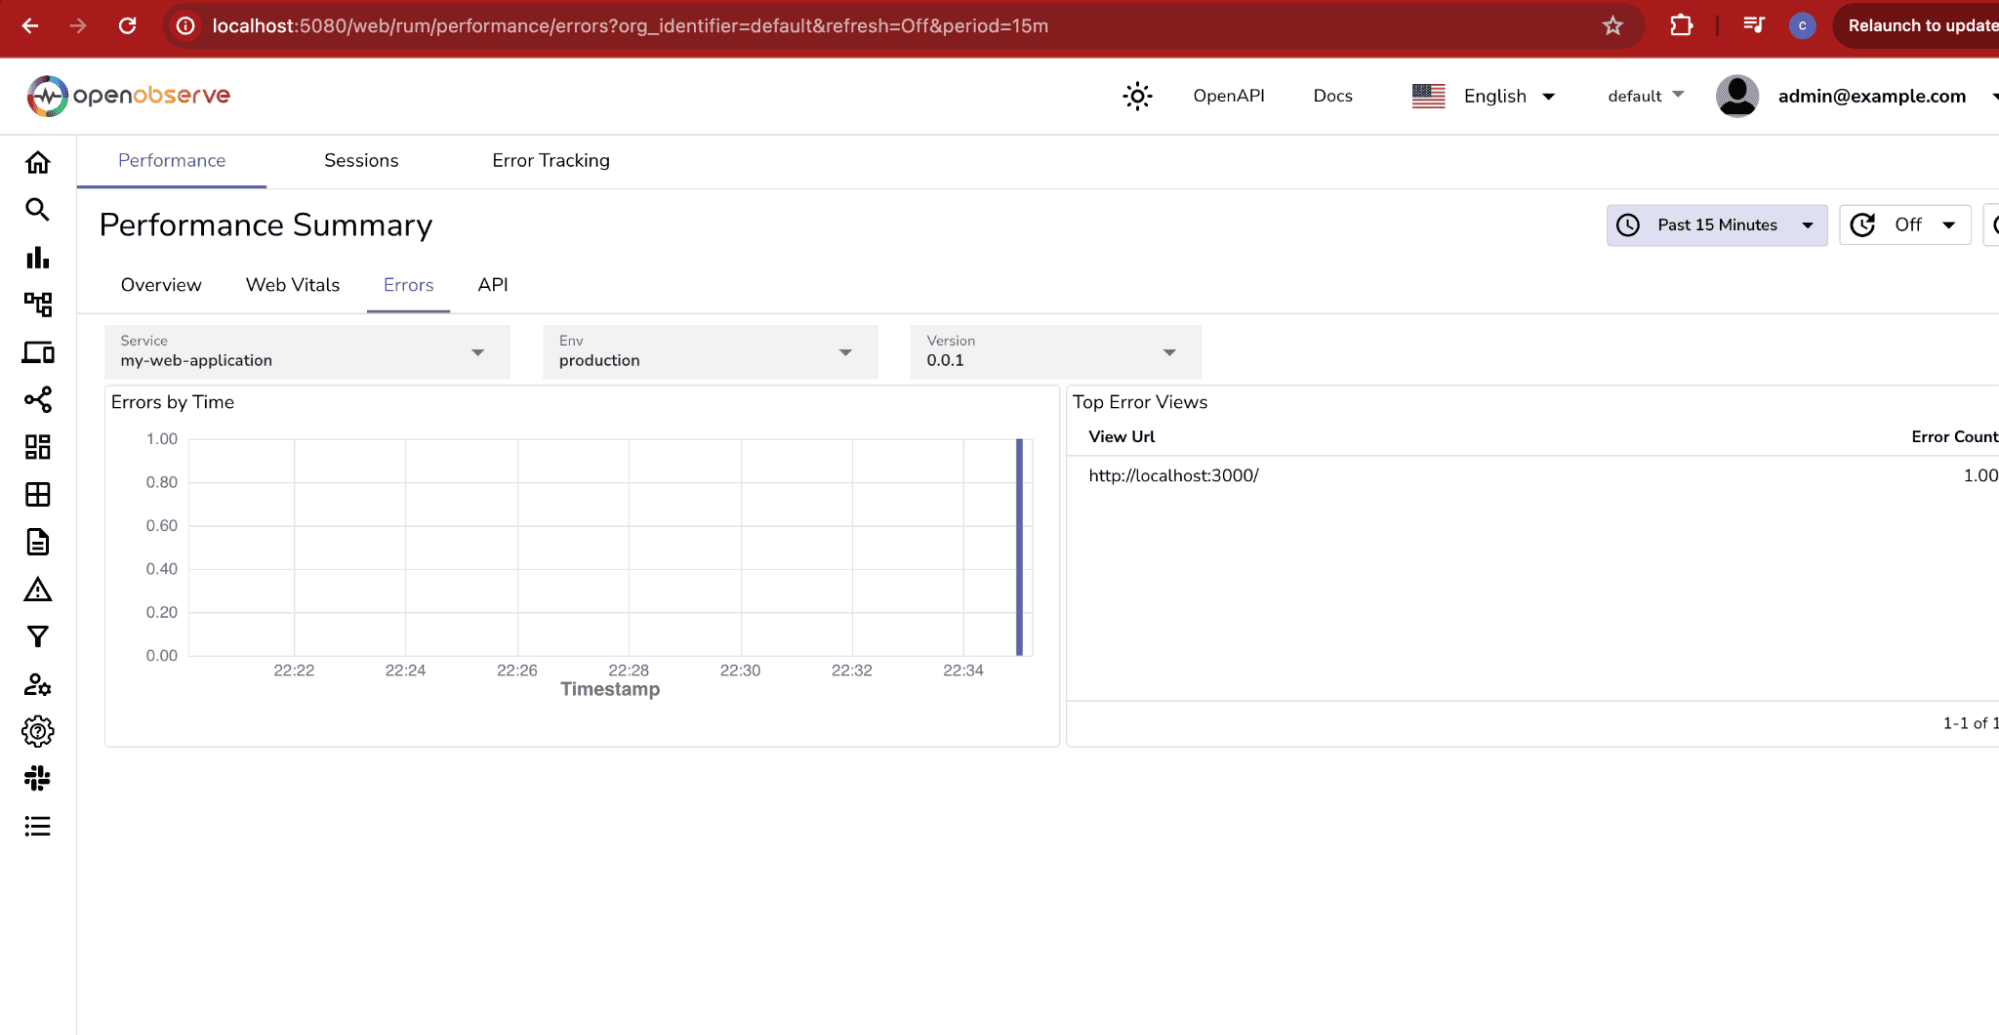
While setting up OpenObserve RUM, there are a few things that can cause issues with logging, session replay, or collecting performance metrics. Here are some frequent mistakes and how to avoid them
openobserveRum.setUser()), you may miss valuable insights about specific user sessions and behaviors.To maximize the value of your OpenObserve RUM integration, here are some recommended practices:
With OpenObserve RUM integrated into your React application, you’ve set up a real-time monitoring system that captures crucial data about user behavior, performance, and potential frontend issues. Whether it's session replays, JavaScript errors, or slow page loads, you now have all the tools you need to analyze and improve your app's user experience.
To make getting started even easier, we’ve created a RUM demo project on GitHub that includes a full setup for testing RUM integration with OpenObserve. The GitHub repository provides detailed instructions and configurations, allowing you to set up RUM with just a 1-click setup (for Mac users), making it easy to test real user monitoring in seconds. With this setup, you can start tracking user interactions, logs, and performance metrics almost immediately, without needing to build the setup from scratch.
Check out the demo here: OpenObserve RUM Demo.
We’re also thrilled to announce the release of our CDN for Real User Monitoring (RUM)! This allows for streamlined integration and fast delivery of our RUM and logs packages directly into your applications. Check out the packages below, and feel free to integrate them for enhanced observability:
For a hands-on example, refer to our demo code on GitHub, where you’ll find everything you need to get started!
With OpenObserve’s powerful RUM and logging capabilities, you’re well-equipped to ensure an optimized and seamless user experience. Whether you’re tracking performance metrics, logs, or user interactions, OpenObserve offers everything you need to maintain top-notch frontend performance. Start exploring today with the GitHub RUM Demo or integrate it directly into your projects!
Ready to supercharge your user experience? Sign up for OpenObserve today and start leveraging the power of RUM.
Chaitanya Sistla is a Principal Solutions Architect with 17X certifications across Cloud, Data, DevOps, and Cybersecurity. Leveraging extensive startup experience and a focus on MLOps, Chaitanya excels at designing scalable, innovative solutions that drive operational excellence and business transformation.