ServiceNow Integration with OpenObserve: Automate Incident Creation from Alerts


Don’t forget to share!
Try OpenObserve Cloud today for more efficient and performant observability.
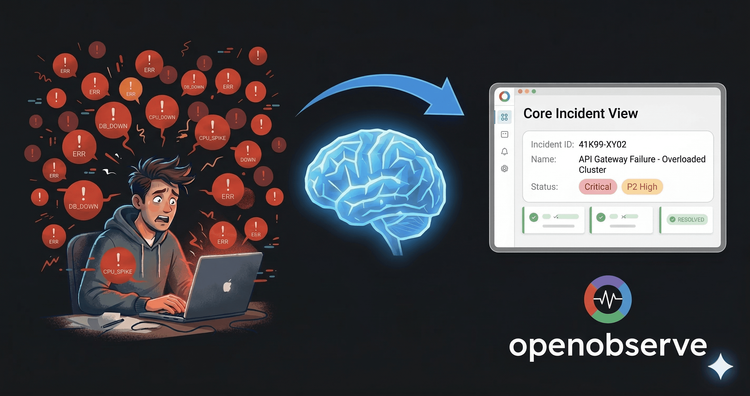
Integrating OpenObserve with ServiceNow automates incident creation directly from your alerts. When your systems trigger an alert in OpenObserve, the integration automatically creates a ServiceNow incident with the relevant context, eliminating manual ticket creation and reducing response times.
This guide walks through two integration methods: a direct webhook approach for straightforward incident creation, and via Actions in Openobserve that provides deduplication and advanced processing capabilities. Choose webhooks for simple use cases where each alert creates a new incident, or use openobserve actions when you need deduplication to prevent duplicate tickets from repetitive alerts.
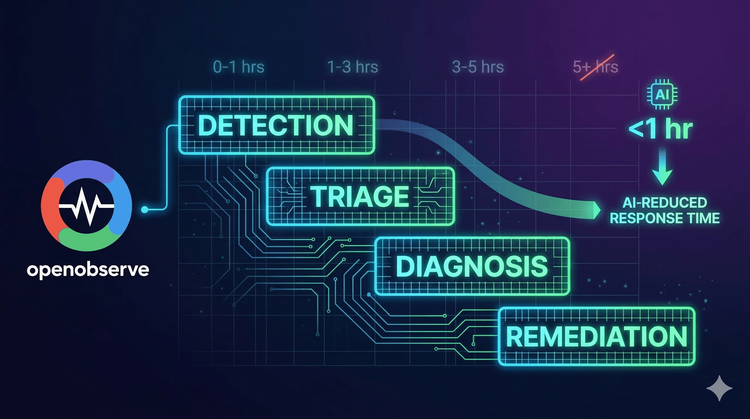
Manual incident creation introduces delays between alert detection and ticket assignment. Automated incident creation provides several operational benefits:
Faster Response Times: Incidents appear in ServiceNow within seconds of alert triggering. Your team starts investigating immediately instead of creating tickets.
Complete Context: Alert payloads include all relevant data like timestamps, affected services, and metric values. This context flows directly into ServiceNow fields.
Alert Deduplication: For repetitive alerts, the actions method can update existing incidents instead of creating duplicates, preventing ticket spam.
Before configuring the integration, ensure you have:
ServiceNow Requirements:
OpenObserve Requirements:
Network Access:
The webhook method requires three configuration steps: creating a template that defines the incident payload structure, setting up a destination that points to your ServiceNow instance, and creating an alert that uses this destination.
Templates define how alert data maps to ServiceNow incident fields. You can use variables that OpenObserve replaces with actual values when alerts trigger, or hardcode values for testing and fixed scenarios.
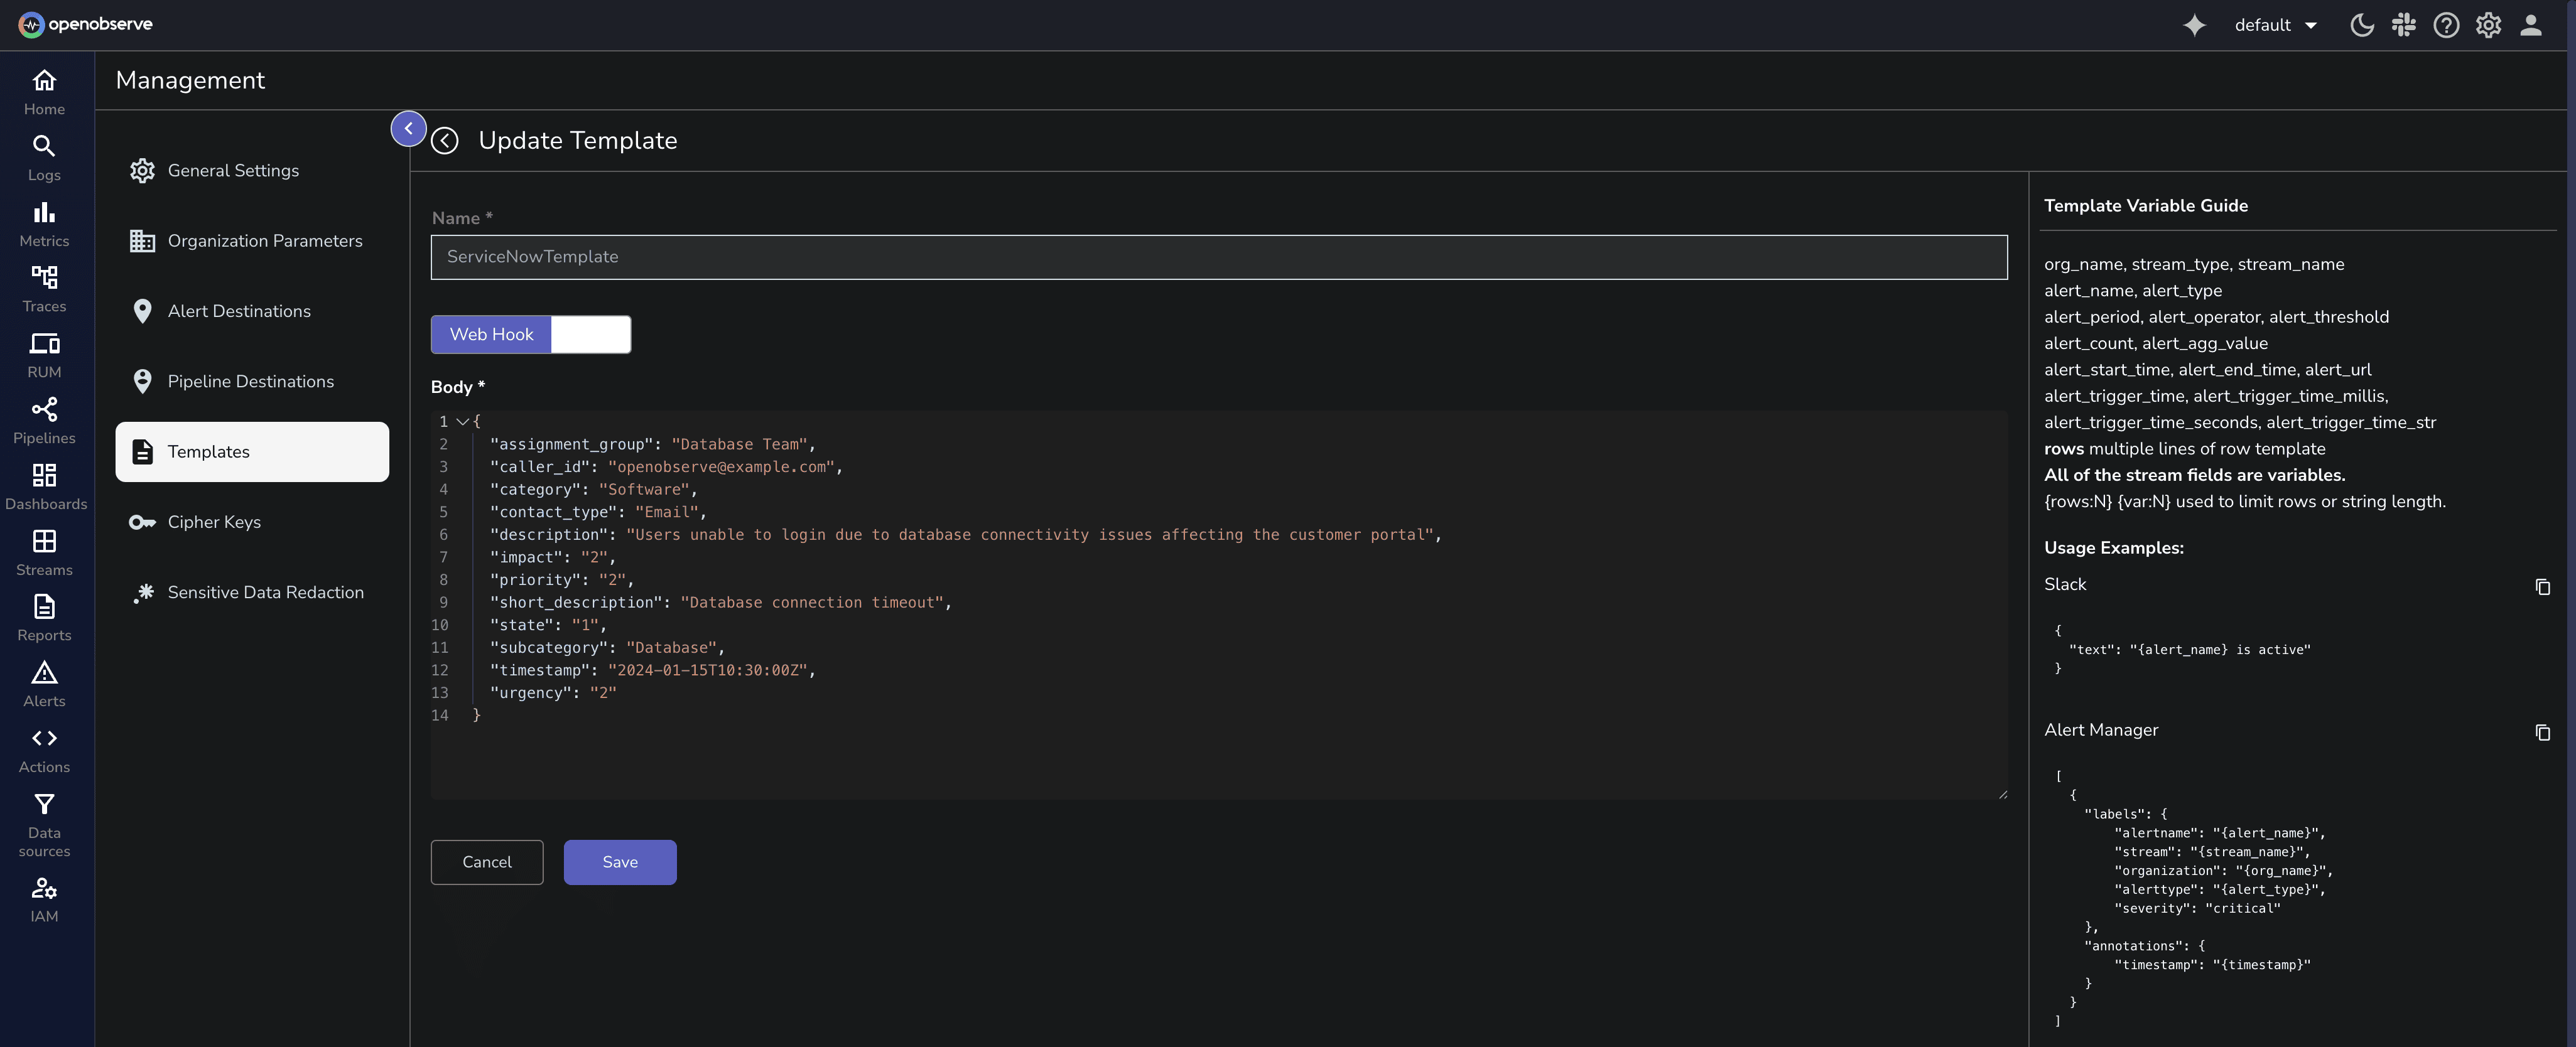
Navigate to OpenObserve's management page by clicking the gear icon, then select Template and click Add Template.
Variable-based templates extract data from your alert results. Each variable like {alert_name} or {description} must exist in your alert query output:
{
  "assignment_group": "{assignment_group}",
  "caller_id": "{caller_id}",
  "category": "{category}",
  "contact_type": "{contact_type}",
  "description": "{description}",
  "impact": "2",
  "priority": "2",
  "short_description": "{alert_name}",
  "state": "{state}",
  "subcategory": "{subcategory}",
  "timestamp": "{timestamp}",
  "urgency": "{urgency}"
}
When your alert fires, OpenObserve substitutes these variables with actual values from your log or metrics data.
Key Field Explanations:
impact and urgency: 1 (High), 2 (Medium), 3 (Low)state: 1 (New), 2 (In Progress), 6 (Resolved)short_description: Brief incident summarydescription: Detailed incident information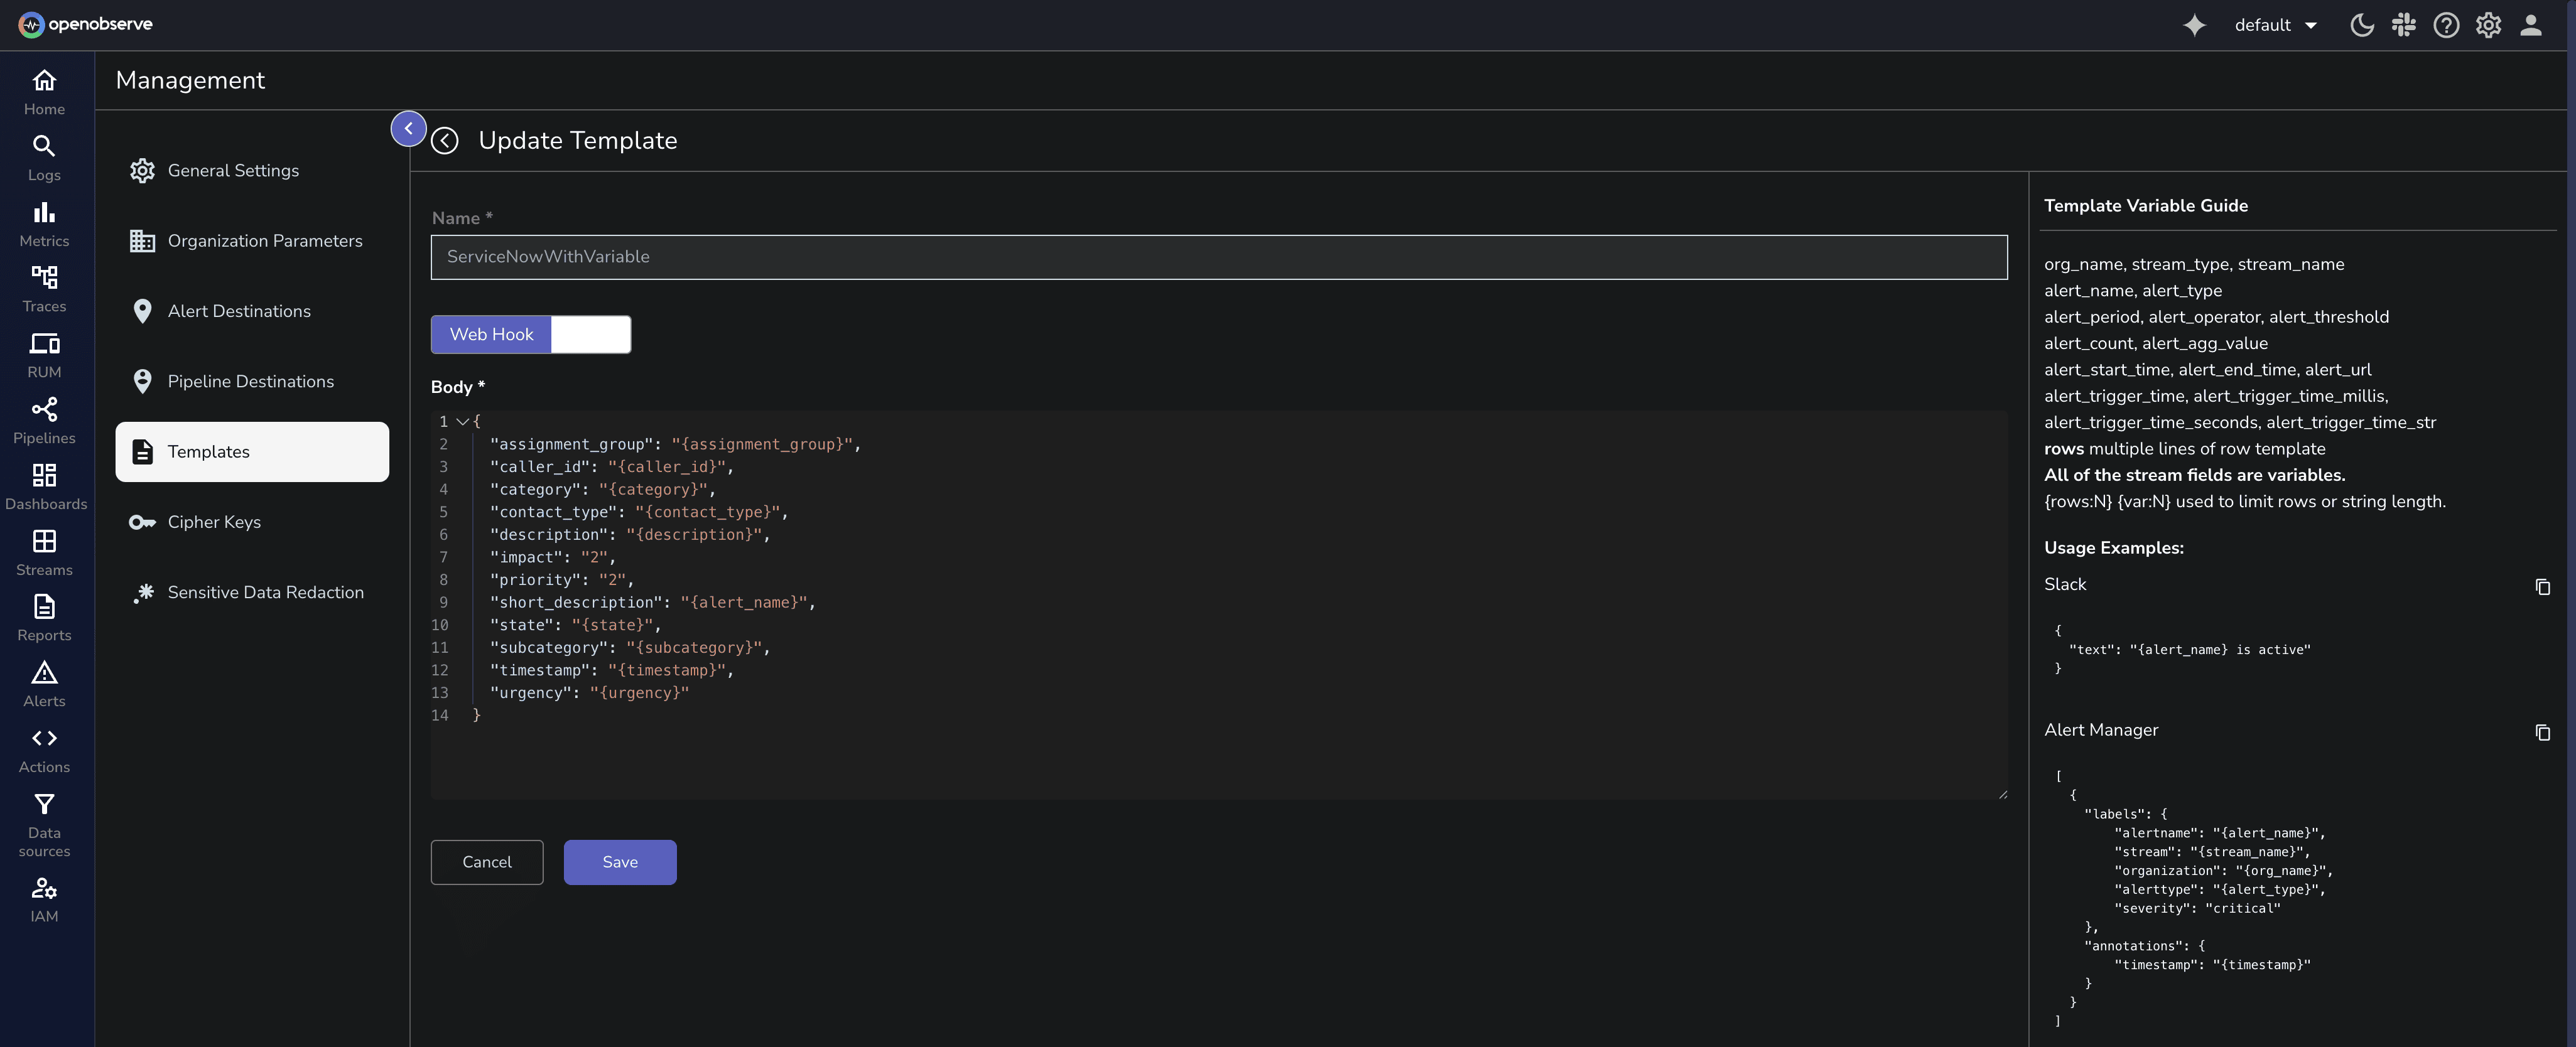
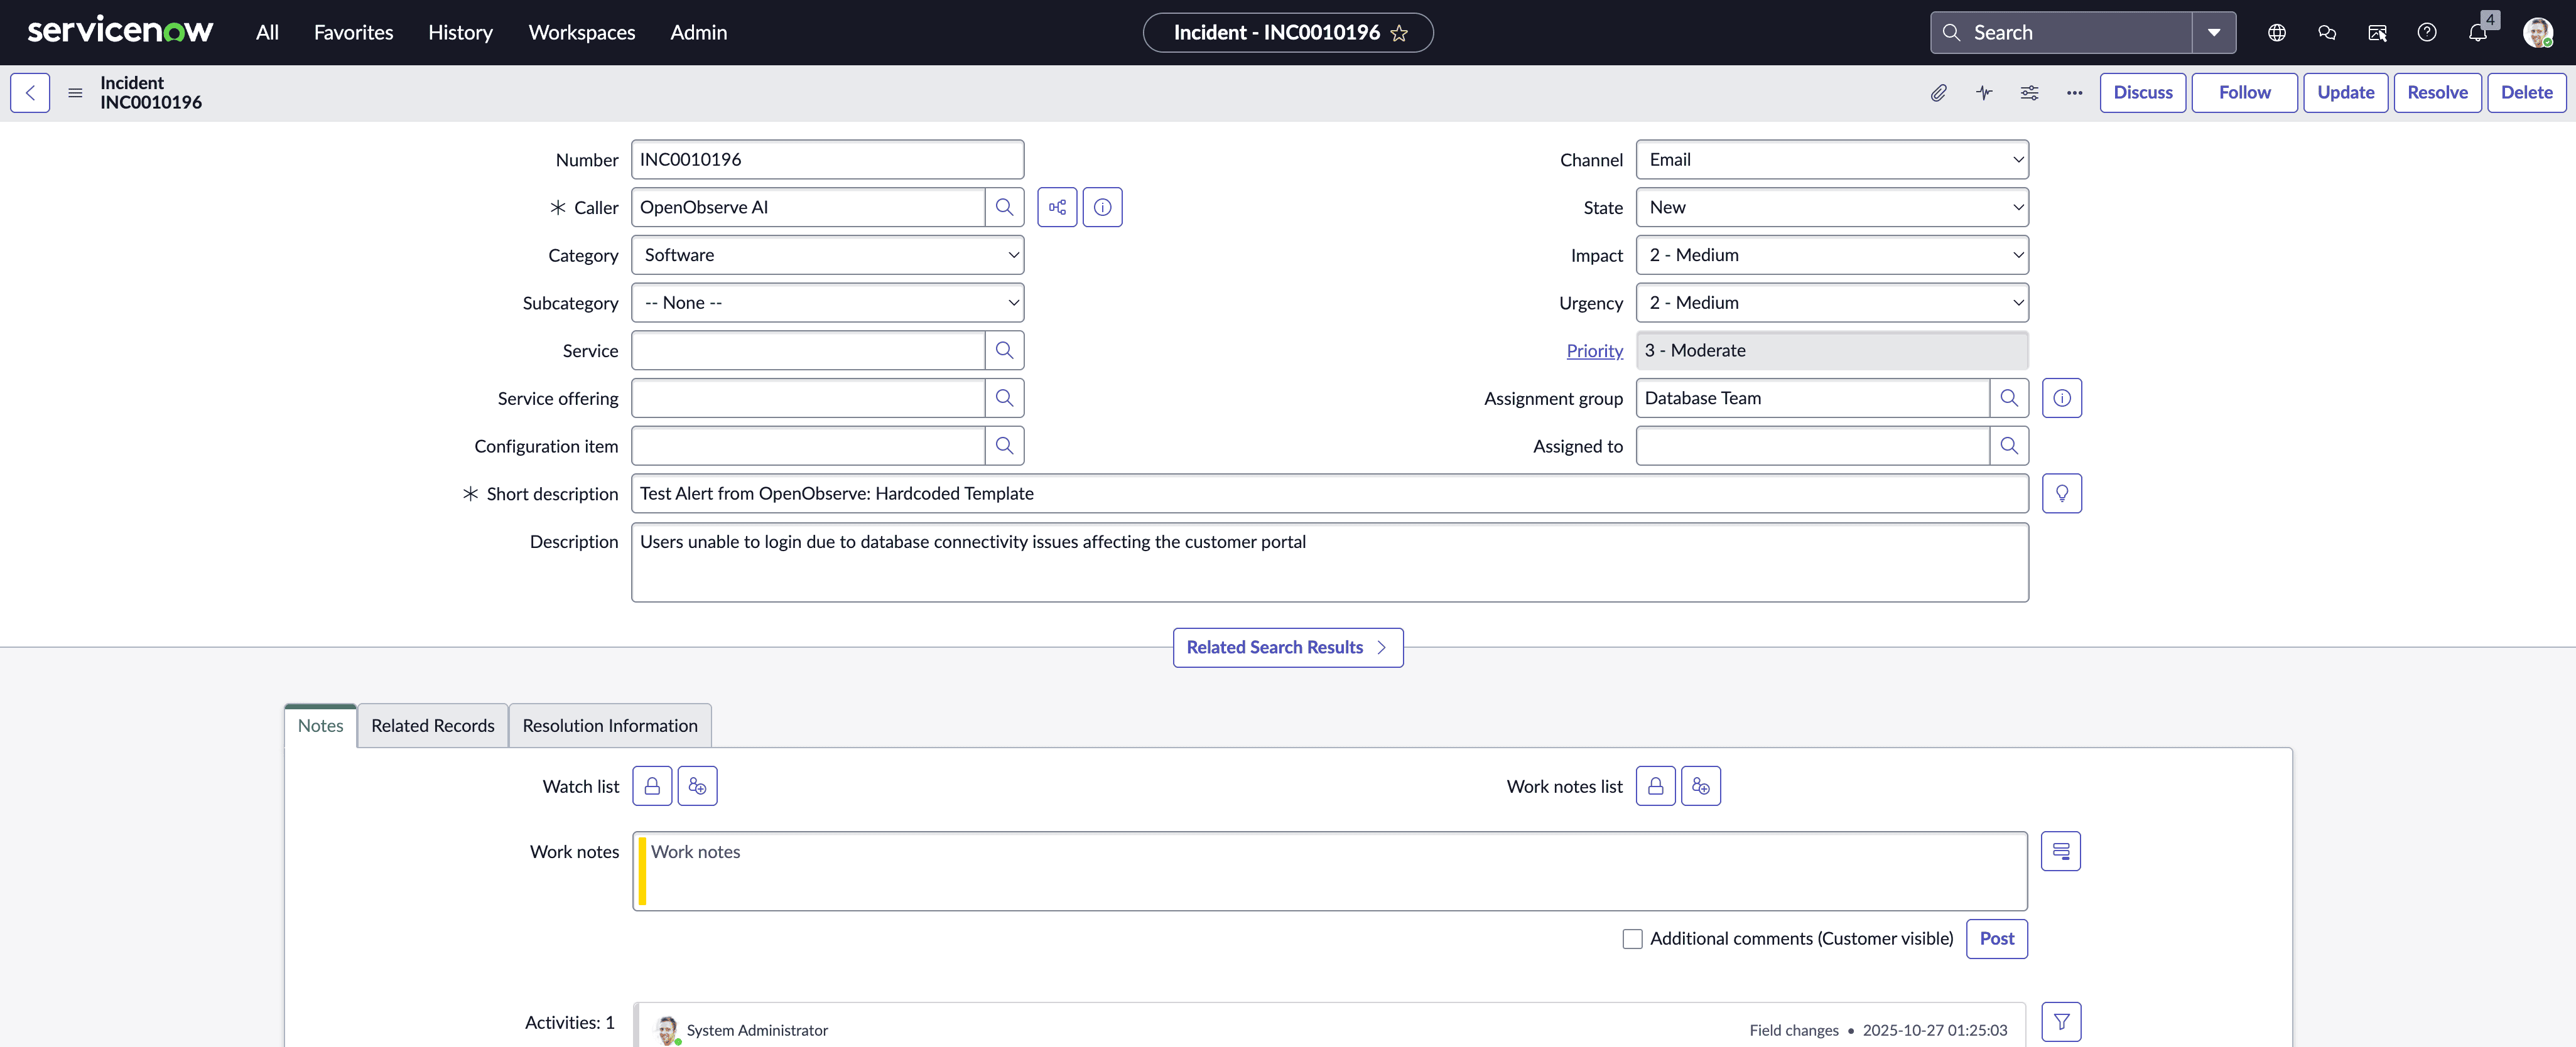
For testing or scenarios where incident fields remain constant:
{
  "assignment_group": "Database Team",
  "caller_id": "openobserve@example.com",
  "category": "Software",
  "contact_type": "Email",
  "description": "Users unable to login due to database connectivity issues affecting the customer portal",
  "impact": "2",
  "priority": "2",
  "short_description": "Database Connectivity Alert",
  "state": "1",
  "subcategory": "Database",
  "timestamp": "2024-01-15T10:30:00Z",
  "urgency": "2"
}
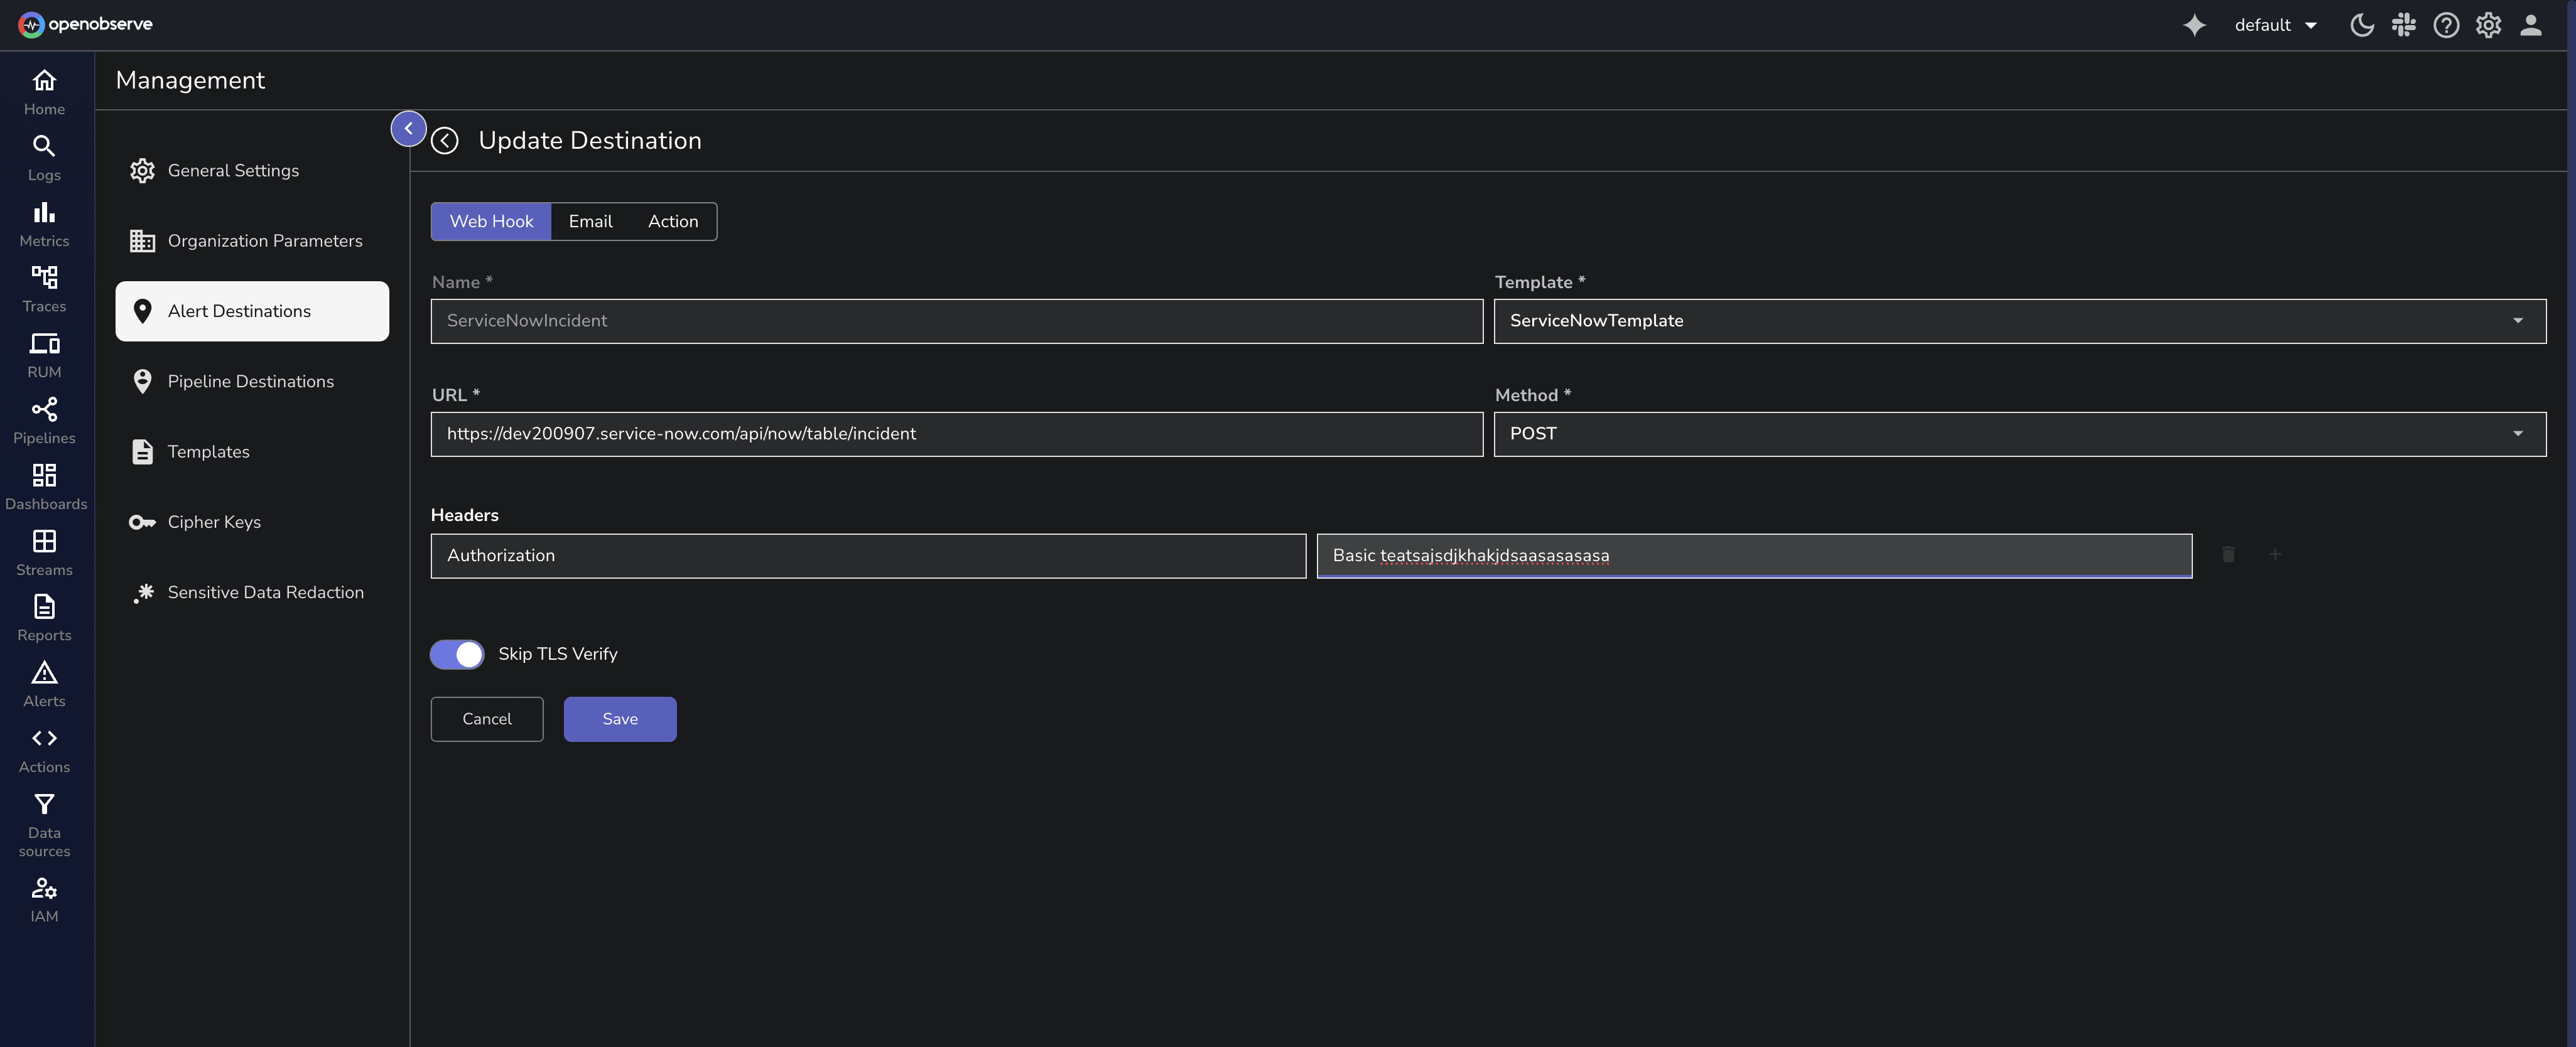
From the management page, navigate to Alert Destination, click Add Destination, and select Webhook.
Name: Give your destination a descriptive name like "ServiceNow Production Incidents".
Template: Select the template you created in Step 1.
URL: Your ServiceNow incident API endpoint:
https://yourinstance.service-now.com/api/now/table/incident
Method: Set to POST.
Headers: Add the Authorization header with your ServiceNow credentials:
Authorization: Basic <base64_encoded_credentials>
To generate the base64 encoded credentials:
echo -n "username:password" | base64
For example, if your username is admin and password is SecurePass123, the header becomes:
Authorization: Basic YWRtaW46U2VjdXJlUGFzczEyMw==
Create an alert in OpenObserve with your monitoring query. For example, a query detecting high memory utilization:
SELECT
    k8s_cluster,
    k8s_node_name,
    round(AVG(value) / 1024 / 1024 / 1024,2) AS alert_value,
    'high_memory_utilization' AS alert_reason
FROM
    k8s_node_memory_usage
WHERE k8s_cluster = 'prod'
GROUP BY
    k8s_cluster,
    k8s_node_name
HAVING alert_value > 80;
In the alert's destination settings, select the webhook destination you created.
Important: For variable-based templates, your alert query must return all fields referenced in the template. If your template uses {assignment_group} but your query doesn't return that field, the variable won't substitute correctly.
Actions in OpenObserve are user-defined Python scripts that support custom automation workflows, with Actions as alert destinations, users can take an immediate action by adding an automation workflow using Actions. The python script provides deduplication using correlation IDs and custom processing logic.
Create a template following the same process as Method 1. You can use either variable-based or hardcoded templates.
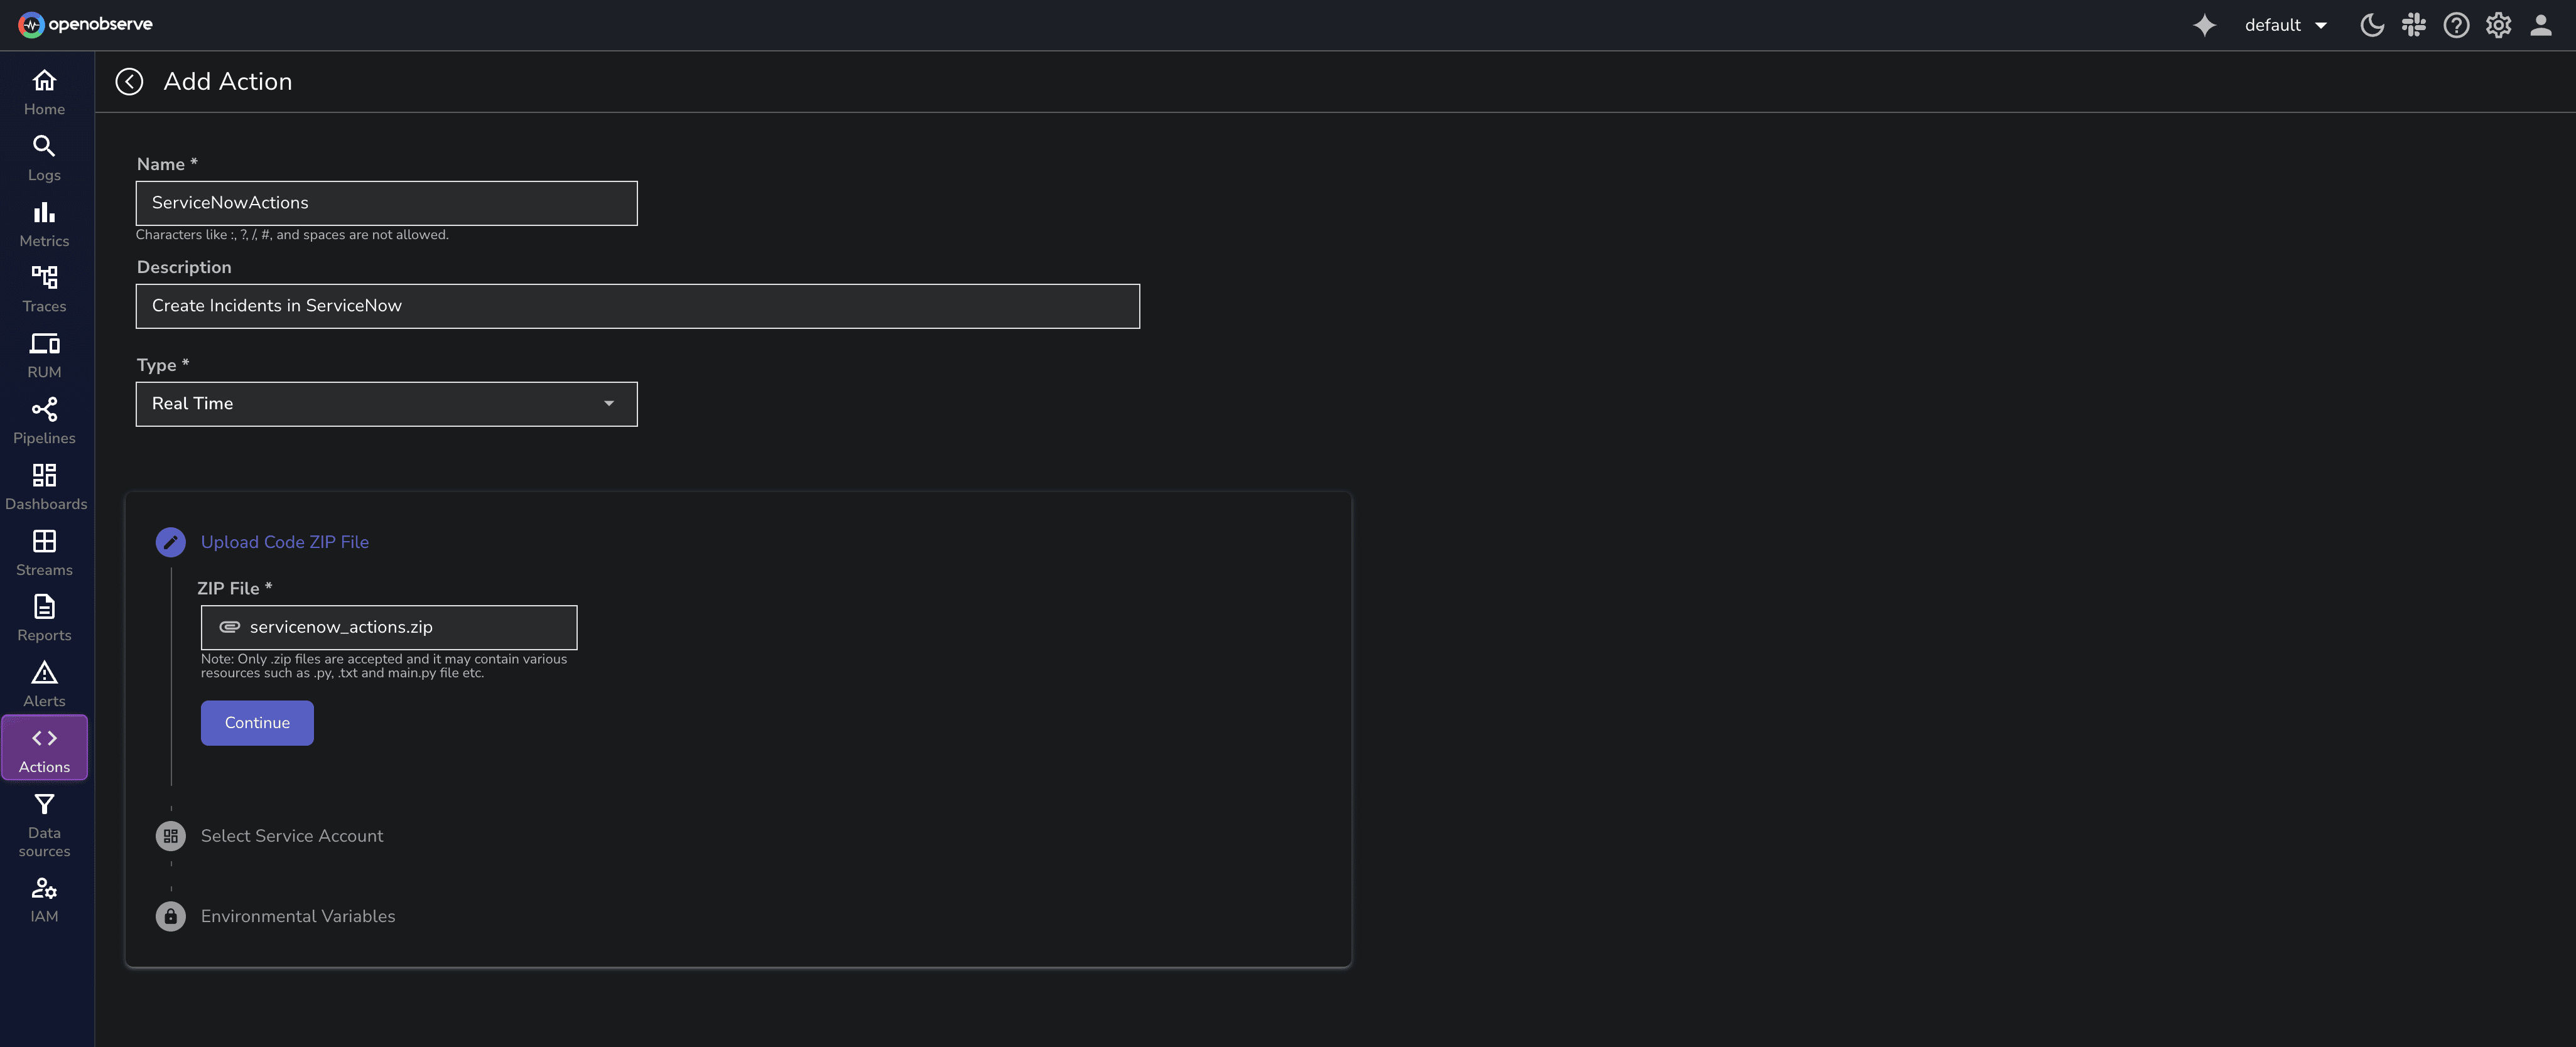
From the OpenObserve landing page, navigate to Actions and click Add Action.
Name: Provide a descriptive name like "ServiceNow Incident Creator with Deduplication".
Description: Document what this action does, for example: "Creates ServiceNow incidents from alerts. Updates existing incidents when correlation_id matches."
Type: Select "Real Time".
Upload Zip File: Download the ServiceNow action package from the OpenObserve Actions repository. This package contains the Python scripts for ServiceNow API interaction and deduplication logic.
Service Account: Select an existing service account or create a new one following the service account creation guide.
Environment Variables: Configure these required variables:
SERVICENOW_URL=https://yourinstance.service-now.com
SERVICENOW_USERNAME=your_username
SERVICENOW_PASSWORD=your_password
Optionally, add these variables to enable execution logging:
OPENOBSERVE_URL=https://api.openobserve.ai
OPENOBSERVE_ORG=your_organization
OPENOBSERVE_STREAM=servicenow_action_logs
OPENOBSERVE_USERNAME=your_username
OPENOBSERVE_PASSWORD=your_password
The action script includes deduplication logic using a correlation_id field. When your template includes a correlation_id:
correlation_idcorrelation_idThis prevents alert storms from creating hundreds of duplicate tickets.
Example Template with correlation_id:
{
  "correlation_id": "alert_{alert_name}_{hostname}",
  "short_description": "{alert_name} on {hostname}",
  "description": "{description}",
  "urgency": "2",
  "impact": "2",
  "category": "Infrastructure",
  "work_notes": "Alert triggered at {timestamp}. CPU usage: {cpu_usage}%"
}
The correlation_id combines alert name and hostname to create a unique identifier. Each unique hostname gets its own incident, but repeated alerts for the same hostname update the existing incident.
Without correlation_id: The action creates a new incident every time, behaving like the webhook method.
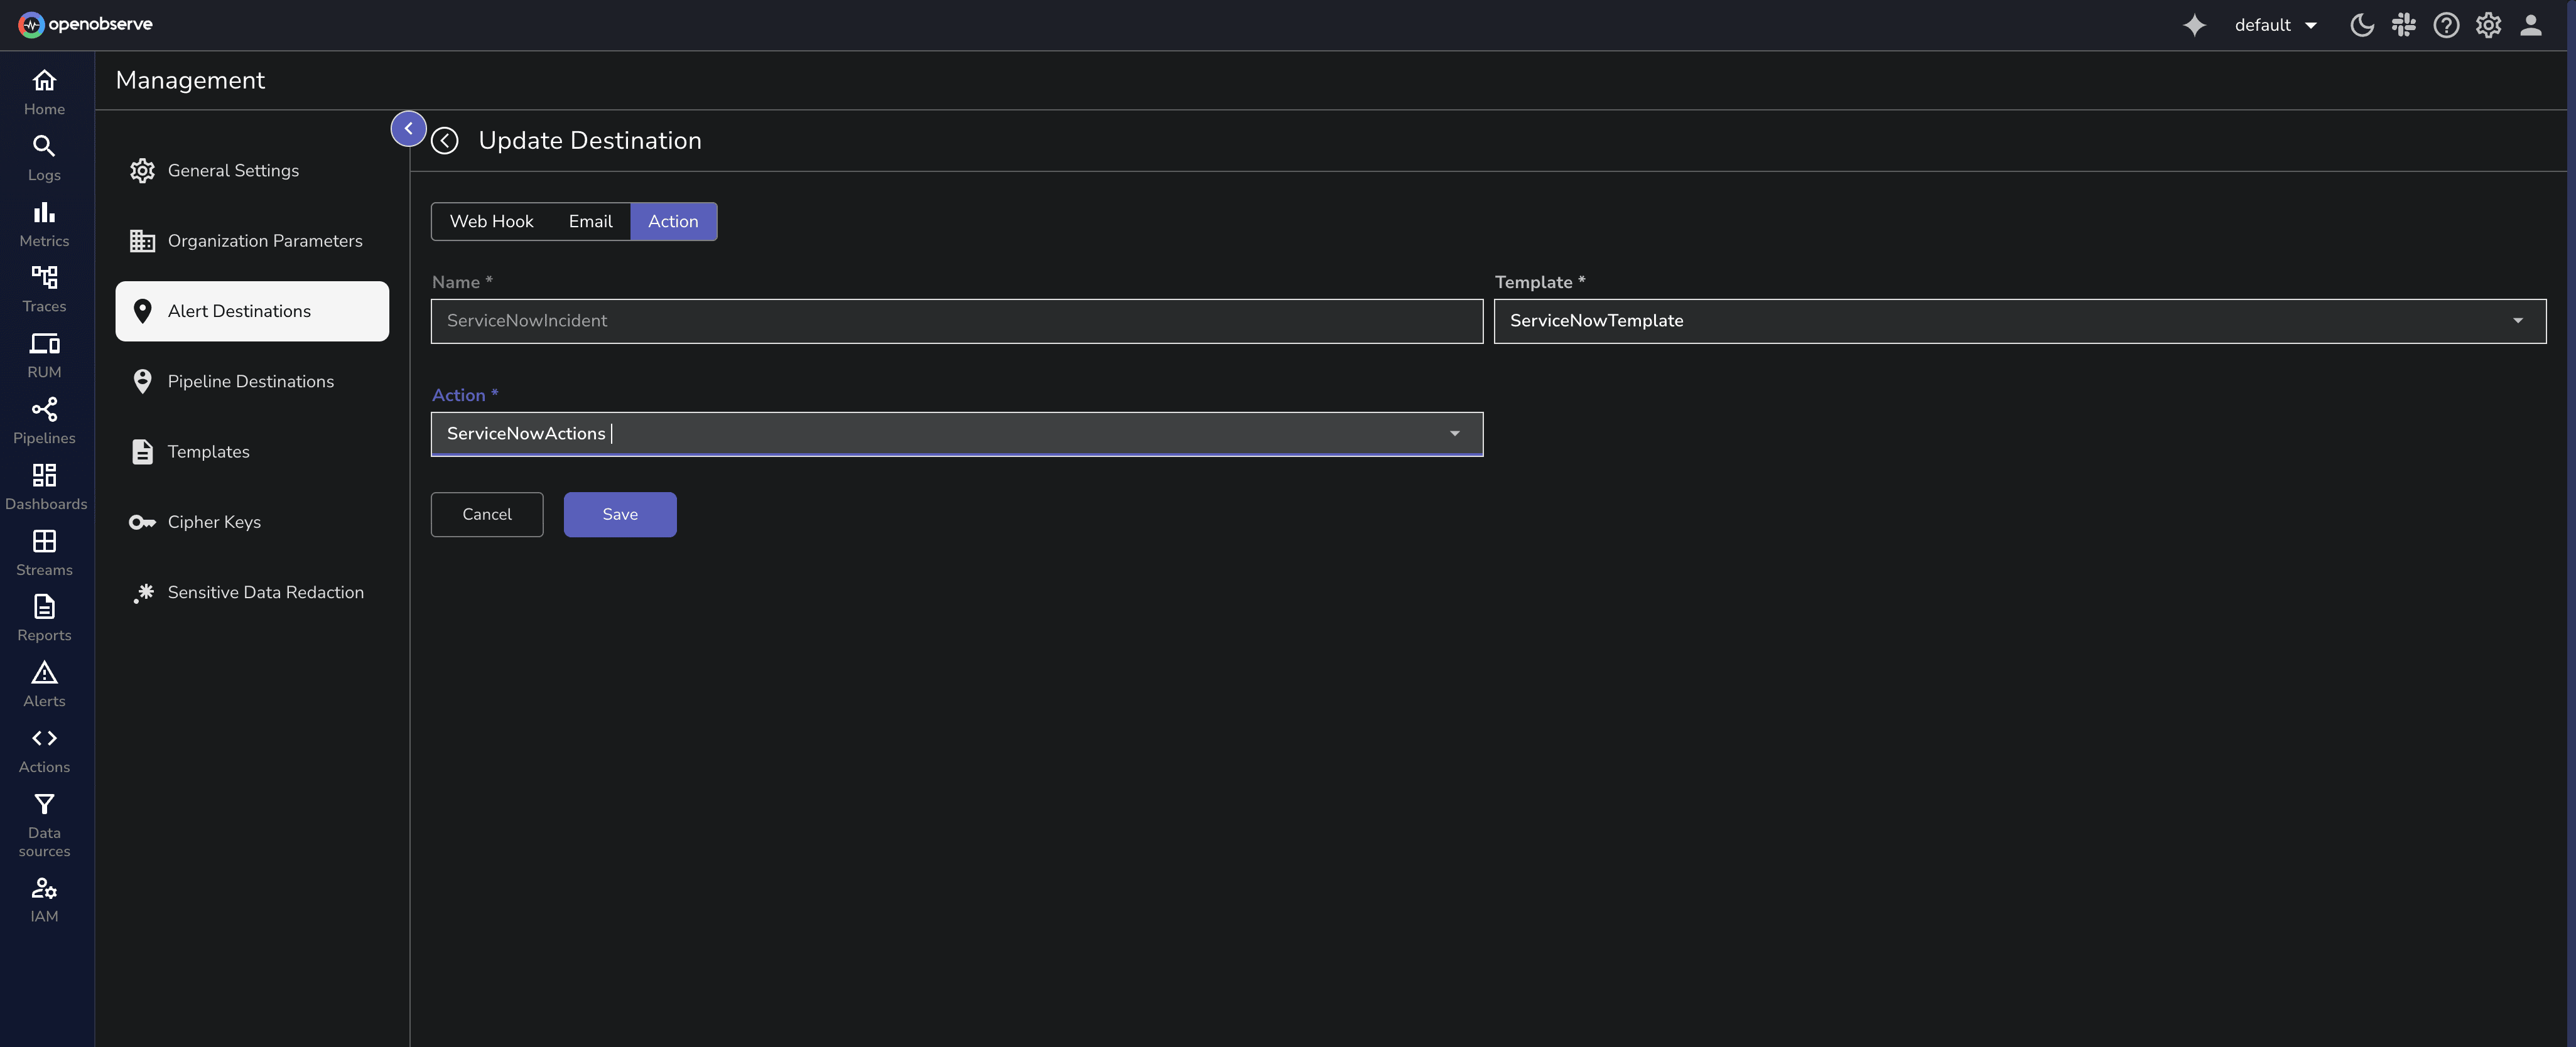
Navigate to Alert Destination, click Add Destination, and select Action.
Name: Descriptive destination name.
Template: Select your template from Step 1.
Action: Select the action you created in Step 2.
Create an alert and select the action destination, test it by triggering an alert.
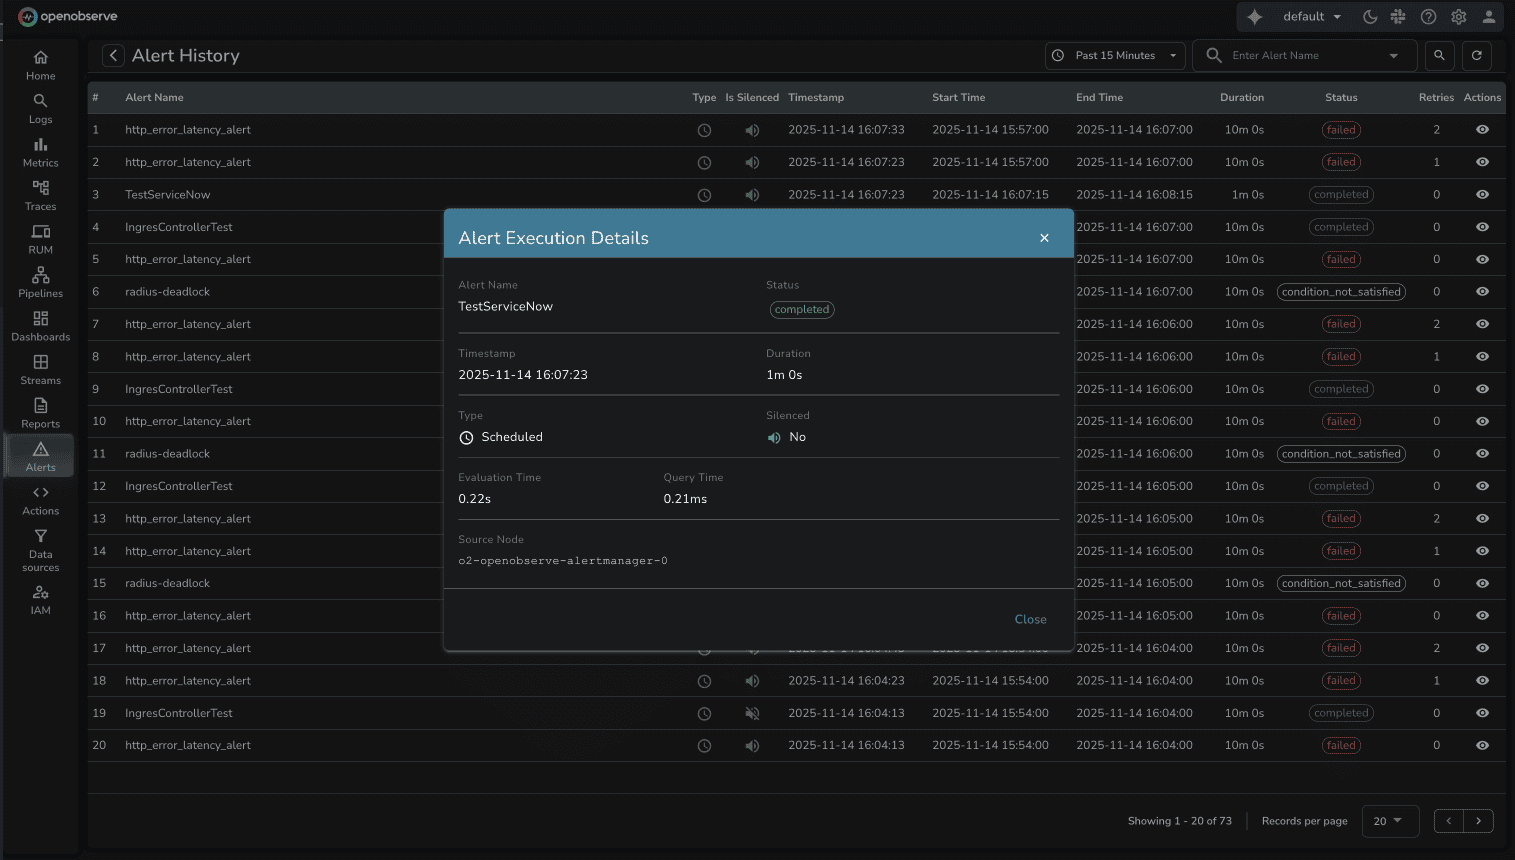
In OpenObserve's alert history, verify:
Navigate to your ServiceNow instance and go to Incident > All.
Verify the incident:
{variable_name} text)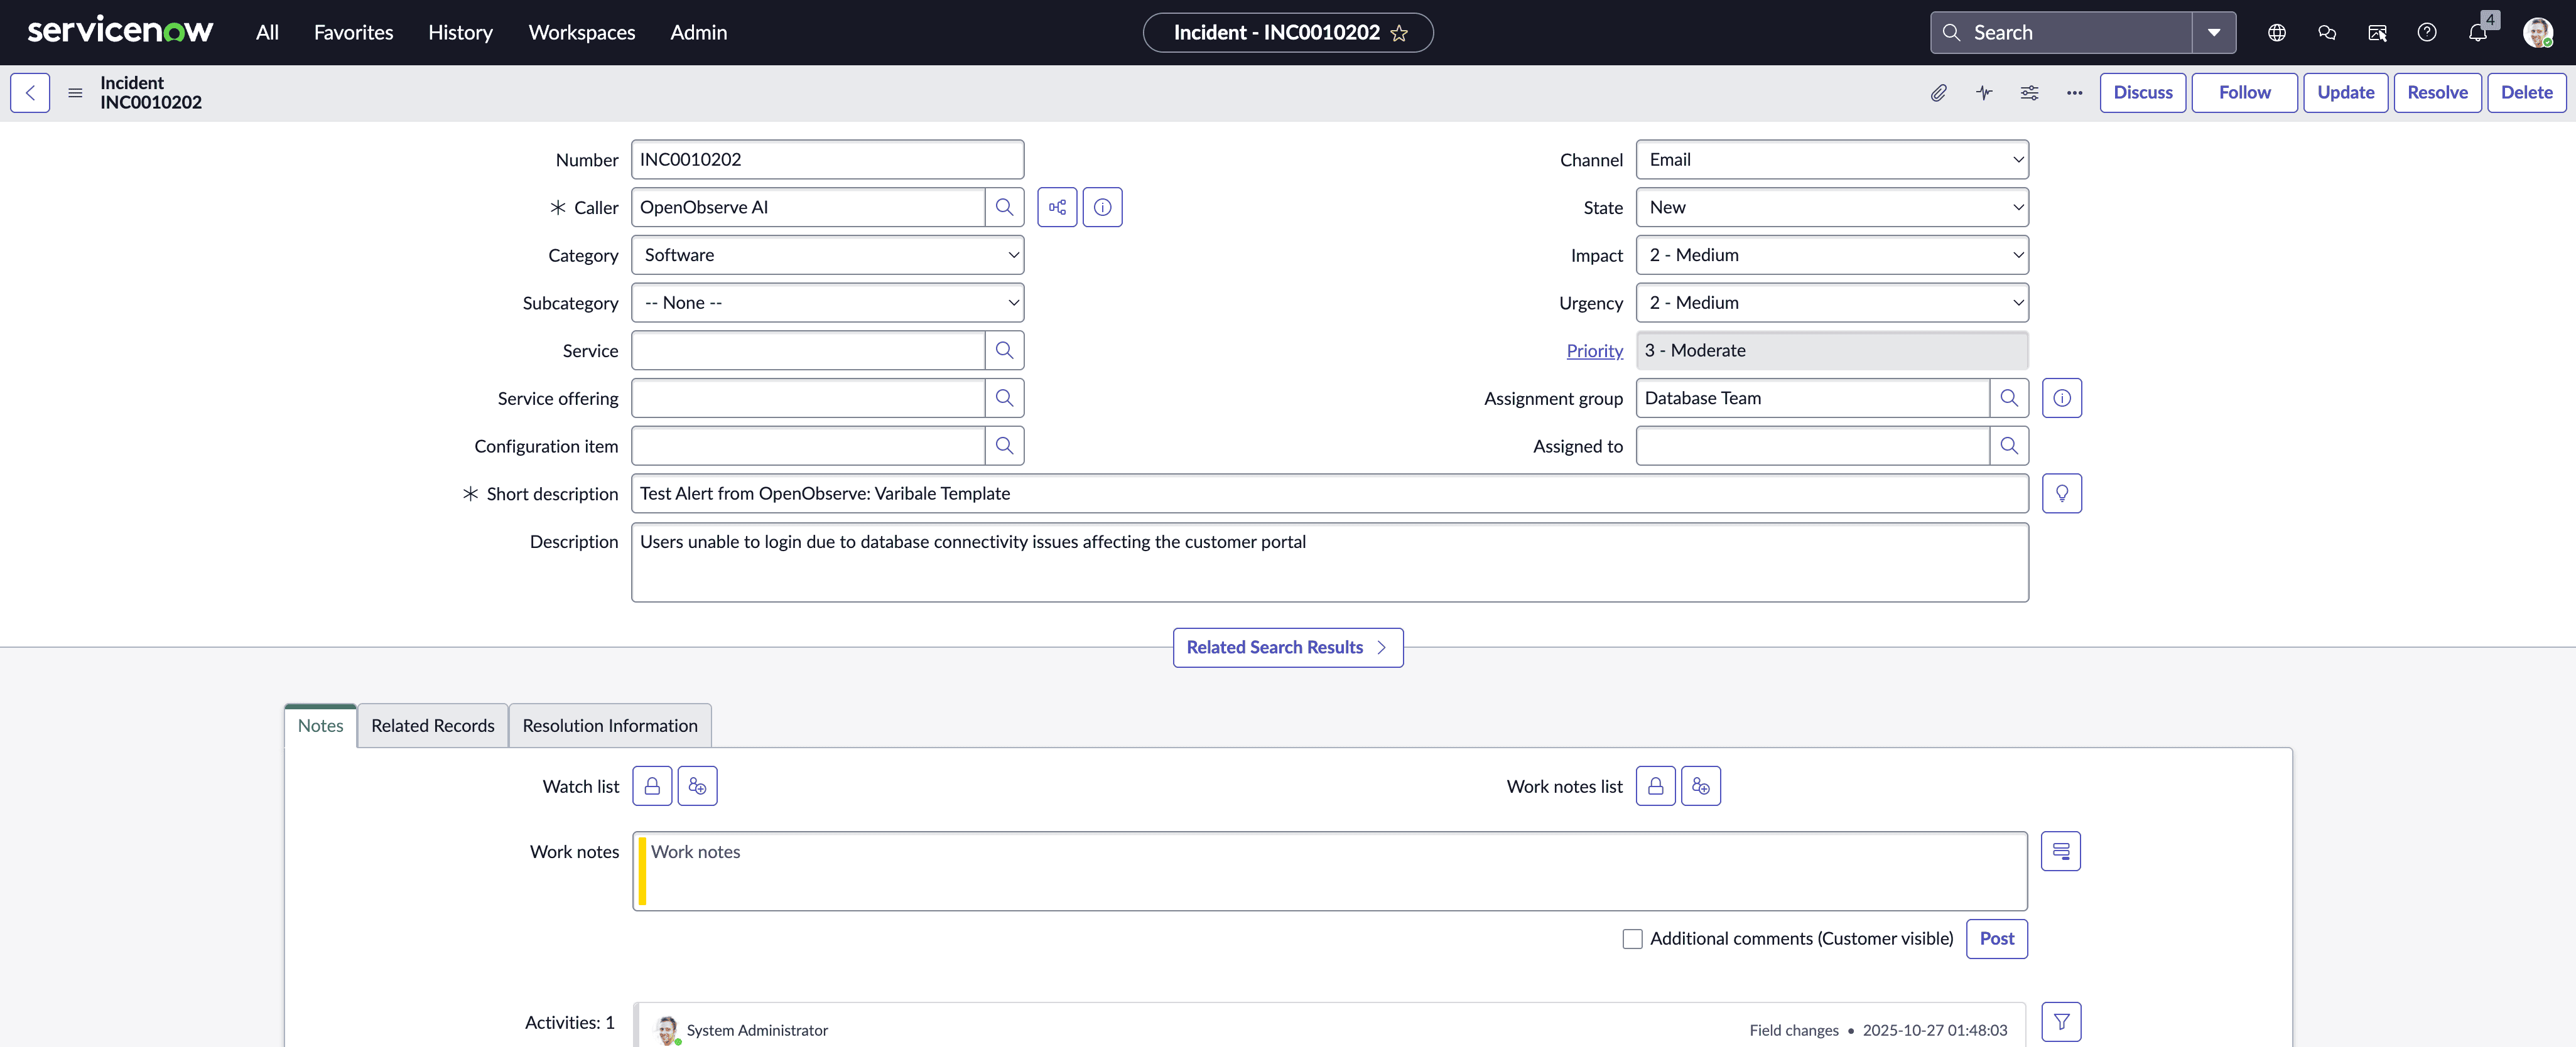
For Actions with Deduplication: Trigger the same alert multiple times and verify that subsequent triggers add work notes to the existing incident rather than creating new ones.
alert_{type}_{resource} for proper deduplication grouping.Incidents Not Creating: Verify ServiceNow credentials by testing manually:
curl -X POST "https://yourinstance.service-now.com/api/now/table/incident" \
  -H "Authorization: Basic <credentials>" \
  -H "Content-Type: application/json" \
  -d '{"short_description":"Test"}'
Variables Not Substituting: Ensure your alert query returns all fields referenced in the template. Query field names must exactly match template variable names.
Deduplication Not Working: Check that correlation_id remains consistent across alert triggers and that incidents are in open state (not closed or resolved).
You now have everything you need to automate ServiceNow incident creation from OpenObserve alerts. Here's how to get started:
Implementation Checklist:
Get Started with OpenObserve Today! Sign up for a free cloud trial
Additional Resources:
Have questions? Join the OpenObserve community or check the documentation for detailed guides.
Webhooks send alert data directly to ServiceNow's API without additional processing. Actions execute custom Python code that provides deduplication, custom field mapping, and advanced error handling. Use webhooks for simple incident creation, use actions when you need deduplication to prevent duplicate tickets.
When using actions with a correlation_id field, the script searches ServiceNow for open incidents with the same correlation_id before creating a new incident. If found, it updates the existing incident's work notes instead of creating a duplicate. This prevents alert storms from creating hundreds of tickets.
Yes. Templates define the JSON payload sent to ServiceNow. You can include any ServiceNow incident field available via the API. Reference the ServiceNow Table API documentation for available fields.
OpenObserve retries failed destination calls according to your alert configuration. The alert execution logs show any failures. For critical alerts, configure multiple destinations as fallback (for example, ServiceNow primary and email/Slack as secondary).
Create multiple templates and destinations. For example, create a "Critical Incidents" template with impact=1 and a "Warning Incidents" template with impact=3. Select the appropriate destination when creating each alert based on severity.
I'm a Solution Architect and Observability Engineer with over 10 years of experience helping organizations build resilient, transparent systems. As a Certified Splunk Consultant, I've spent my career turning data into actionable insights that drive real business outcomes. I'm passionate about open source observability tools and believe that robust monitoring is the foundation of modern infrastructure. I share practical strategies, lessons learned, and hands-on guidance from the trenches of enterprise observability
Manas is a passionate Dev and Cloud Advocate with a strong focus on cloud-native technologies, including observability, cloud, kubernetes, and opensource. building bridges between tech and community.