


Filters
This guide provides instructions on how to apply filters to narrow the data shown in a dashboard panel by using fixed values, referencing dynamic variables, or combining multiple conditions with logical operators.
When to Use Filters
Use filters to:
- View only specific logs, metrics, or trace data
- Make dashboards interactive using variables
- Apply logic-based filtering for complex scenarios
How to Add Filters
The following section explains how to add different types of filters, with examples.
List: Static Filter
Use static filters when the filter values are known and do not change at runtime.
To add a static filter to a panel:
- In the panel editor, select the + icon in the Filters section.
- Select Add Condition.
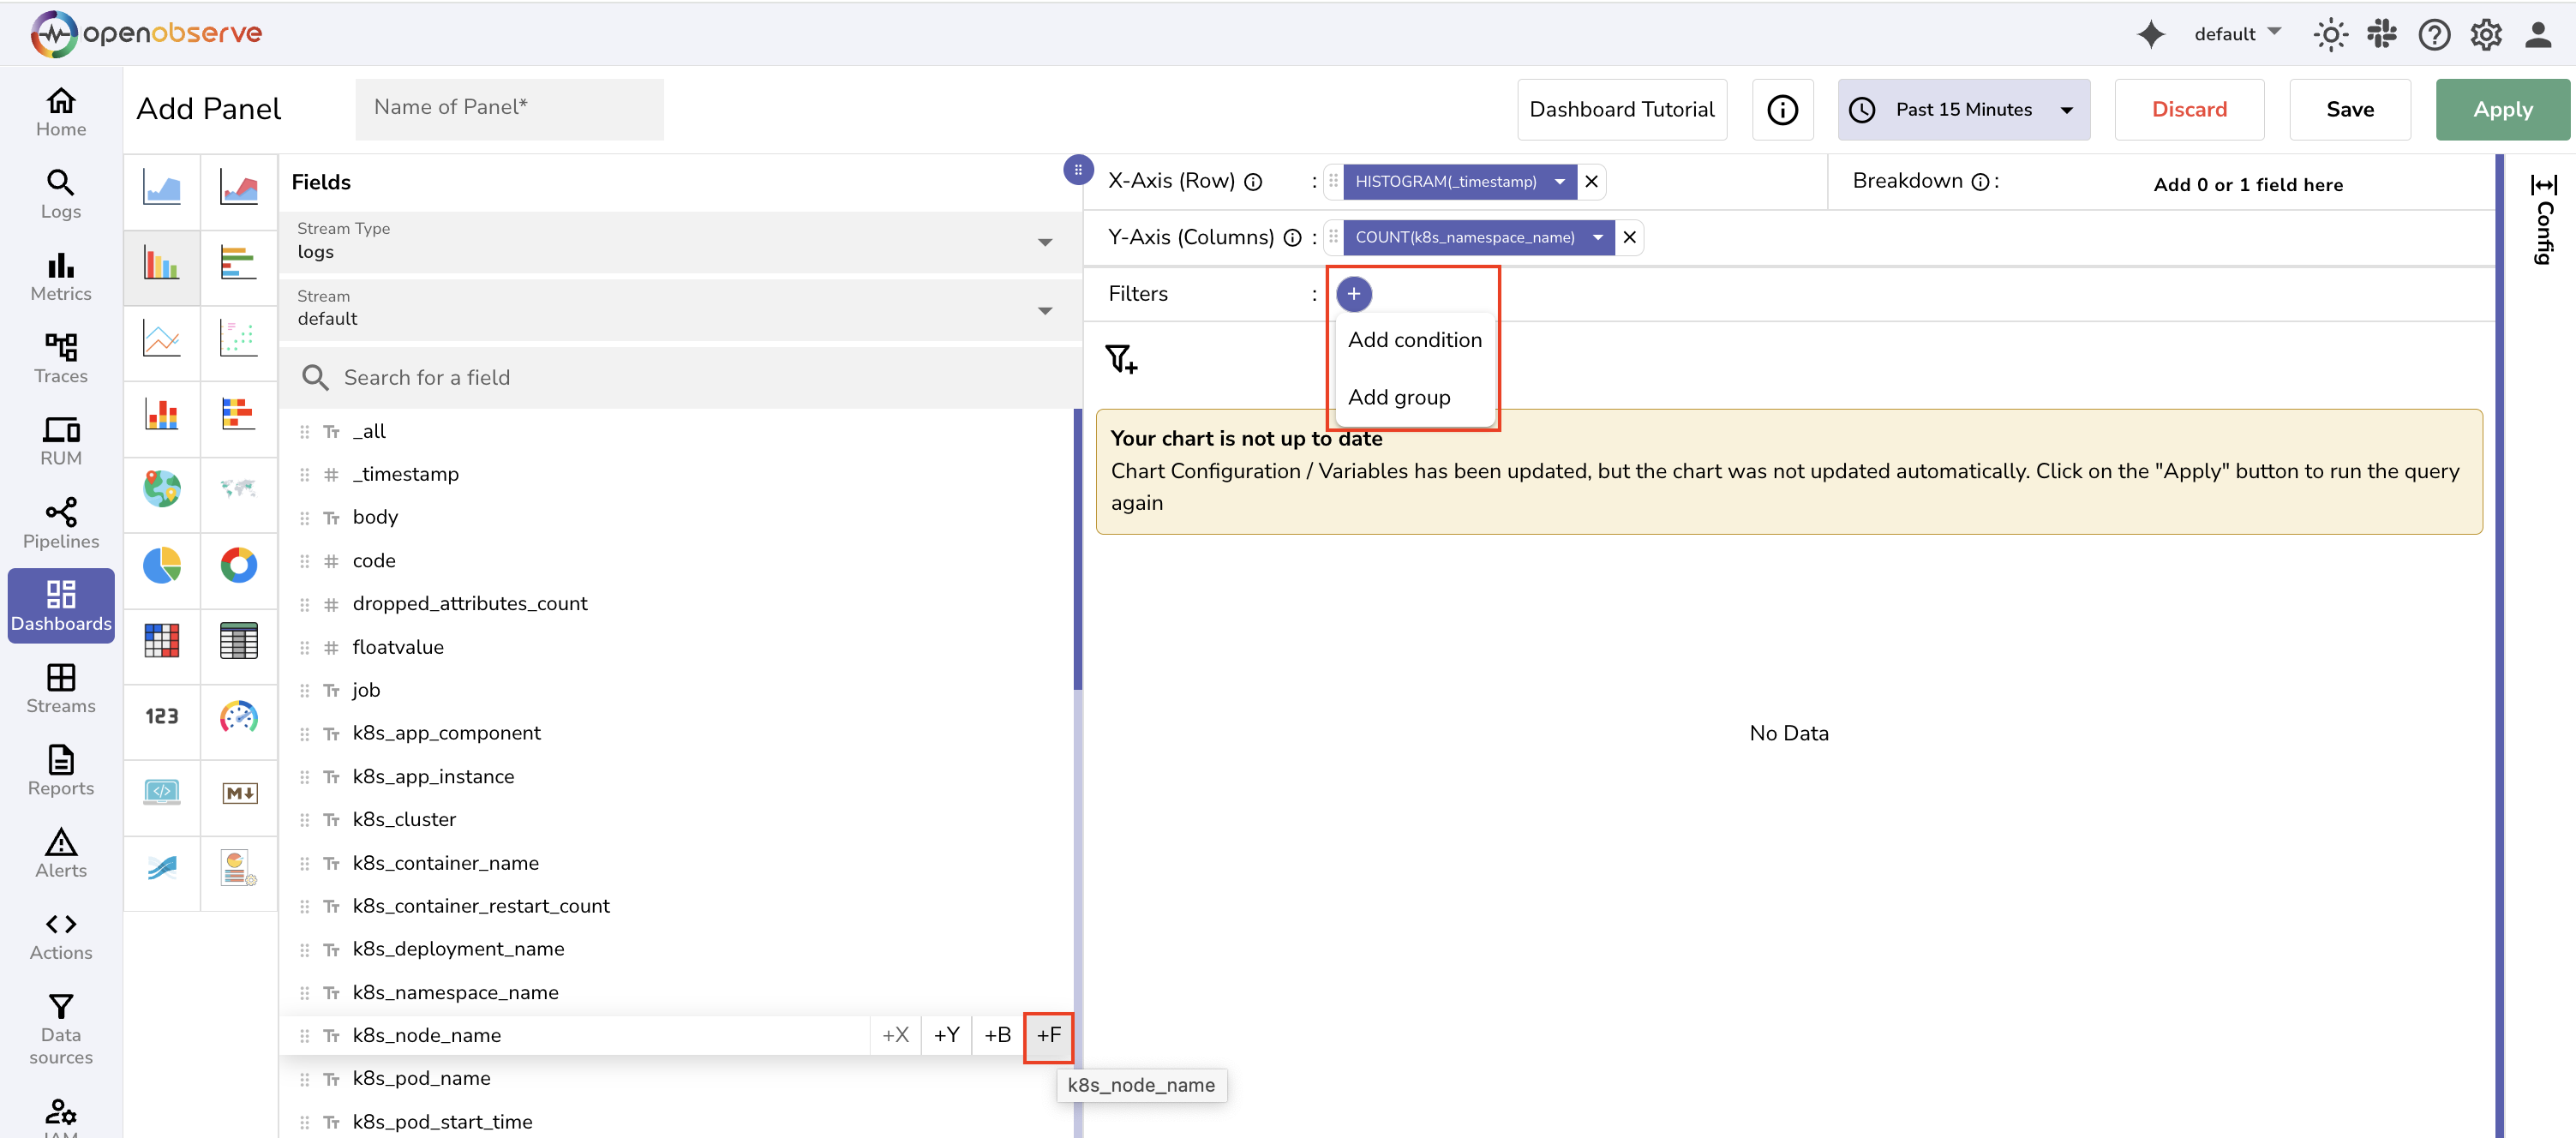 Alternatively, hover over a field in the Fields section and select the +F icon to add a filter directly.
 - Click the filter and open the dropdown.
- Verify or change the selected field using the Filters on Field dropdown.
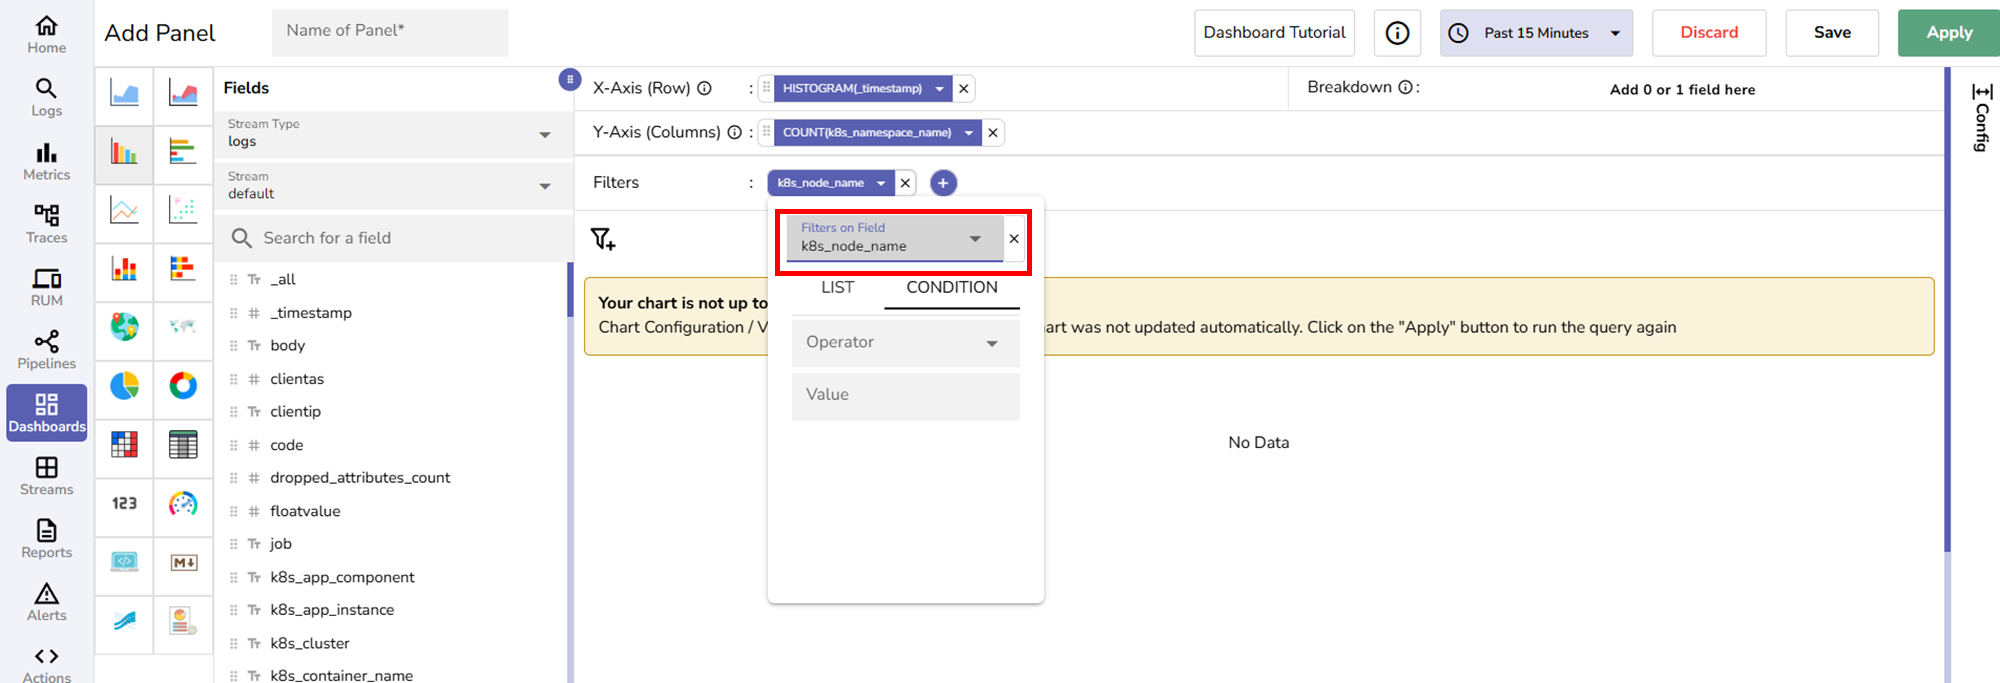
- Choose the List tab.
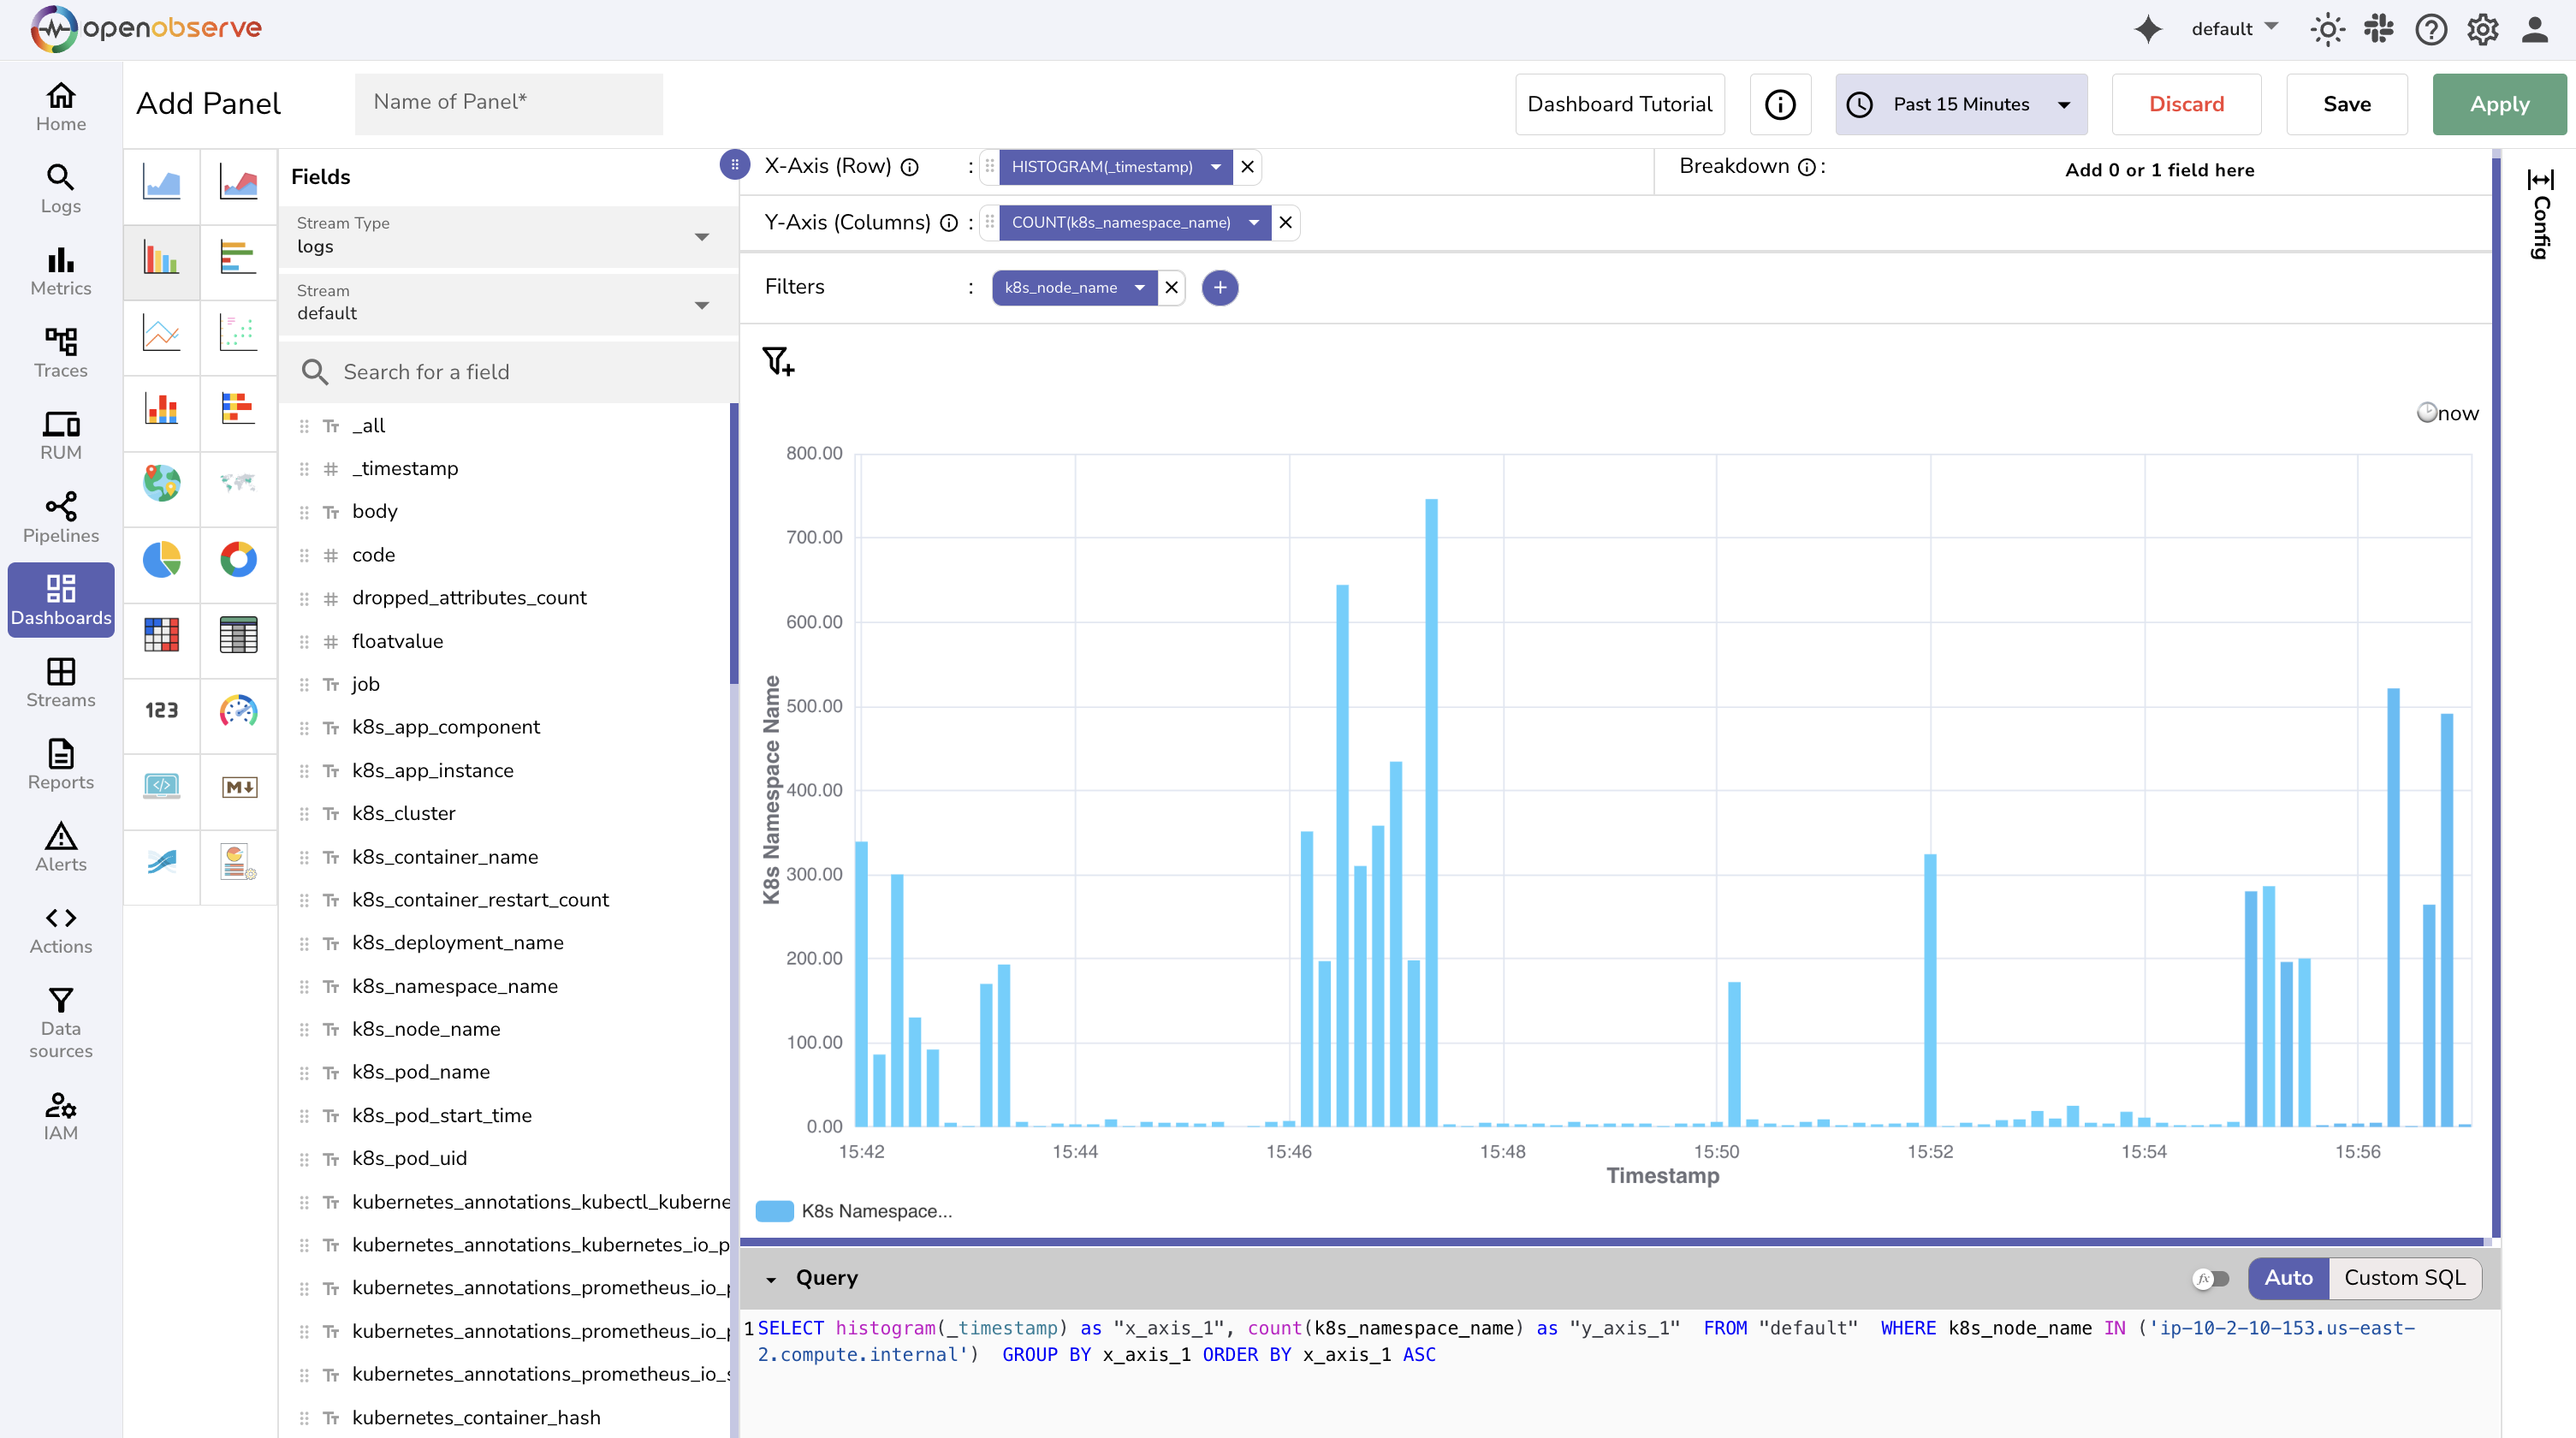
- Select one or more values from the available list.
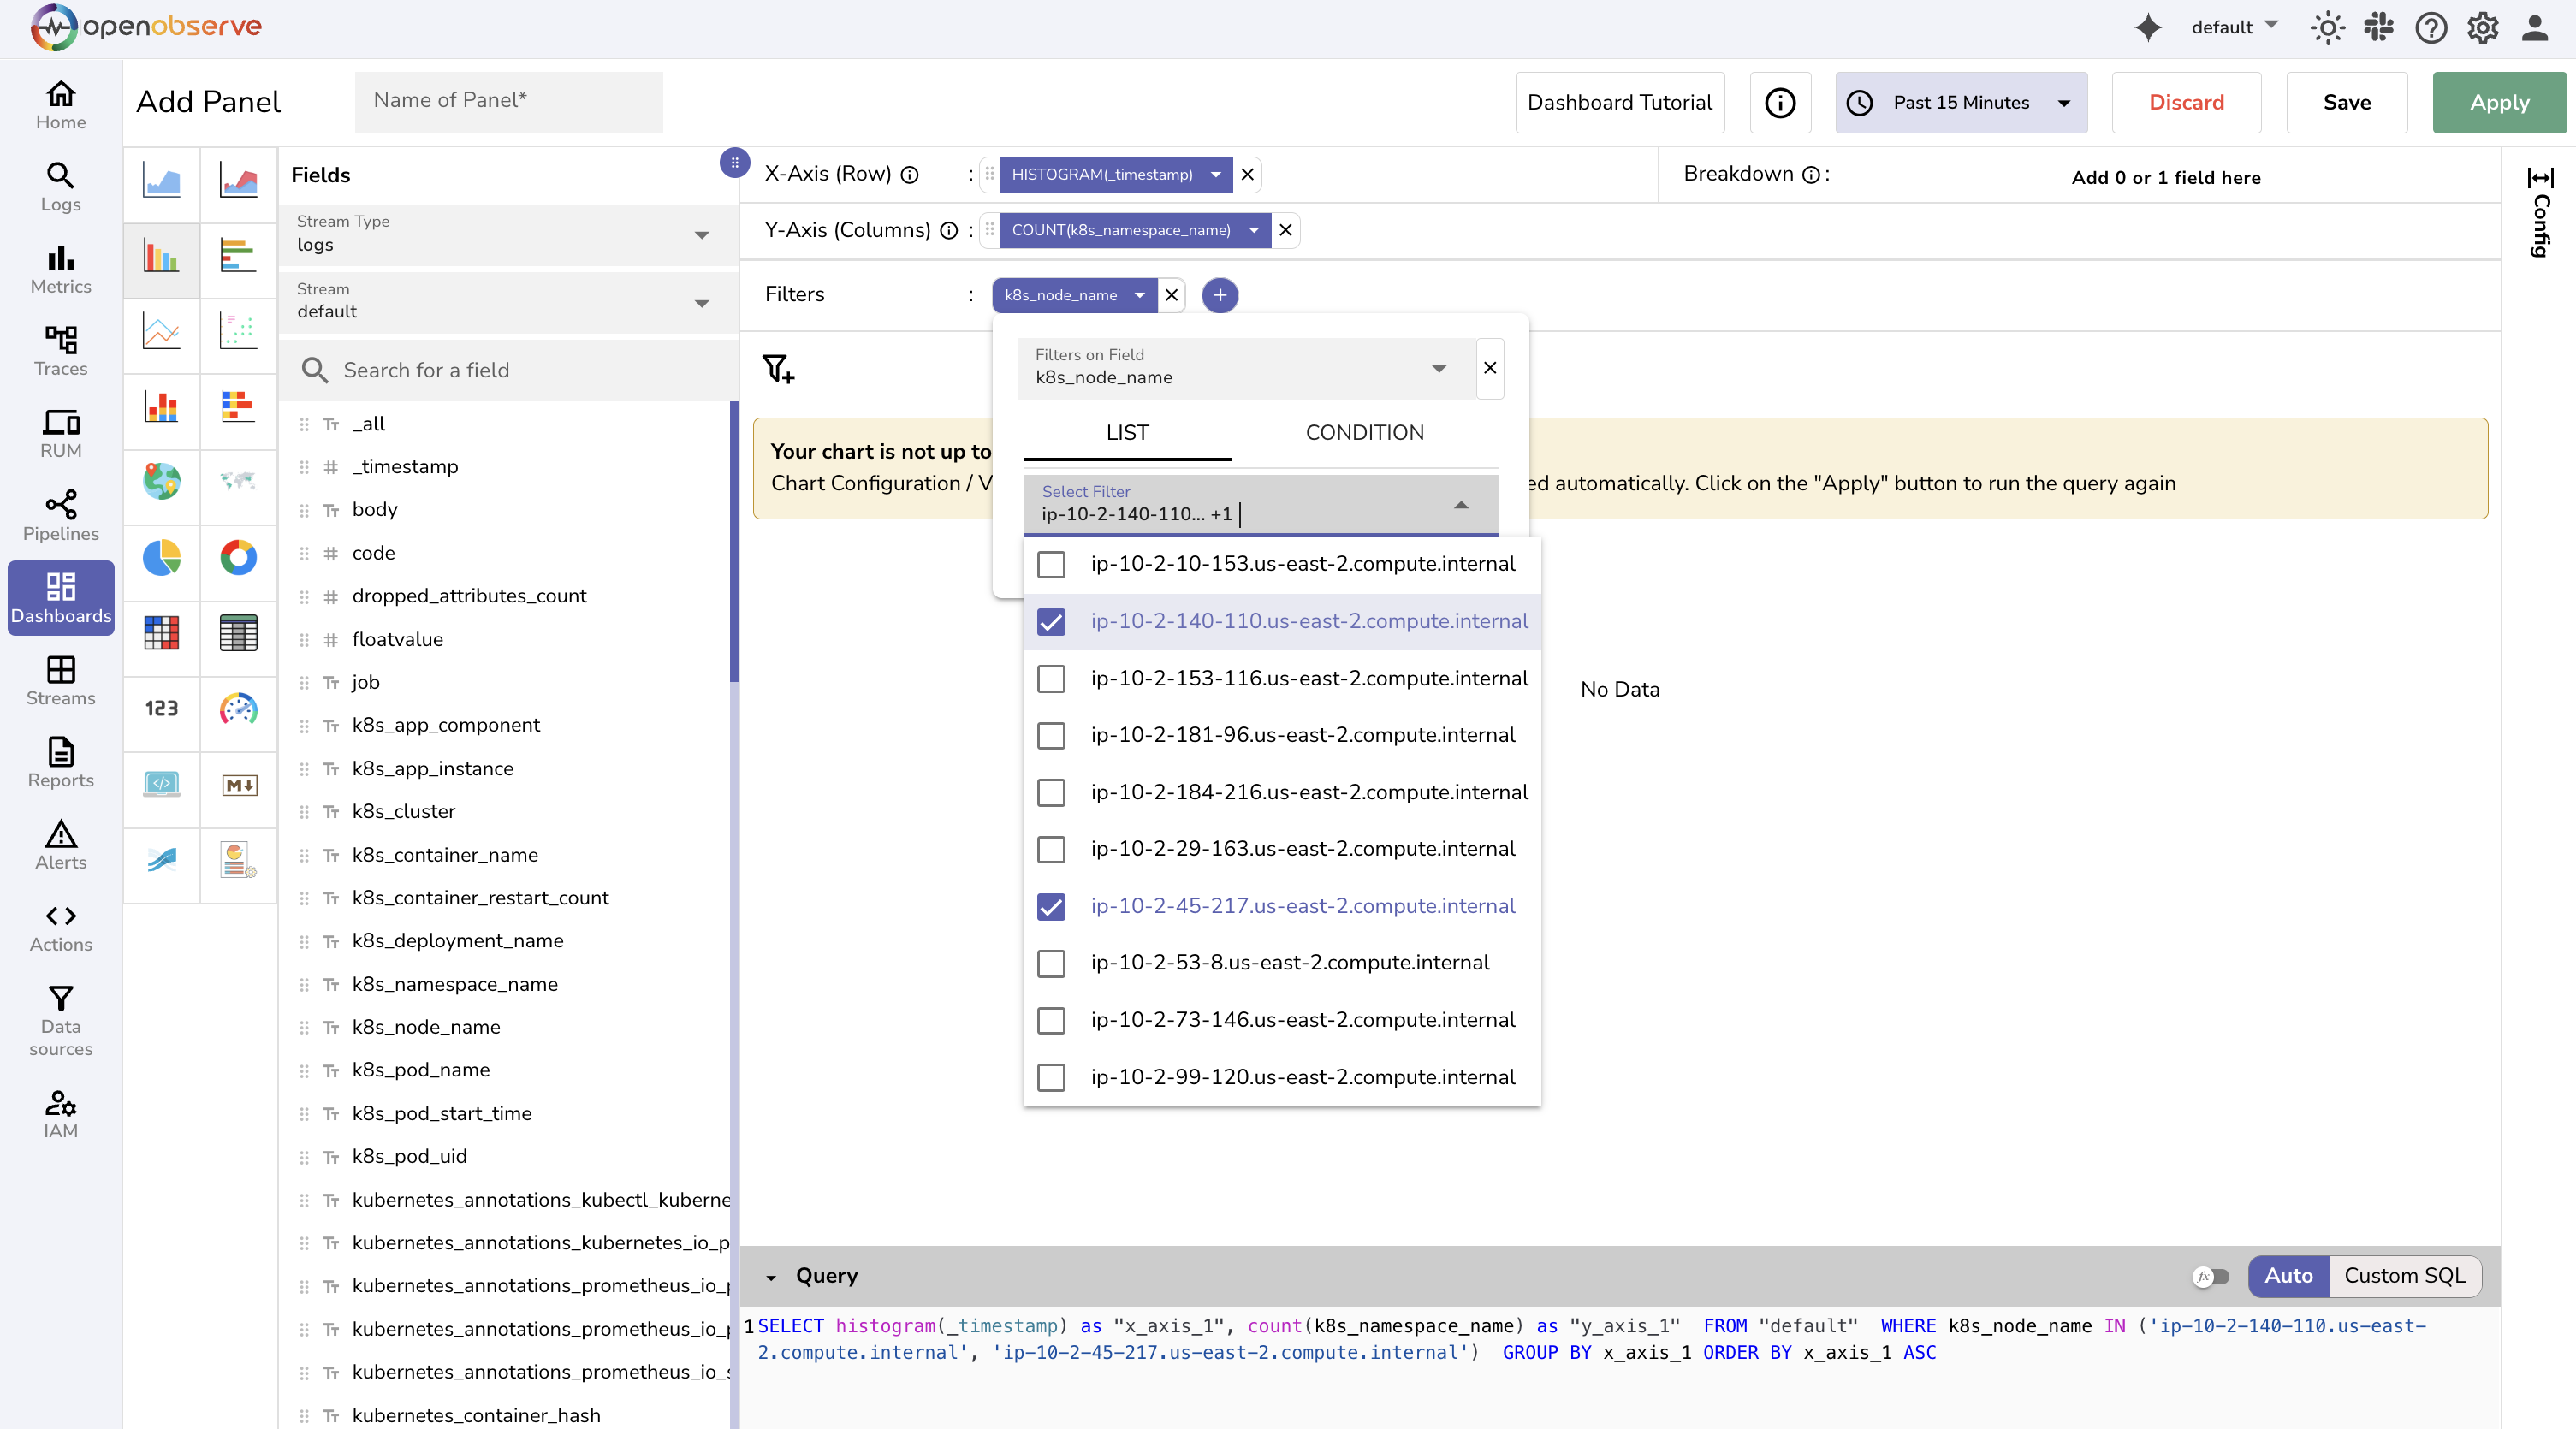 This panel filters data strictly based on the selected values.
Use Case: View total log volume over time across two Kubernetes nodes.
- X-axis:
HISTOGRAM(_timestamp) - Y-axis:
COUNT(k8s_namespace_name) -
Filter:
- Field:
k8s_node_name - Value: i
p-10-2-45-217.us-east-2.compute.internal,ip-10-2-140-110.us-east-2.compute.internal
- Field:
This panel displays the total log activity for the selected values.
Condition: Dynamic Filter
Use this when the value needs to be typed manually or passed dynamically using a variable.
To add a dynamic filter to a panel:
- In the panel editor, select the + icon in the Filters section.
- Select Add Condition.
Alternatively, hover over a field in the Fields section and select the +F icon to add a filter directly.
- Click the filter and open the dropdown.
- Verify or change the selected field using the Filters on Field dropdown.
- Choose the Condition tab.
- In the Operator section, choose an operator. For example,
=,>,IN,str_match. - In the Value section, you can provide a fixed value or a variable like
$my_variable. Ensure that the variable namedmy_variableexists. See Variables in OpenObserve to learn how to create a variable. - Click Save to save the panel.
Important
Before you provide a fixed value, know the filed type associated with the value. This helps avoid syntax errors and ensures accurate query generation.
The field type is indicated with Tt and # in the Fields list.
Tt represents string fields and # represents numeric fields.
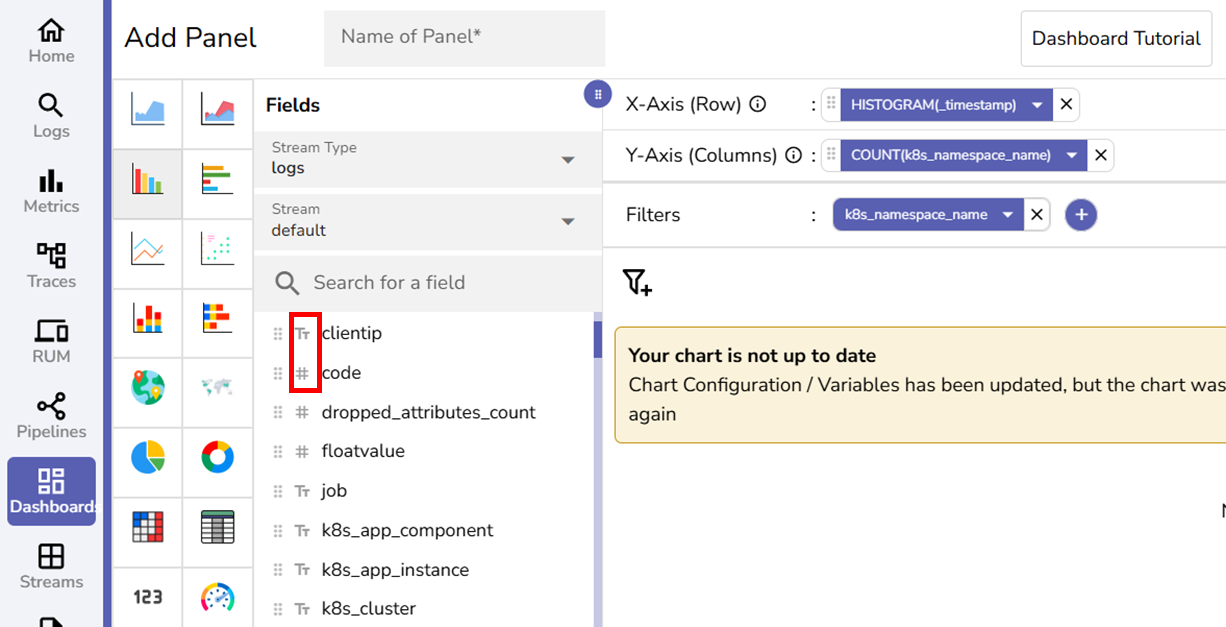
When a filter is applied:
- For string fields, values are automatically quoted in the SQL query. For example,
'123e'. - For numeric fields, values are treated as raw numbers. For example,
123e.
Add Filter Groups
- In the Filter section, click + > Add Group to create nested filters. You can add multiple filter conditions inside the group and combine them using AND or OR operators.
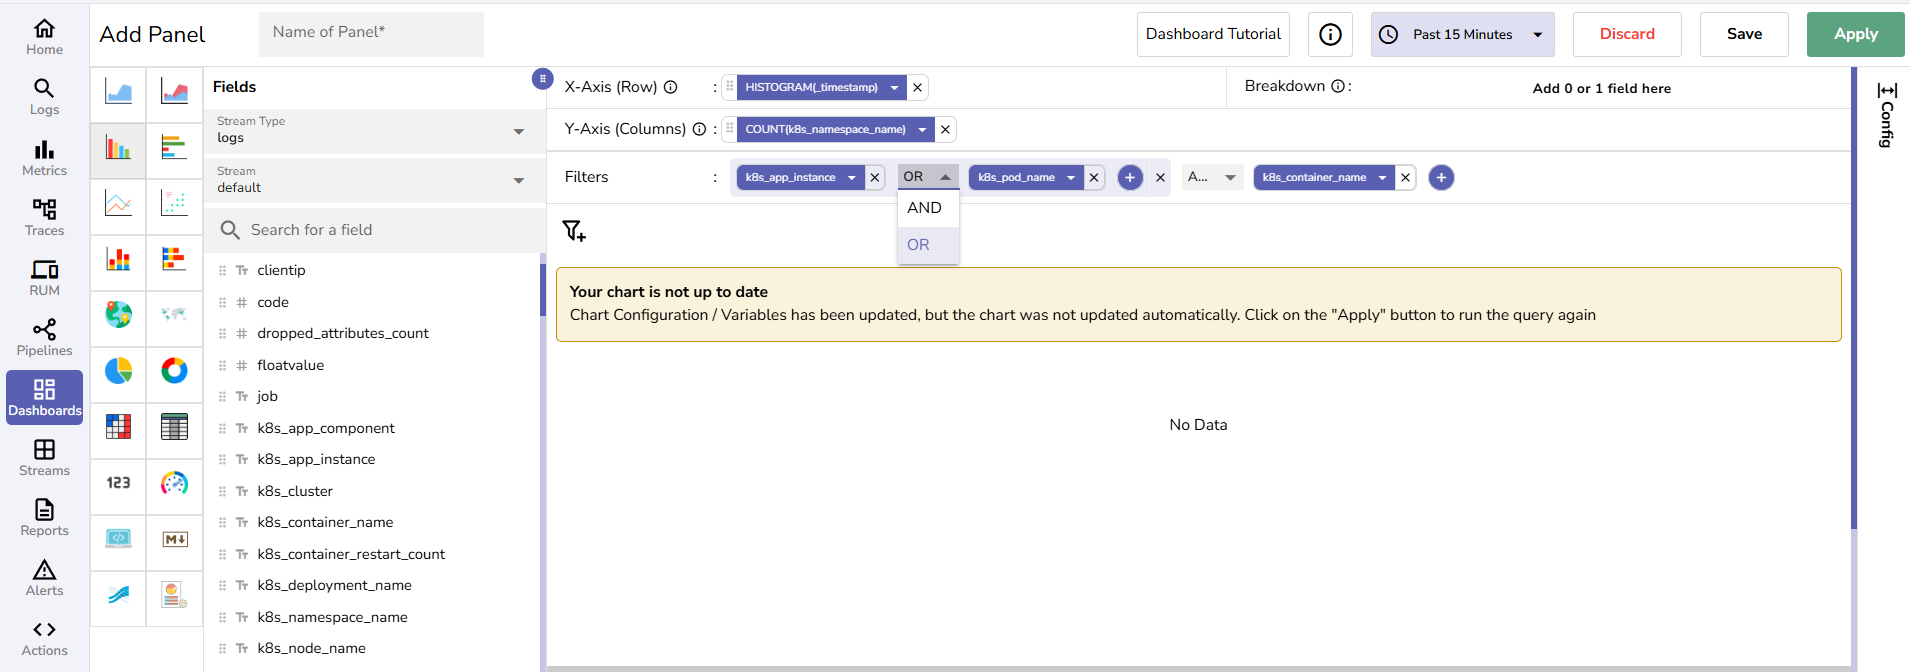
- After configuring filters, click Apply to run the query.
- Click Save to save the panel.
Note
You can also combine static and dynamic filters.